
Christmas Pavlova Wreath
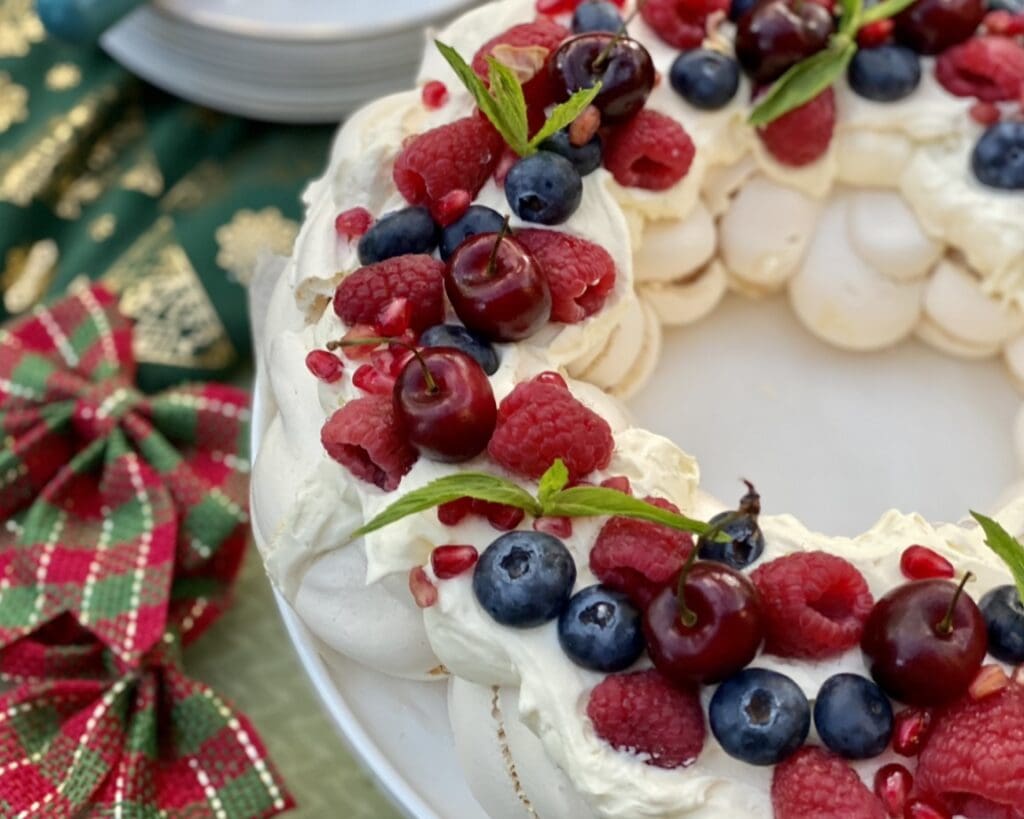
This beautiful Christmas Pavlova Wreath has an crisp shell and soft, marshmallowy centre. A stunning holiday dessert for your table!
Updated 20 December 2025
After placing the final scatter of pomegranate arils on top of my Christmas pavlova wreath, I stepped back to admire it from a distance.
Look-wise, it’s far from perfect (it never is), with a few cracks here and there, but I was completely ecstatic. Sitting on the table in the sunshine, this pavlova wreath looked glorious. Even after making this Christmas pavlova recipe so many times, I still can’t quite believe I made it myself.
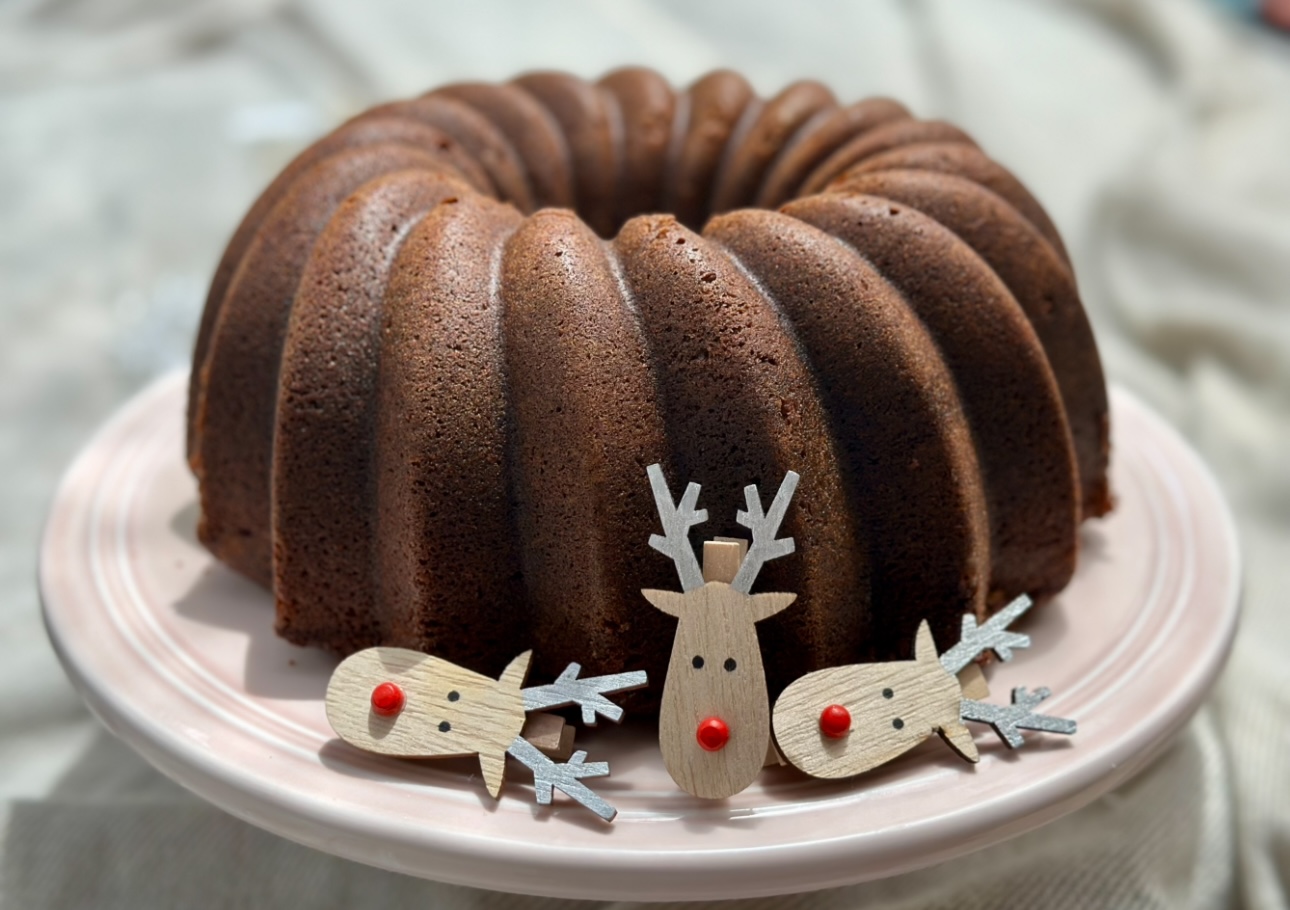
Over the years, this pavlova has shared the Christmas table with other glorious festive desserts, such as Gingerbread Bundt Cake and Christmas Log Cheesecake, but it’s always the one that captures everyone’s attention.
But as we all know, looks aren’t everything, especially when it comes to food. The most important part is the taste. And let me tell you, this pavlova tastes even better than it looks.
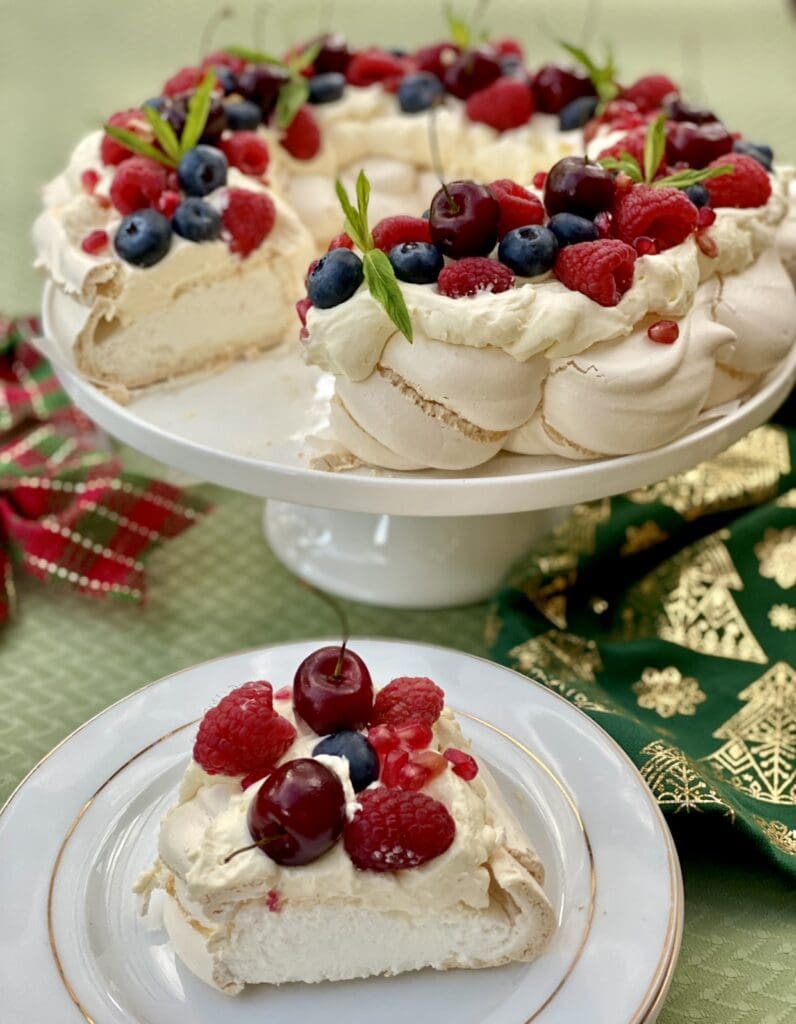
It has a beautifully crisp crust that stays crunchy for days, even once decorated, while the inside remains pillow-soft and melts in your mouth.
This pavlova calls for generous lashings of whipped cream and plenty of seasonal berries and fruit. It’s so dangerously light and indulgent that you may find yourself reaching for another slice. I didn’t… but I may have served myself an enormous one.
Why You’ll Love This Christmas Pavlova Wreath
A show-stopping Christmas dessert
No matter what your guests are doing, once you bring this Christmas pavlova out, they’ll pause to take a look. Let’s face it, this dessert is here to impress and will happily steal the spotlight on any Christmas table.
Crisp shell with pillowy, marshmallow-soft centre
It has everything we love in a classic, well-made pavlova. A delightfully crisp exterior with an inside that’s airy, soft and marshmallowy. Your spoon will glide straight through it with ease.
Easier than it looks
I know this is the kind of dessert that looks like it takes years to master, but I promise it’s actually not that difficult…unless you’re whipping the meringue by hand! Pavlova uses only a handful of ingredients, and the technique is very approachable.
My philosophy when it comes to baking is simple: I’m not a professional baker, so there may be a few imperfections along the way. A crack here, slightly uneven piping there, but I’m certainly not going to cry about it, especially when it turns out this good! This pavlova recipe ticks all my boxes when it comes to taste and texture.
Subscribe to 3CatsFoodie’s FREE Newsletter
For the latest recipes and other fun stuff!
What makes a perfect pavlova
Crisp on the outside, soft and marshmallowy inside
The hallmark of a great pavlova is a light, crisp shell that gently cracks when you tap it with a spoon, revealing a soft, pillowy centre. That marshmallowy middle is what makes pavlova so special! Airy, cloud-like and impossible to resist.
Why cracks are part of the charm
If your pavlova has a few cracks, you’ve done it right. Cracks happen naturally as the meringue cools and settles, and they’re easily hidden under whipped cream and fruit. Don’t expect aesthetic perfection here, and you’ll be grateful for it. Way less stress and far more fun in the kitchen!
Ingredients you’ll need
Pavlova ingredients
Eggs – I used 7 large eggs (approximately 58g / 2oz per egg). After separating them, the egg whites weighed 240g / 8.5oz in total. Eggs are much easier to separate when chilled, so I separate them straight from the fridge, then left the whites at room temperature for about 20–30 minutes (depending on how warm the day is).
Caster sugar (superfine sugar) – Caster sugar has finer granules than regular white sugar, but it’s not the same as powdered sugar. Many baking recipes call for caster sugar because it dissolves more quickly and evenly into mixtures. If you can’t find caster sugar, you can easily make your own by pulsing regular white sugar in a food processor or blender a few times until it looks finer. Take care not to over-process it, or it will turn into powdered sugar.
Toppings for a festive pavlova wreath
Thickened cream (whipping cream) – Thickened cream here has gelatine added to help it hold its shape and typically contains around 35% milk fat. For best results, whip the cream to medium to firm peaks so it holds its shape and supports the fruit topping.
Icing sugar (powdered sugar, confectioners’ sugar) – Icing sugar usually comes in two forms here: icing sugar mixture and pure icing sugar. Icing sugar mixture is softer and less prone to lumps because it contains added starch. For this recipe, I use icing sugar mixture, as the cornstarch helps stabilise the whipped cream.
Seasonal fruits – I know it’s not summer globally during the Christmas holidays! So you may not be surrounded with fresh berries. Just swap with seasonal fruits, or use fruit compote like this simple and delicious Strawberry Compote.
How to make Christmas Pavlova Wreath
Step-by-step guide with photos

1. Preheat the oven to 110°C (230°F). Make sure all your equipment is completely free from grease, as any residue can prevent the egg whites from whipping properly. To be safe, I like to wipe my mixing bowl and balloon whisk with paper towel lightly dipped in vinegar.
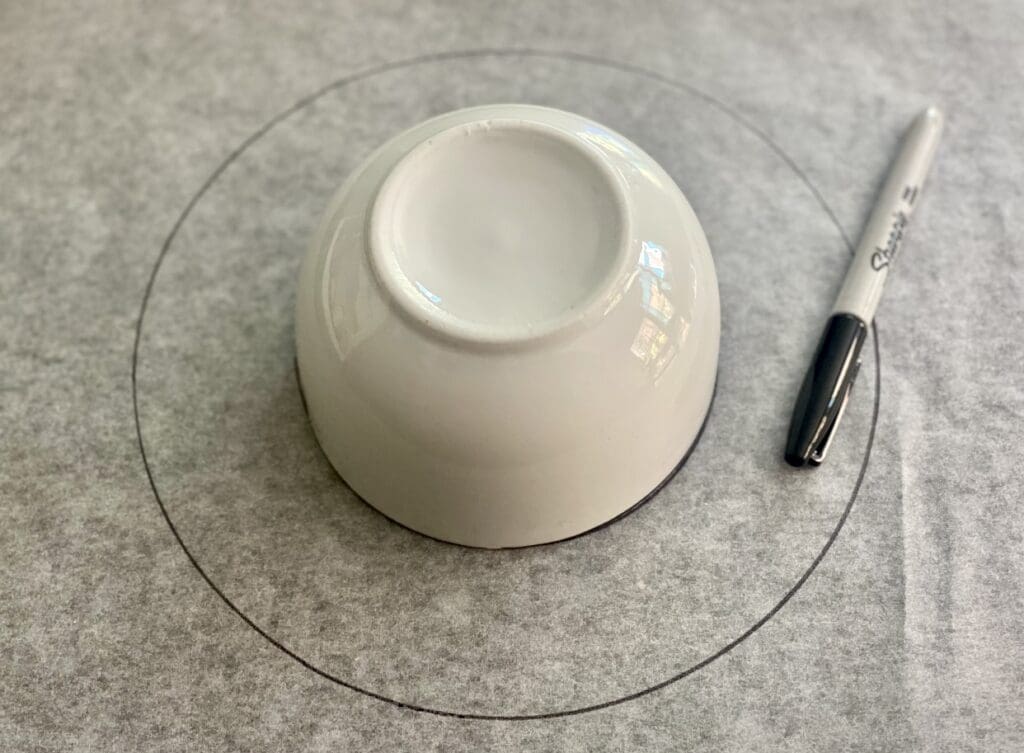
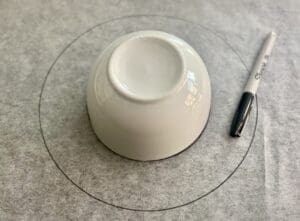
2. Using a round object approximately 25cm (9.8in) in diameter (I use the base of a cake tin), trace a circle onto non-stick baking / parchment paper. Use another round object about 12cm (4.7in) in diameter and trace it inside the larger circle to create a ring. Flip the paper over and place it on a large, flat baking tray.
3. Prepare a large piping bag fitted with a 1.5cm (0.6in) plain round nozzle.
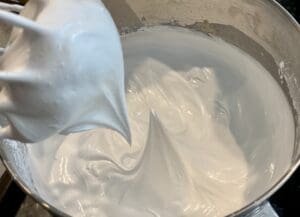
4. In a stand mixer or using a hand mixer, whisk the egg whites on medium-high speed with a balloon whisk attachment. Once the whites become foamy, increase the speed to high and gradually add the sugar, one tablespoon at a time. Continue whisking for 6–8 minutes, or until stiff, glossy peaks form. Add the cornflour, vinegar and vanilla extract, then whisk on high for a further 1 minute until fully incorporated.
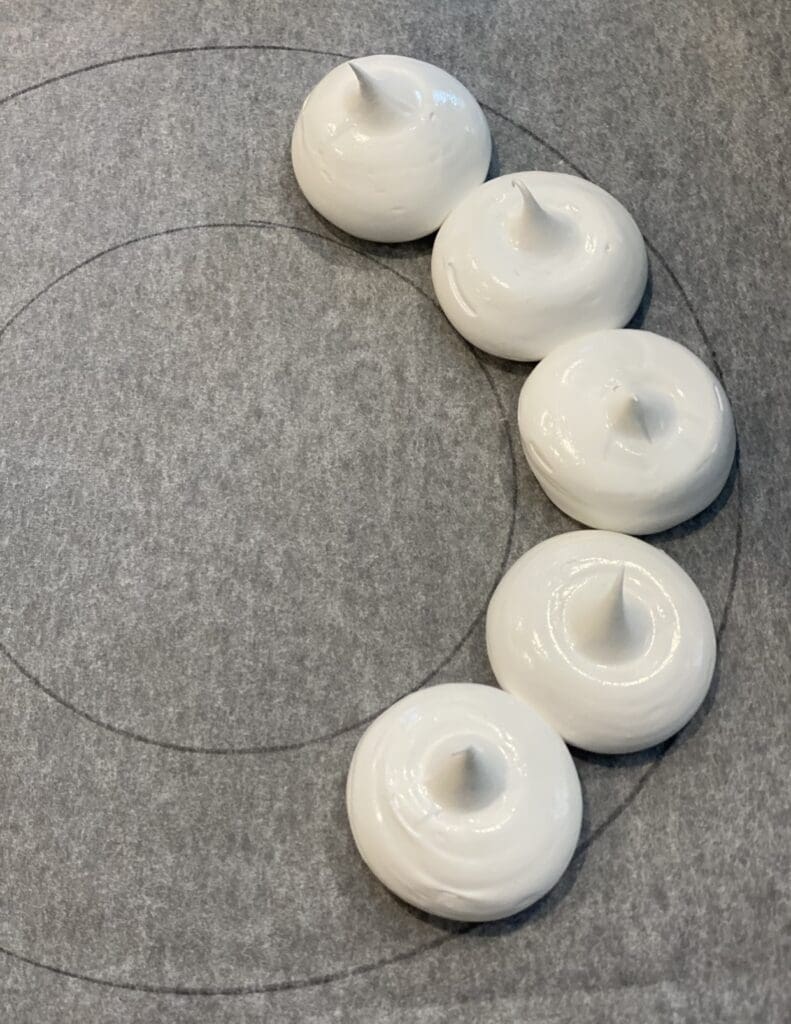


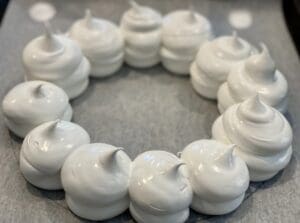
5. Transfer the meringue into the prepared piping bag. Secure the baking paper to the tray by piping a small dab of meringue under each corner (this will act as glue and stop the paper from moving)
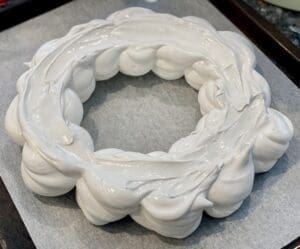
6. Using the drawn ring as a guide, pipe large mounds of meringue around the circle. Once you’ve completed one layer, pipe over the mounds again, building up the height until all the meringue is used (mine were about three layers high). Use the back of a spoon to gently flatten the tops, creating an even surface for the pavlova toppings.
7. Bake for 75 minutes (1 hour and 15 minutes), then turn the oven off and leave the oven door slightly ajar. Leave the pavlova in the oven for at least 6 hours or overnight to cool completely before decorating.
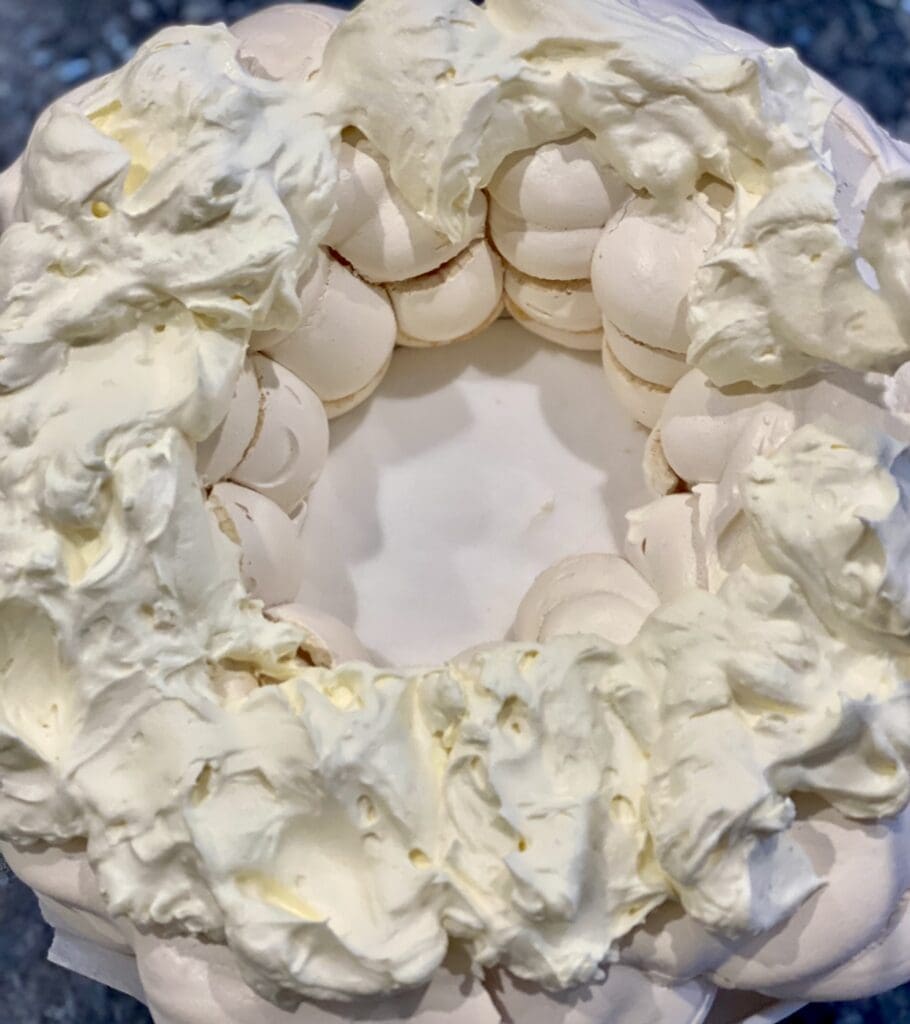

8. Use a large, flat plate or cake board to carefully turn the pavlova upside down. Gently peel away the baking paper, then turn the pavlova upright again.
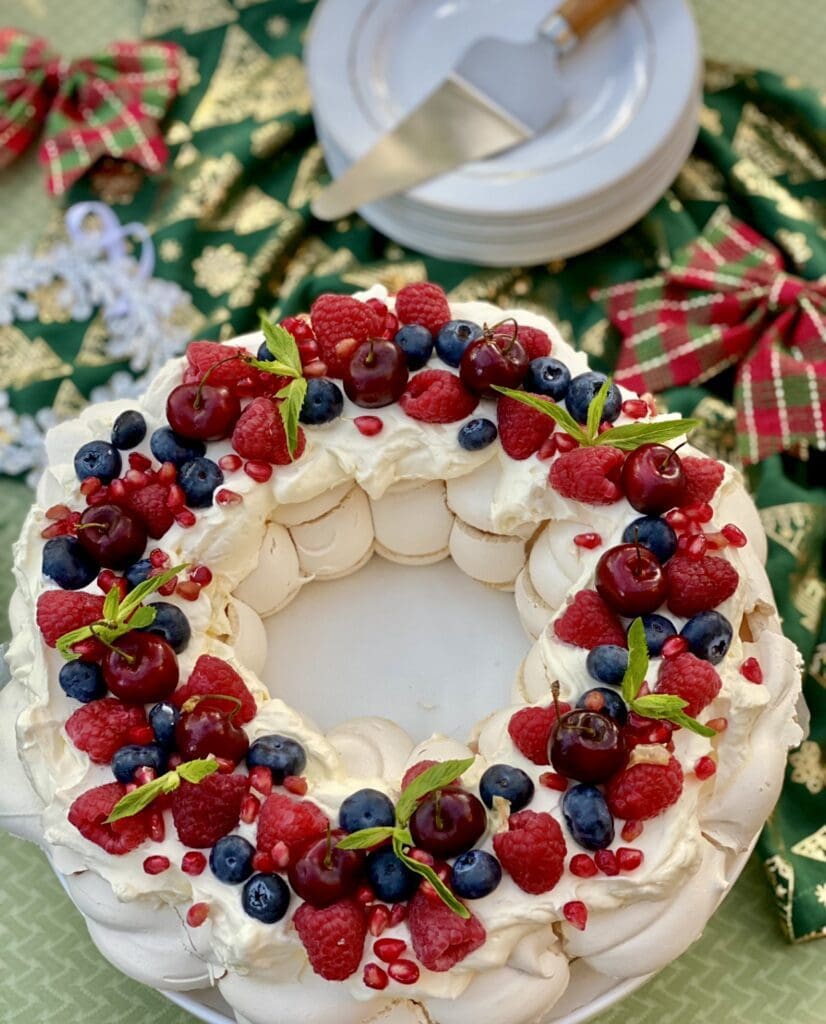
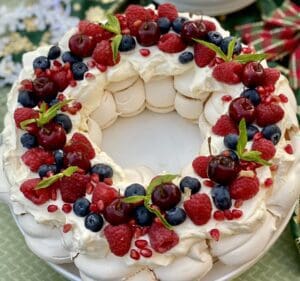
9. Place the cream, icing sugar and vanilla extract into a large bowl and whisk using a stand or hand mixer until medium-firm peaks form. Spoon the whipped cream generously over the pavlova, then decorate with your choice of fresh fruit and a few sprigs of mint.
Tips for Success
Make sure all equipment is free from grease
Any trace of grease or moisture can stop egg whites from whipping properly, so this step is crucial for a successful pavlova. Make sure your mixing bowl, whisk and spatula are completely clean and dry. I like to wipe everything with paper towel lightly dipped in vinegar to remove any hidden residue before starting.
Let the pavlova dry in the oven after baking
Once the pavlova has finished baking, turn the oven off and leave the door slightly ajar. Letting the pavlova cool and dry slowly in the oven for at least 6 hours or overnight helps prevent collapse and and allows the centre to set beautifully while keeping that soft, marshmallowy texture.
Make-ahead tips for Christmas
The pavlova base can be made one to two days ahead and stored in a cool, dry place once completely cooled. Keep it in an airtight container and wait until just before serving to add the cream and fruit for the best texture and crispness.
More Christmas Recipes You’ll Love
Frequently Asked Questions
Can I make pavlova ahead of time?
Yes. The pavlova base can be made 1–2 days ahead and stored in a cool, dry place once completely cooled. Keep it in an airtight container and wait until just before serving to decorate with cream and fruit for the best texture.
Why did my pavlova crack?
Cracks are completely normal and usually happen as the pavlova cools and settles. They don’t affect the taste or texture and are easily hidden under whipped cream and fruit. A few cracks are part of the charm of a good pavlova.
How long does pavlova last once decorated?
Once decorated, pavlova is best enjoyed within 24 hours. The cream and fruit will gradually soften the shell, but it will still taste delicious the next day if stored in the fridge.
Can I freeze pavlova?
Yes, pavlova can be frozen before it’s decorated. Once fully cooled, wrap the pavlova base well in plastic wrap and place it in an airtight container or freezer bag. Freeze for up to one month. Thaw at room temperature and decorate just before serving. Avoid freezing pavlova once decorated, as the cream and fruit don’t freeze or thaw well.
Why is my pavlova soft or sticky?
A soft or sticky pavlova is often caused by humidity, under-baking, or storing it in an airtight container while still warm. Letting the pavlova dry slowly in the oven after baking helps reduce stickiness and improves the final texture.
I’ve used a third-party application to calculate the calories and nutritional information, so please treat this as an approximate guide only.
All cooking measurements are in Australian standard cups and spoons. For specific details and conversions, please visit my Australian Cooking Measurements page.
I’d love your feedback if you make this recipe. You can support my work by rating the recipe and leaving a comment — simply scroll to the comments section below or click the green circle in the bottom left corner. An email address is required to help prevent spam, but it will not be published.
I’d also love to see your creations, so don’t forget to tag me on Instagram @3catsfoodie
Cheers – Cat T

Christmas Pavlova Wreath
Ingredients
Meringue
- 7 (240g / 8.5oz) large eggs (egg whites only, at room temperature) (NOTE 1)
- 2 cup (440g / 16oz) caster sugar (superfine sugar) (NOTE 2)
- 2 tbsp cornflour (or cornstarch)
- 2 tsp white vinegar
- 1 tsp vanilla extract
For the whipped cream
- 2 cups (500ml / 0.5 US qt) thickened cream (NOTE 3)
- 2 tbsp icing sugar (powdered sugar) (NOTE 4)
- 1 tsp vanilla extract
Fruit topping & garnish (swap with any fruits you like)
- raspberries
- blueberries
- cherries
- pomegranate arils
- mint leaves
Instructions
- Preheat the oven to 110°C (230°F). Make sure your equipment is free from grease, as this may prevent the egg whites from whipping up. To be safe, I like to wipe my bowls and balloon whisk with paper towels lightly dipped in vinegar.Using a round object approximately 25cm (9.8in) in diameter (I use the base of a cake tin), trace a circle onto non-stick baking / parchment paper. Use another round object about 12cm (4.7in) in diameter and trace it inside the larger circle to create a ring. Flip the paper over and place it on a large, flat baking tray.
- Prepare a large piping bag fitted with a 1.5cm (0.6in) plain round nozzle.In a stand mixer or using a hand mixer, whisk the egg whites on medium-high speed with a balloon whisk attachment. Once the whites become foamy, increase the speed to high and gradually add the sugar, one tablespoon at a time. Continue whisking for 6–8 minutes, or until stiff, glossy peaks form. Add the cornflour, vinegar and vanilla extract, then whisk on high for a further 1 minute until fully incorporated.
- Place the meringue into the piping bag, then secure the baking paper to the tray by using the meringue as glue in each corner. Pipe large mounds using the drawn ring as a guide. Once you've made a single layer, go over the mounds again, until you've used all the meringue (mine were three layers high). Use the back of a spoon to flatten the top of the mounds to make an even surface for the pavlova toppings.
- Bake for 75 minutes (1 hour and 15 minutes), then turn the oven off and leave the oven door slightly ajar. Leave the pavlova in the oven for at least 6 hours or overnight to cool completely before decorating.
- Use a large, flat plate or cake board to carefully turn the pavlova upside down. Gently peel away the baking paper, then turn the pavlova upright again.Place the cream, icing sugar and vanilla extract into a large bowl and whisk using a stand or hand mixer until medium-firm peaks form. Spoon the whipped cream generously over the pavlova, then decorate with your choice of fresh fruit and a few sprigs of mint.

Great recipe. It was the best pavlova I have ever made and everyone was suitably impressed. Thanks!
Hi Lena,
I’m absolutely ecstatic after reading your comment. Thank you for giving this recipe a try. I’m sure your pavlova turned out beautifully! Enjoy the rest of this festive season to the fullest ?.