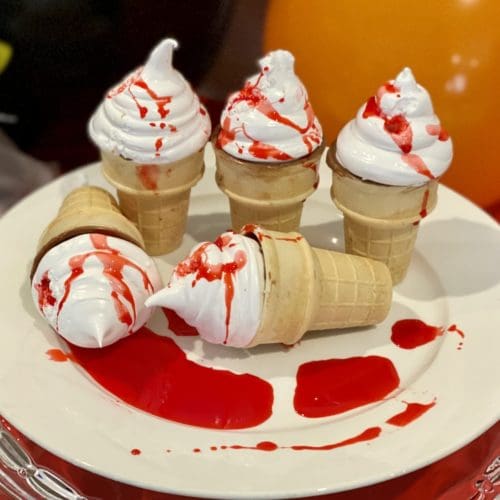
Scary Bloody Ice creams
Looking for Halloween treats to make at home? These creative and yummy bloody ice creams will bring loads of fun to any Halloween party!
Ingredients
- 10 flat ice cream cones (NOTE 1)
- 275 gm milk chocolate (chopped if using a block) (NOTE 2)
- 1 tbsp oil (NOTE 3)
MARSHMELLOW
- 1 cup water
- 1 cup sugar
- 1 tbsp powdered gelatine (NOTE 4)
FAKE BLOOD
- 4 tbsp strawberry syrup or topping (NOTE 5)
- 1-2 tsp icing sugar (confectionary sugar)
- red food colouring (gel or liquid)
- 1 tsp vanilla extract
Instructions
COAT THE CONES IN CHOCOLATE
- Assemble the cones in an egg tray or an object that would help hold the cones up (NOTE )

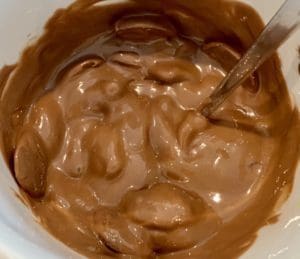
- Place the chocolate and oil into a microwave-safe jug or bowl. Zap it for 30 seconds intervals until melted, make sure to stir each time.
- Carefully pour the melted chocolate halfway into the cone and swirl it to coat all of the insides of the cone. Empty the excess chocolate back into the jug and repeat with the remaining cones. Once done transfer the cones with the egg holder into the fridge to chill.

MAKE THE MARSHMALLOW
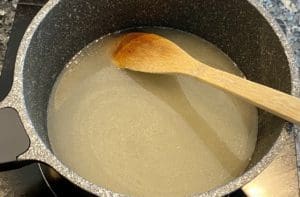
- In a saucepan on low heat add in sugar, water and gelatine. Stir the mixture until the gelatine has dissolved (3-4 mins) then turn up the heat slightly and simmer for 5 minutes. Stir regularly to prevent the gelatine from clumping. Transfer the gelatine mixture into a mixing bowl and let it cool for 10 minutes.
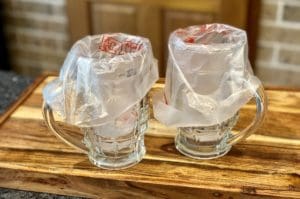
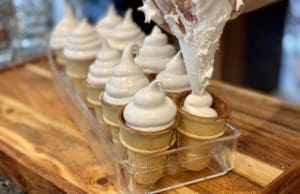
- Using 2 piping bags with a wide circle nozzle or disposal bags cut (2cm) from the tip. Open the bags over a tall cup ready to fill it in with whipped marshmallow.
- Using a balloon whisk on high-speed whip up the marshmallow mixture for 6-8mins. It is ready when the marshmallow is thick, fluffy and can just hold it's shaping for piping. Quickly divide the whipped marshmallow into the piping bags.
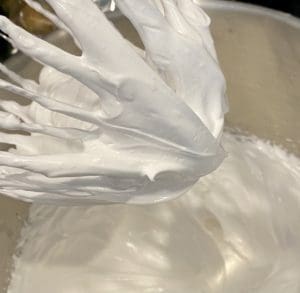
- Working fast push the whipped marshmallow down towards the tip of the piping bag. Squeeze firmly but gently upright and fill in all the cones. One done, chill the cones in the fridge for 30 minutes.
MAKE THE FAKE BLOOD
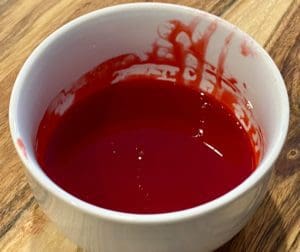
- In a small bowl sieve in the icing sugar then add syrup and food colouring and mix well. Depending on the syrup you have it may vary in colour so you may need to play around with these 3 ingredients to get the right colour that would resemble blood.
- Make a small hole in the marshmallow by using a wide straw (bubble tea straw). Gently press the straw into the top of the marshmallow and slowly push and twist down. Make sure to insert straw only halfway and not all the way down as the syrup will gather at the bottom of the cone.

- Use a piping bag or a teaspoon and fill in the holes with the syrup and spatter small amounts on the marshmallow and plate. If you prefer not to fill the syrup inside the marshmallow you can just dip the top of the marshmallow into the syrup.

Notes
NOTE 1: Ice cream cones - Mini ice cream cones with a flat bottom so you can stand them up.
NOTE 2: Chocolate - milk, dark or white chocolate can be used. Do not skip this part as the chocolate prolongs the cone from going stale and stops the syrup from leaking through the cones.
NOTE 3: Oil - is used to help melt the chocolate evenly and thin it out so it will make it easier to coat the cones. Use a flavourless oil (vegetable/canola/sunflower) so it doesn't impact the taste of the chocolate.
NOTE 4: Gelatine powder - Gelatine powder is sold in stores in a box with sachets or small containers.
NOTE 5: Strawberry syrup - To keep the recipe simple I used Hershey's strawberry syrup. The colour is light red and translucent so I added icing sugar and red food colouring to make it resemble blood.
Tips for making the cones in advance - The cones are best made on the day and eaten right away to enjoy the crispy cone. However, if you would like to prep the cones in advance you can so the night before but the cones will be stale.
I recommend filling at topping the syrup before serving to save on the mess. I kept some filled and topped cones overnight and they held up well thanks to the chocolate, but it was still very messy to store!
Storage - These cones are best served within two days of making them. Place cones in an airtight container and store in the fridge.
Nutrition
Serving: 1coneCalories: 270kcalCarbohydrates: 45gProtein: 2gFat: 11gSaturated Fat: 6gSodium: 19mgPotassium: 88mgFiber: 2gSugar: 37gVitamin C: 1mgCalcium: 7mgIron: 1mg