
Easy Halloween treats (Bloody ice creams)
Looking for easy Halloween treats to make at home? These creative and yummy bloody ice creams will bring loads of fun to any Halloween party!
BLOODY ICE CREAMS – Halloween treats
WELL HELLO HALLOWEEN! It’s time for us to get busy and make creative, tasty and exciting Halloween treats. Get your crowd or family excited with these scary bloody ice cream treats!
These treats are fun to make and if you have young children they would be delighted to assist you in the kitchen. Firstly, you may want to rename this treat as you don’t want your kids running around screaming BLOODY ICE CREAM!
What’s is a bloody ice cream made of?
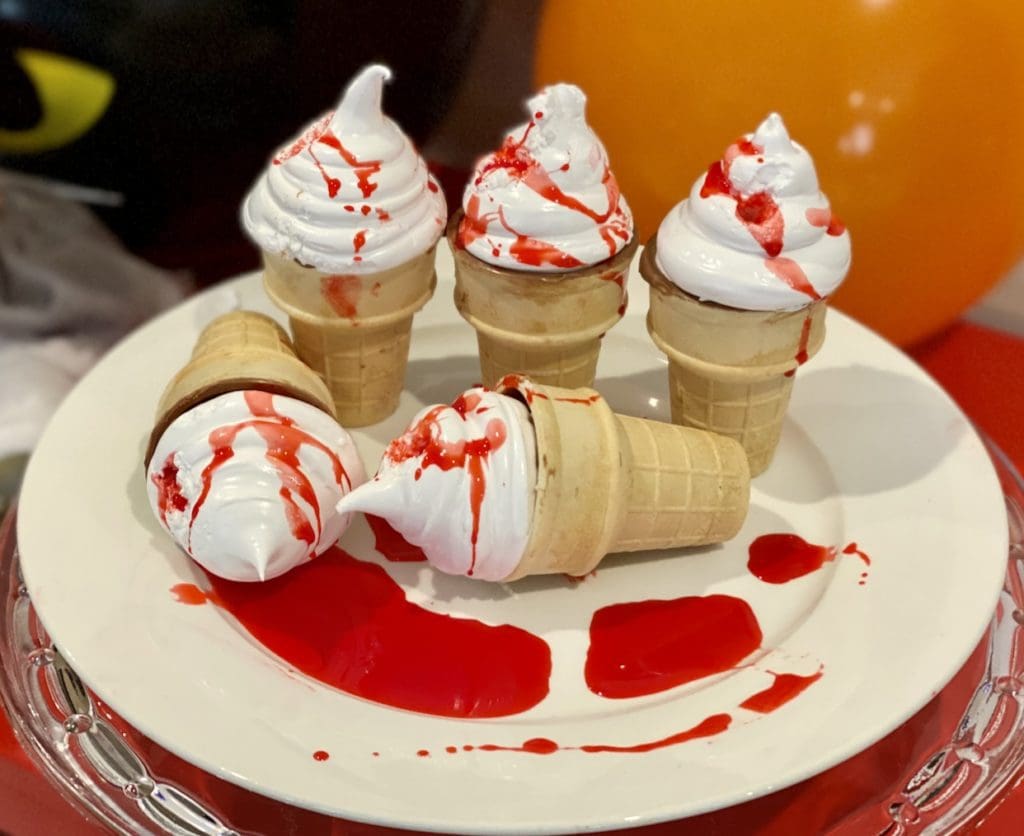
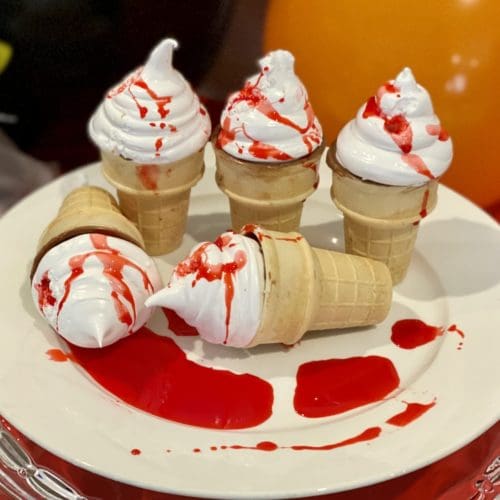
These treats are filled with naughty sweet stuff that children and even adults will love to eat. Bloody ice cream is a cone filled with chocolate, light fluffy marshmallow with strawberry topping.
Yup, you’ll probably feel a rapid surge of sugar rush through your entire body after biting into one of these, but that’s okay because it’s HALLOWEEN TREAT TIME!
Just a word of warning though, there may be lots of uncontrollable giggling over blood-stained teeth, mouths, hands and clothes!
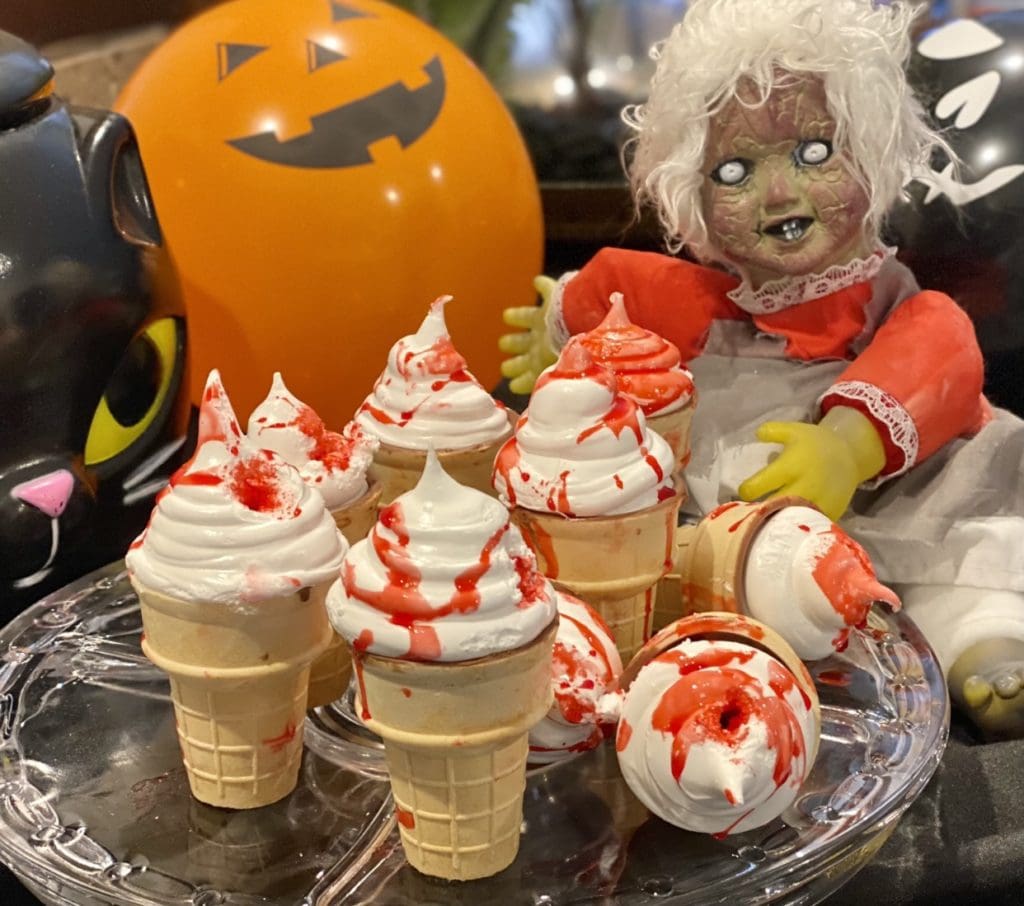
Meet Mary, she loves Halloween treats
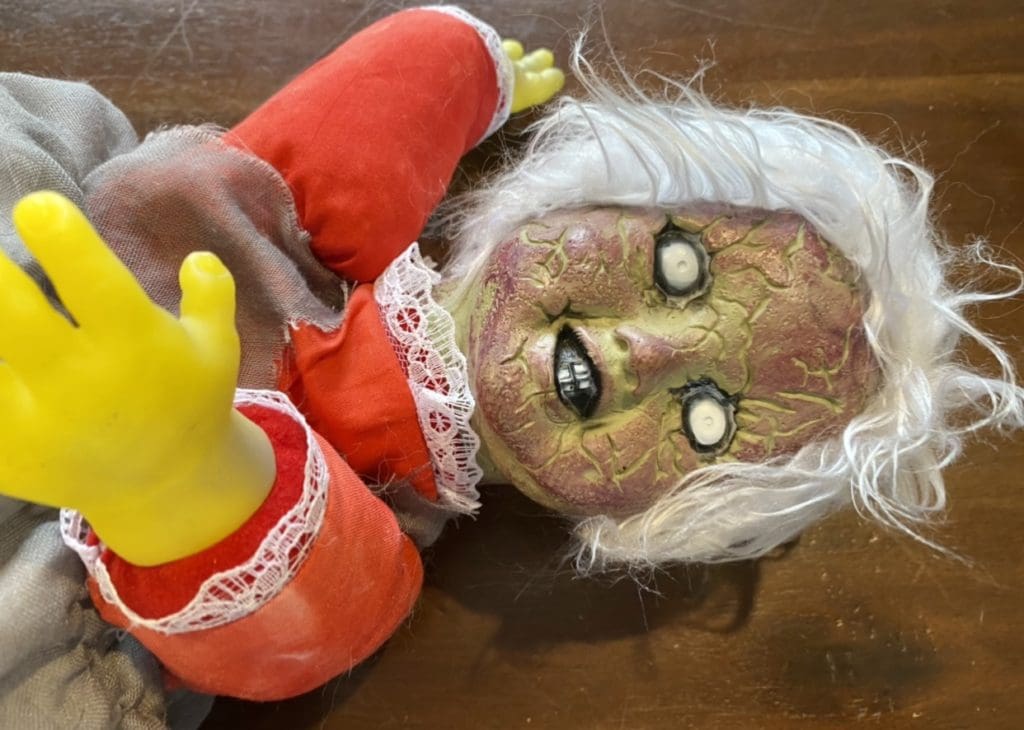
Mary is enchantingly beautiful and misunderstood but she’s also insanely creepy. She’s been sitting up at our dinner table for the last few weeks watching our every move.
My sister Nara found Mary in a shop carelessly thrown in the bargain bin. Nara didn’t have the heart to leave the abandoned doll there, so we somehow all ended up adopting her in our already crowded household.
I was feeding Kai at the dinner table when Nara plopped Mary next to us. She bought Mary to help me get inspired for my first Halloween post. I thanked her but asked her to move Mary away from Kai as she may scare him.
The always thoughtful Nara did, she moved Mary to the other side of our dinner table, but Mary was still looking at us.
So, since she’s living with us I felt compelled to name her and to me, she looks like a Mary. Creepy things are named Mary, like The Queen Mary (the very haunted ghost ship) and Bloody Mary.
I used to be obsessed with spirits and ghosts and found them intriguing and frightening at the same time. However, after giving birth to Kai I refused to watch, read or even listen to haunted stories as it usually involves creepy babies or small children that are evil or supernatural forces are attracted to them. SO……um, yeah no thanks!
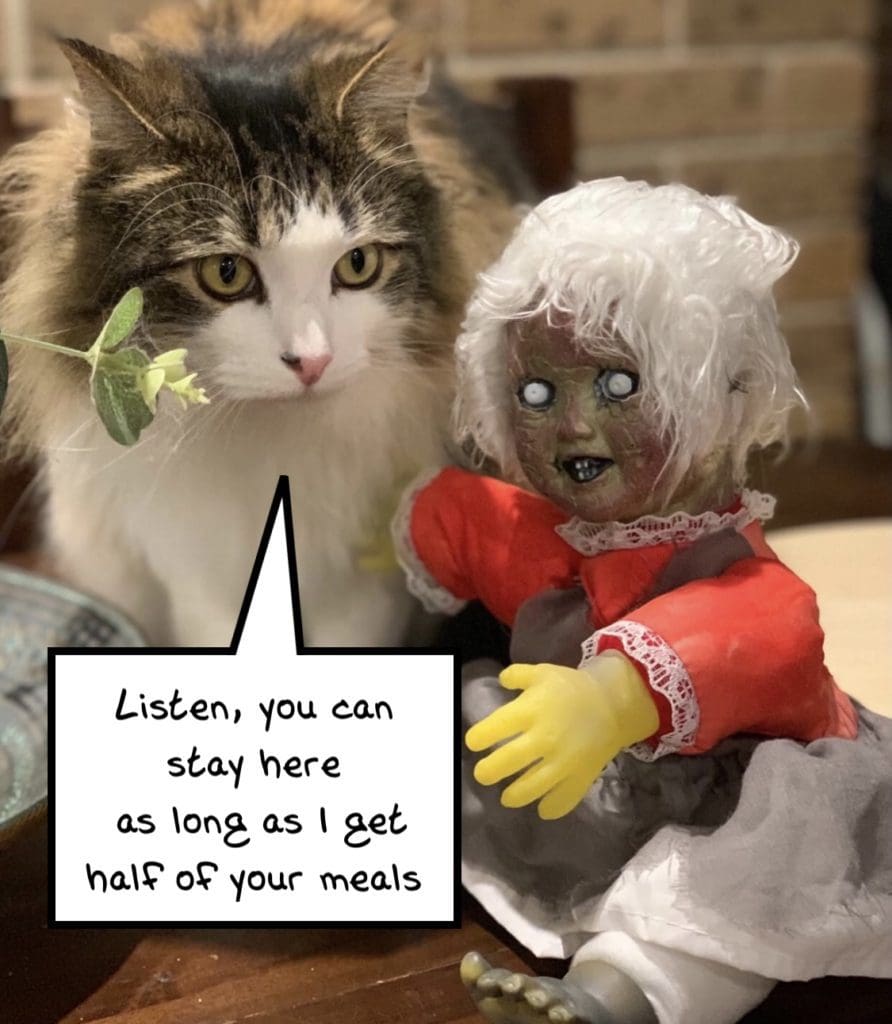
As shown below, Mary has fitted in quite well and she gets along with Teddie the most. We often spot them both having secret liaisons, but when Teddie gets caught he scurries off as nothing happened.
You can read more about Teddie and his antics in my GET YOUR DIRTY PAW OUT OF MY FOOD post.
Halloween treats should also be yummy!
You eat with your eyes but even the most gorgeous and spectacular looking dish means anything if it doesn’t taste any good, right?
So, I took forever to come up with my first Halloween post. I wanted to take the time to come up with an idea that was original, creative, fun but most importantly it had to be yummy!
So after a few painful weeks of trial and error, I finally came up with scary bloody ice creams.
For the latest recipes, join our FREE 3CatsFoodie mailing list
Back when I was at school, cake shops sold marshmallow cones topped with colourful sprinkles displayed in their windows. These were my inspiration for my bloody ice cream.
I made 4 trial batches of marshmallows to test out for sweetness and texture so I could get it perfect. I am very ashamed to admit that we ate all of it so none of the batches went to waste.
The cones sold in stores were always stale and sometimes soggy as they have been left out in the open. I didn’t want the same happening to mine so I coated the inside of the cones with yummy chocolate.
Eventually, the cones will still go stale but the chocolate prolongs it and even when stale having the chocolate makes it all okay!
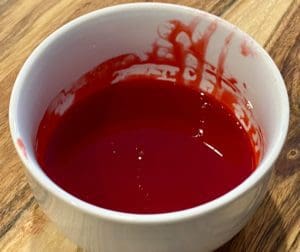
For the blood filling and topping, I kept it simple by using strawberry syrup mixed with icing sugar and red food colouring. I could have got fancy by making homemade raspberry coulis BUT with a baby, this ain’t happening!
If you are a sweet tooth check out my SALTED CARAMEL SLICE, it has 3 layers of naughty goodness!
Ingredients for Bloody Ice cream
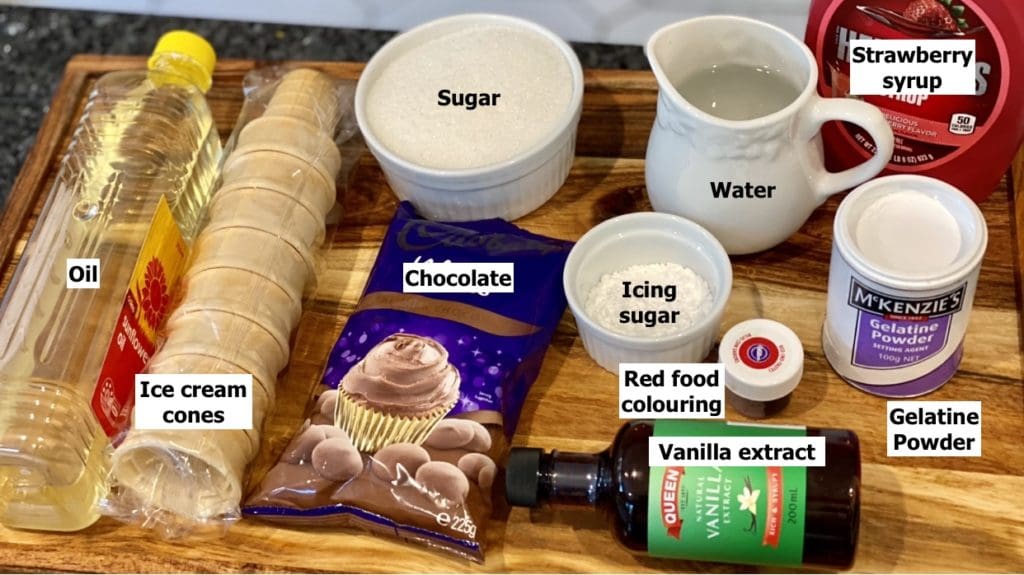
Ice cream cones – Mini ice cream cones with a flat bottom so you can stand them up.
Chocolate – milk, dark or white chocolate can be used. Do not skip this part as the chocolate prolongs the cone from going stale and stops the syrup from leaking through the cones.
Oil – is used to help melt the chocolate evenly and thin it out so it will make it easier to coat the cones. Use a flavourless oil (vegetable/canola/sunflower) so it doesn’t impact the taste of the chocolate.
Gelatine powder – Gelatine powder is sold in stores in a box with sachets or small containers.
Strawberry syrup – To keep the recipe simple I used Hershey’s strawberry syrup. The colour is light red and translucent so I added icing sugar and red food colouring to make it resemble blood.
Icing sugar – also known as confectionary sugar. If you have lumps in the sugar sieve it before mixing in the syrup and food colouring.
Red food colouring – A good quality red gel or liquid food colouring works well.
How to make scary bloody cones
Step-by-step guide with photos
There are 3 main components to making these bloody ice cream cones. It may look overwhelming at first glance but it’s quite straight forward.
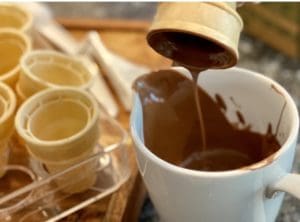
1. Coat the cones in chocolate
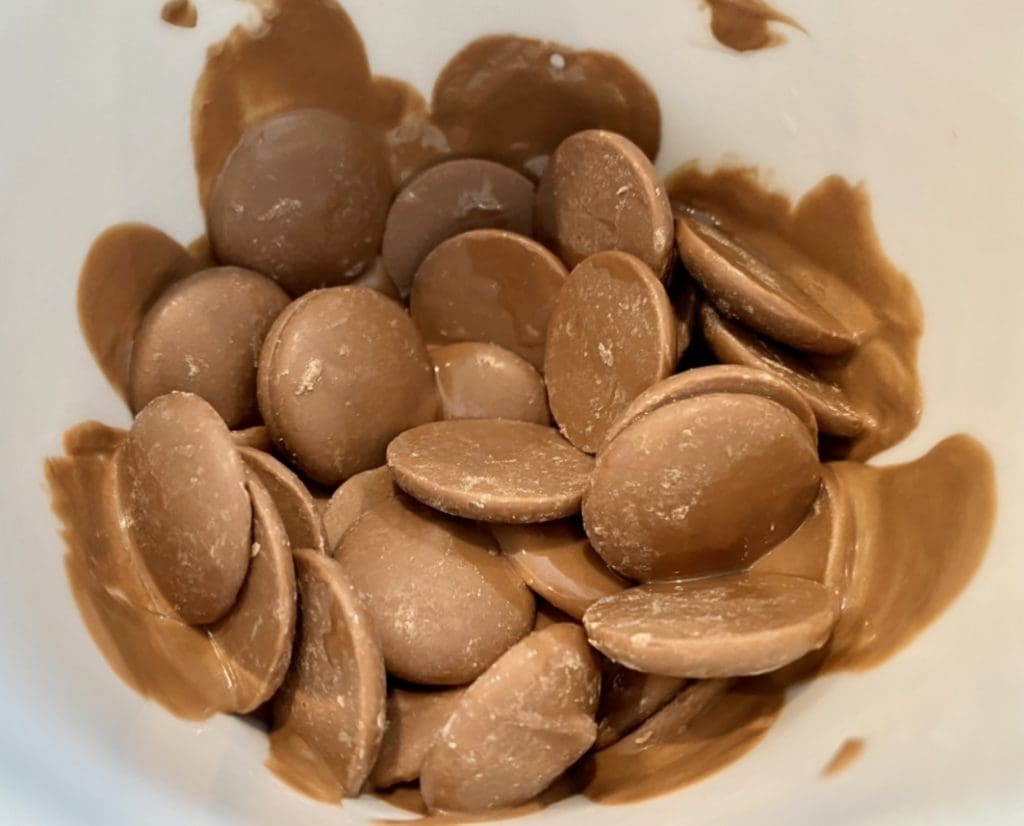

The chocolate does 2 imperative things besides making these cones taste better. It prolongs the cones from being stale and it prevents the blood syrup from leaking.
Start on chocolate first as it needs time to chill and set in the fridge. They will be ready by the time the marshmallows are whipped up.
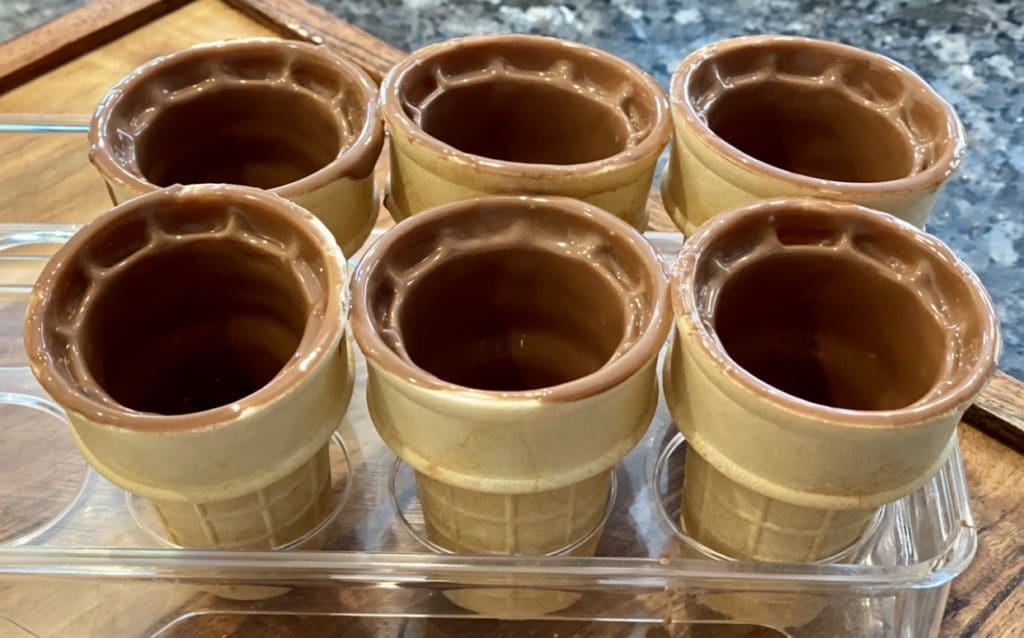
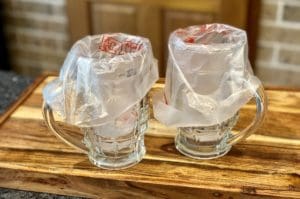
If possible use an egg holder from the fridge or a suitable object to keep the cones up. You could even use a shoebox lid with holes cut in to fit the cones, or just carefully stand them up on their own.
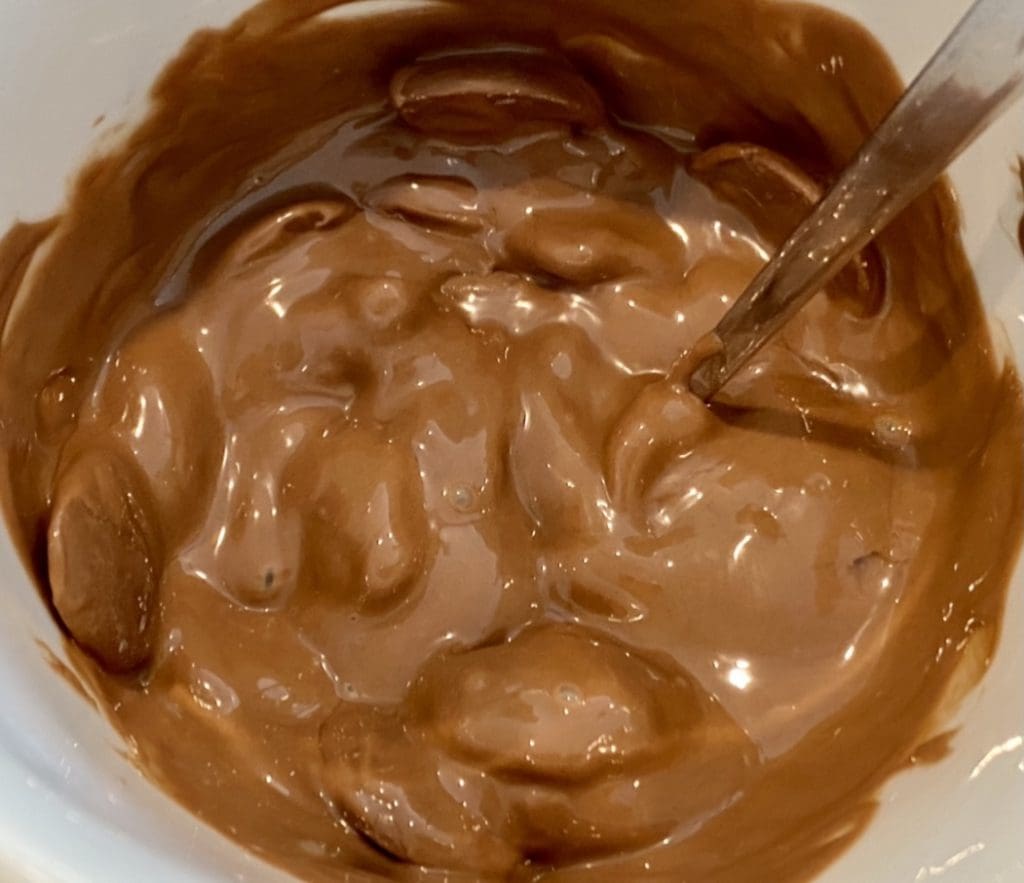
Place the chocolate and oil into a microwave-safe jug or bowl. Zap it for 30 seconds intervals until melted, make sure to stir each time.
Carefully pour the melted chocolate halfway into the cone and swirl it to coat all of the insides of the cone. Empty the excess chocolate back into the jug and repeat with the remaining cones. Once done transfer the cones with the egg holder into the fridge to chill.
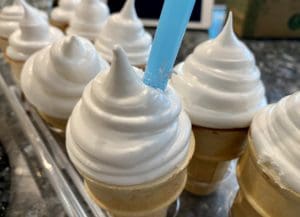
2. Make the marshmallows
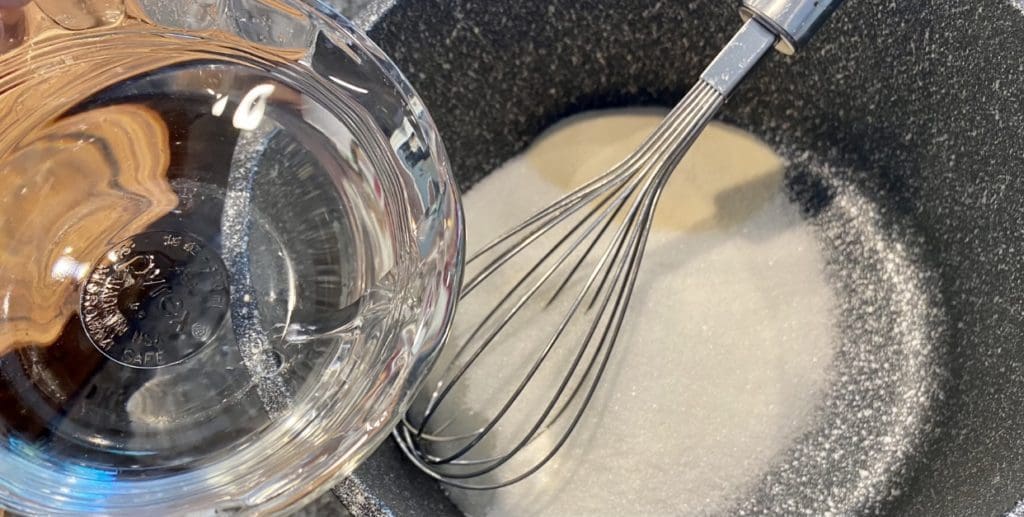
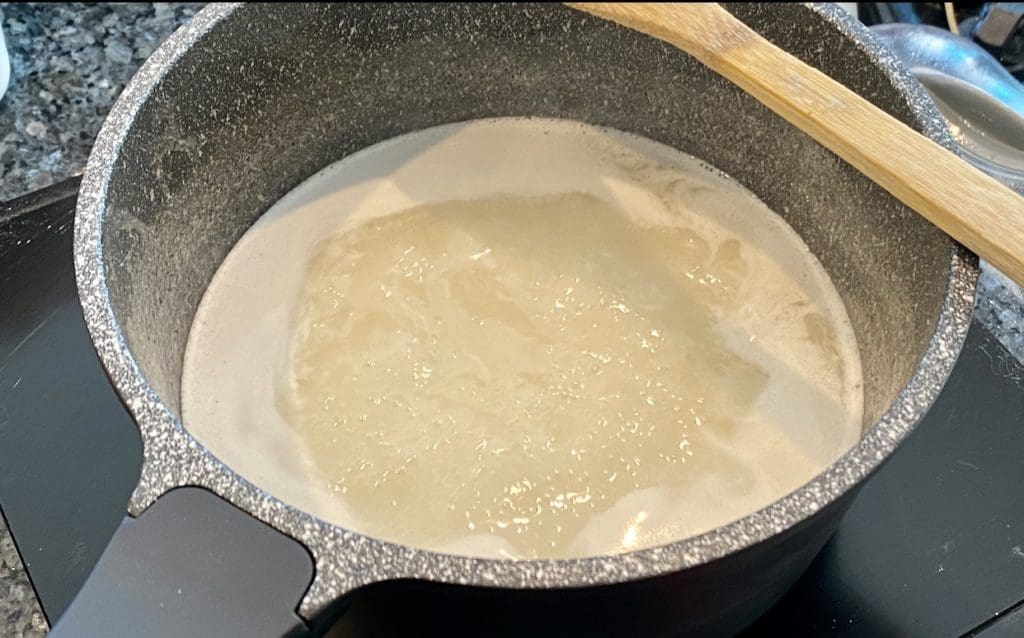
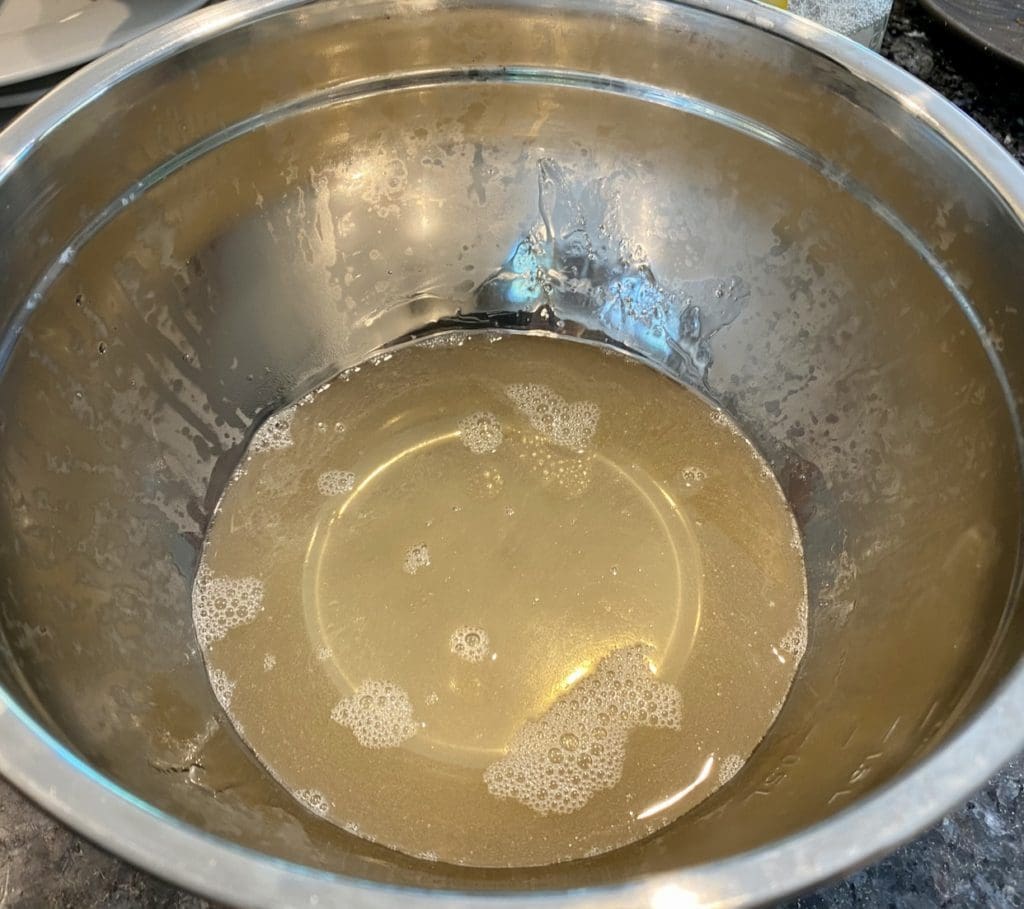
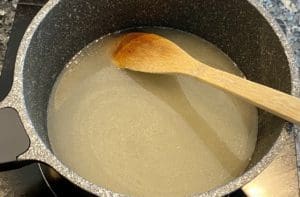
In a saucepan on low heat add in sugar, water and gelatine. Stir the mixture until the gelatine has dissolved (3-4 mins) then turn up the heat slightly and simmer for 5 minutes. Stir regularly to prevent the gelatine from clumping. Transfer the gelatine mixture into a mixing bowl and let it cool for 10 minutes.
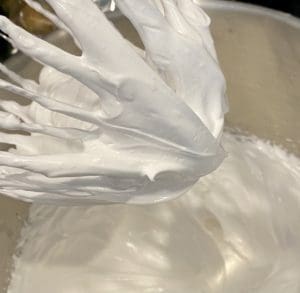
You will need to work fast in piping out the marshmallows into the cones as it sets quickly once whipped.

Using 2 piping bags with a wide circle nozzle or disposal bags cut (2cm) from the tip. Open the bags over a tall cup ready to fill it in with whipped marshmallow.
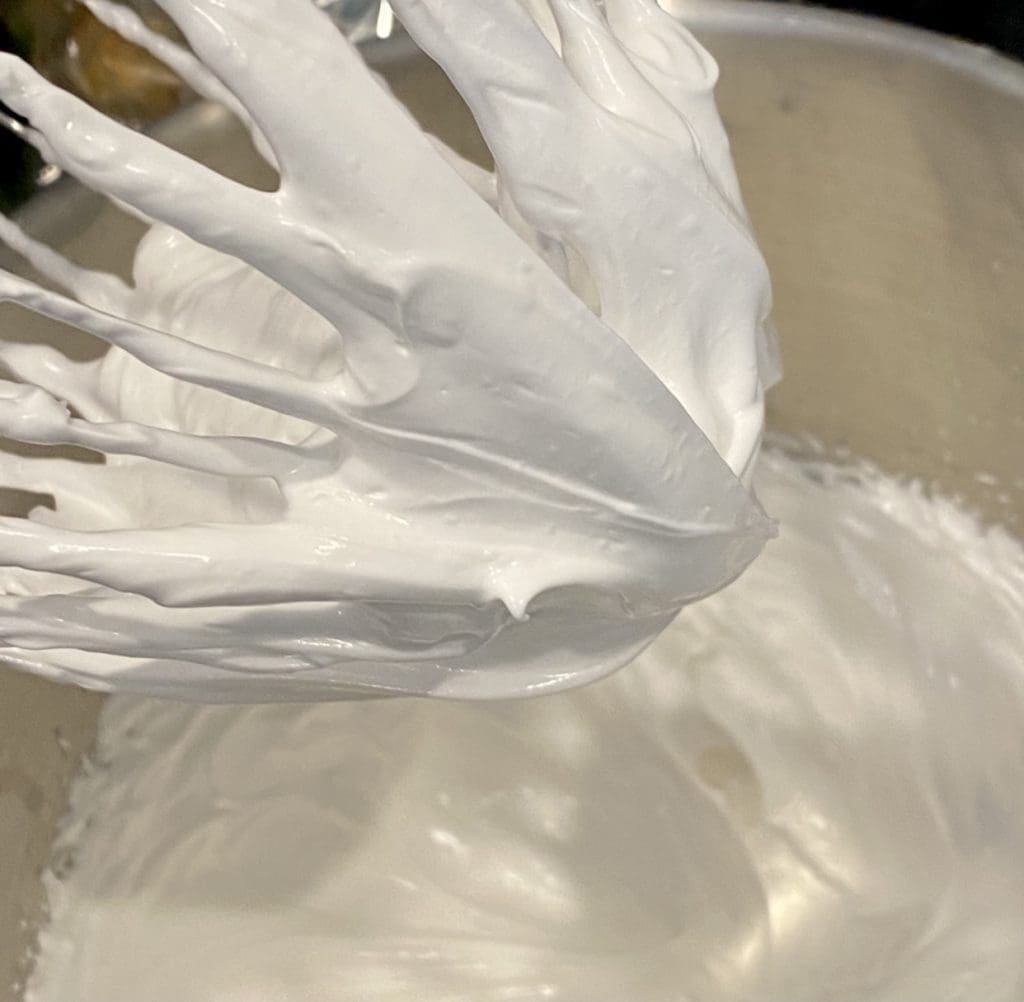

Using a balloon whisk on high-speed whip up the marshmallow mixture for 6-8mins. It is ready when the marshmallow is thick, fluffy and can just hold it’s shaping for piping. Quickly divide the whipped marshmallow into the piping bags.

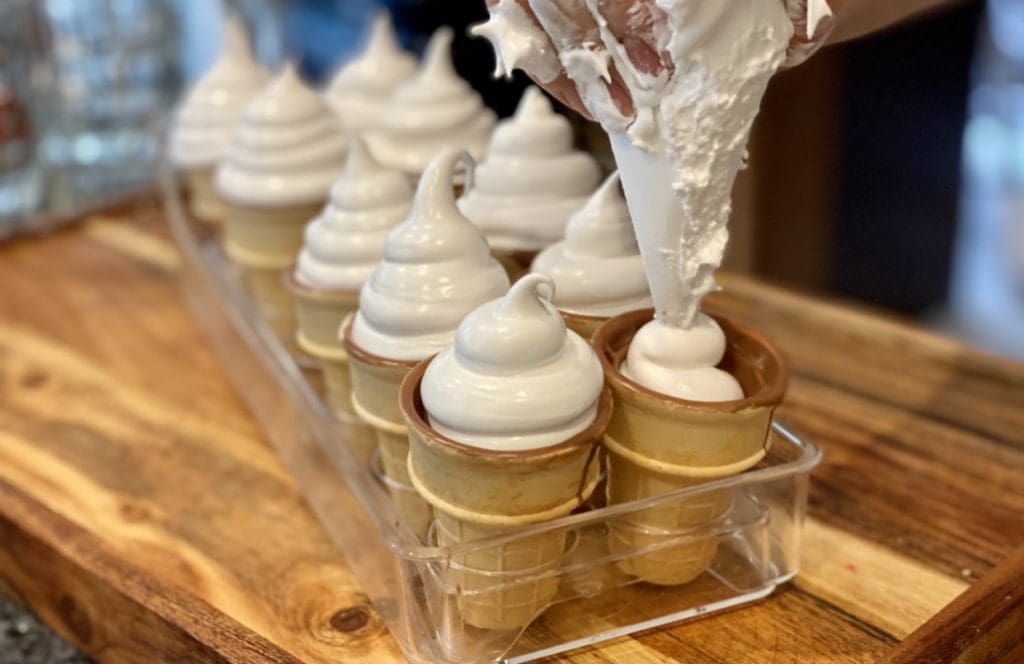
Working fast push the whipped marshmallow down towards the tip of the piping bag. Squeeze firmly but gently upright and fill in all the cones. One done, chill the cones in the fridge for 30 minutes.
3. Make the fake blood filling and topping
This last part can be done just before serving the cones.


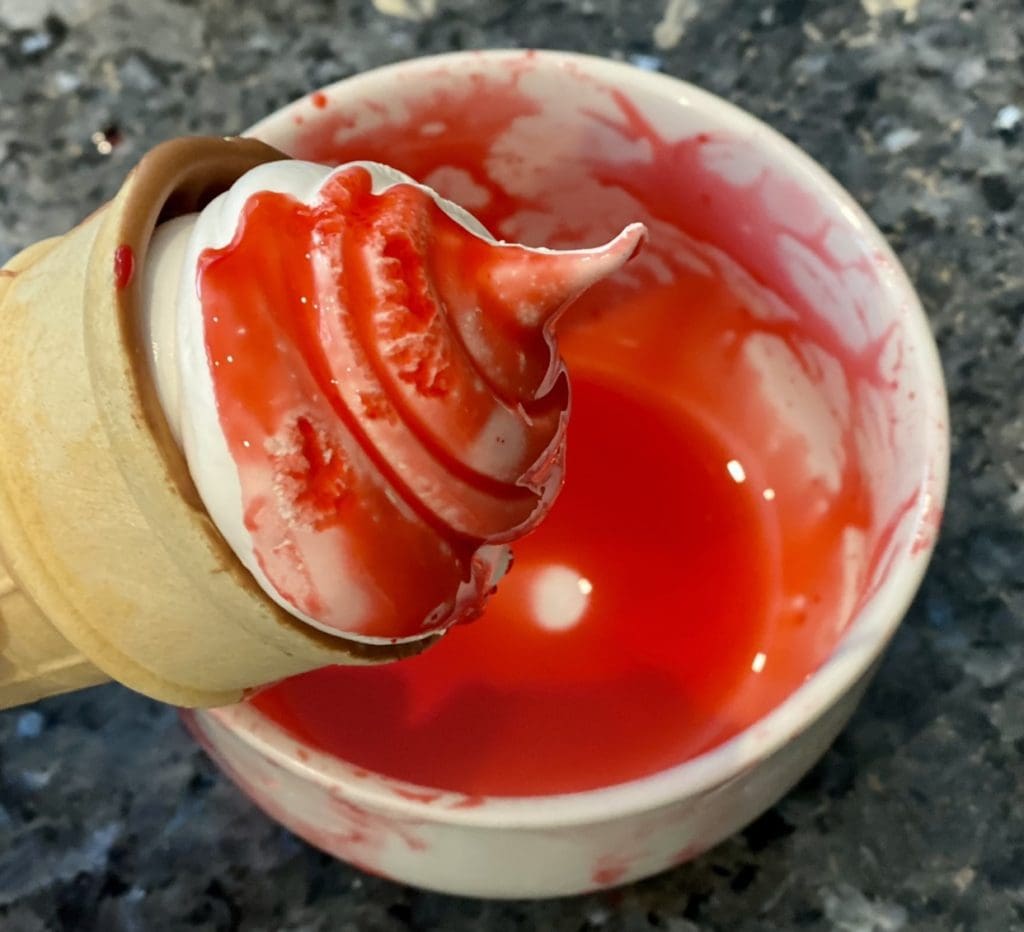
In a small bowl sieve in the icing sugar then add syrup and food colouring and mix well. Depending on the syrup or topping you have it may vary in colour as mine was light red and transparent.
To make mine resemble blood I added icing sugar to make it matte and red food colouring to deepen the red colour. you may need to play around with these 3 ingredients to get the right colour that would resemble blood.

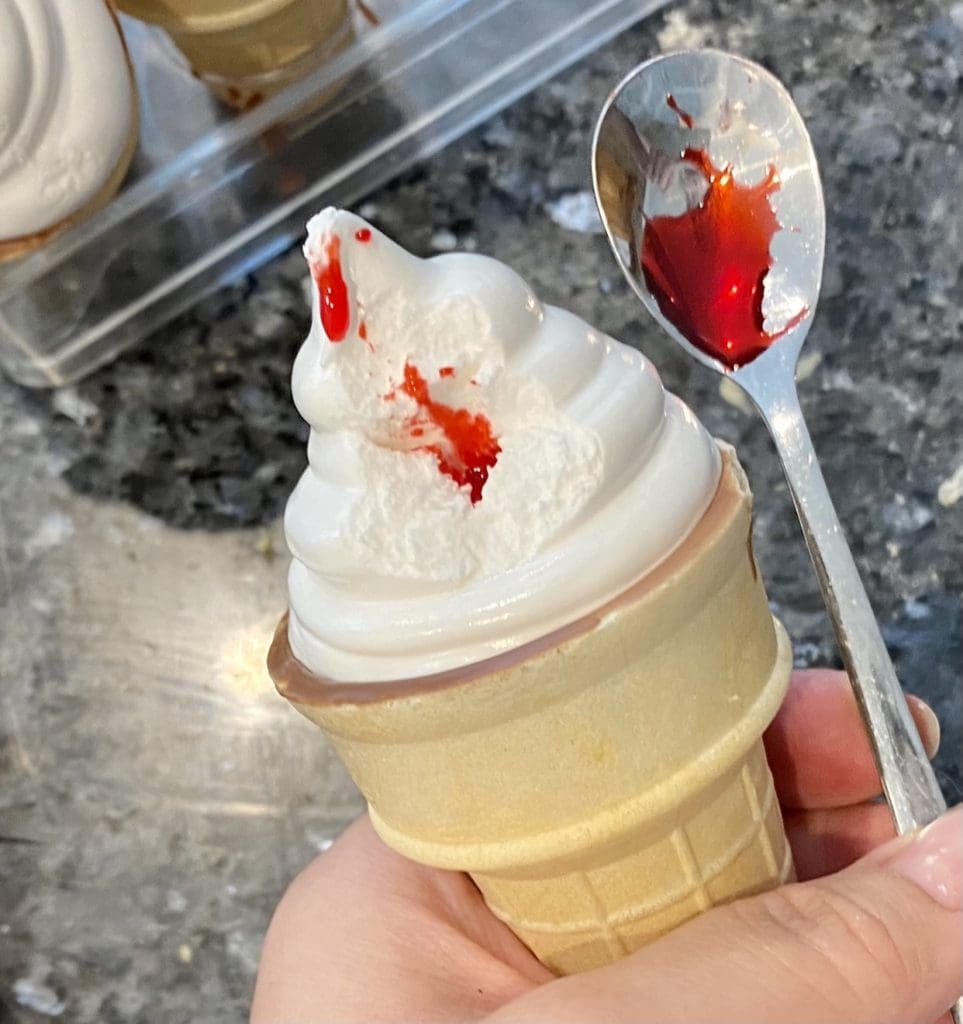
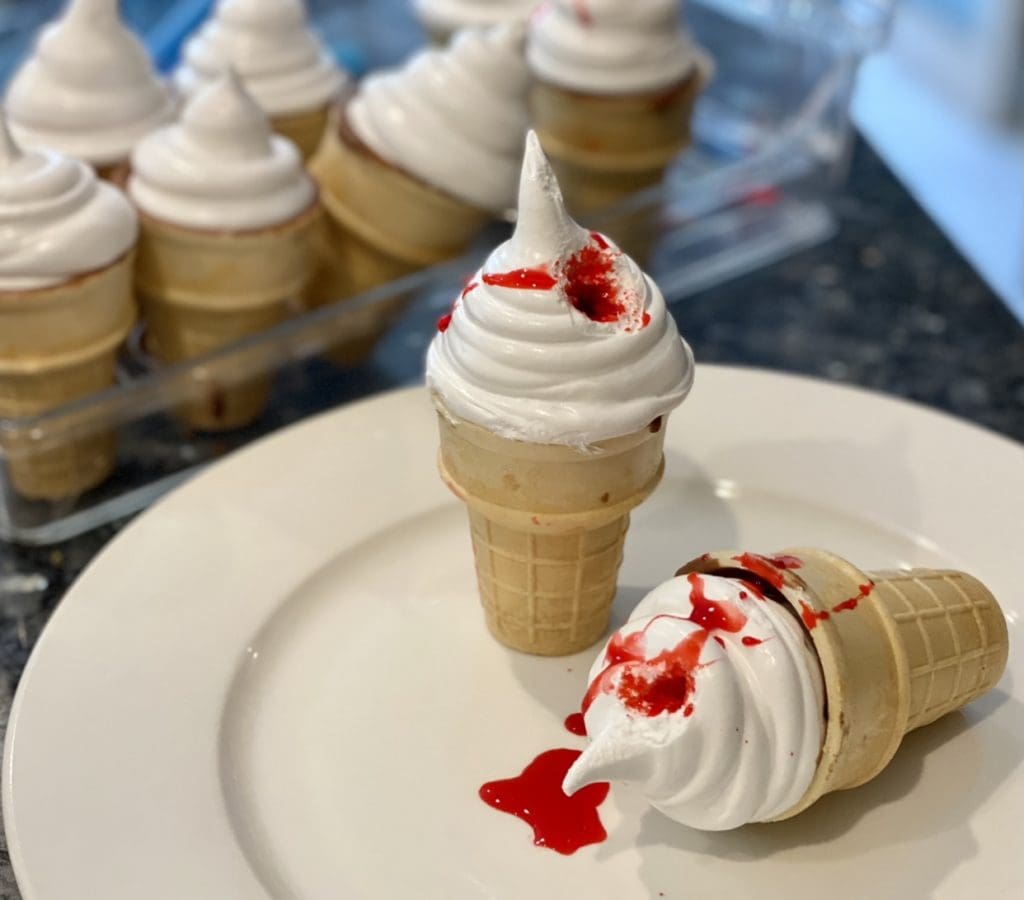
Make a small hole in the marshmallow by using a wide straw (bubble tea straw). Gently press the straw into the top of the marshmallow and slowly push and twist down. Make sure to insert straw only halfway and not all the way down as the syrup will gather at the bottom of the cone.
If you prefer not to fill the syrup inside the marshmallow you can just dip the top of the marshmallow into the syrup.
Use a piping bag or a teaspoon and fill in the holes with the syrup and spatter small amounts on top of the marshmallow and plate.
Tips for making the cones in advance and storage
The cones are best made on the day and eaten right away to enjoy the crispy cone. However, if you would like to prep the cones in advance you can so the night before but the cones will be stale.
I recommend filling at topping the syrup before serving to save on the mess. I kept some filled and topped cones overnight and they held up well thanks to the chocolate, but it was still very messy to store!
Storage – These cones are best served within two days of making them. Place cones in an airtight container and store in the fridge.
HAPPY HALLOWEEN AND ENJOY THESE TREATS!
Cooking measurements are in Australian standard spoon and cup measurements.
A Third-Party Application calculated the calories and nutritional information. Please use this as an approximate guide only.
I would love to hear your thoughts or feedback on this post. If you have made this recipe, please show your support by commenting and rate this recipe. You can do this by scrolling down or by clicking the green circle on the left. To prevent spam on this site, your email address is required but it will not be published.
Cheers (I’ll drink to that) – Cat Tre
Scary Bloody Ice creams
Ingredients
- 10 flat ice cream cones (NOTE 1)
- 275 gm milk chocolate (chopped if using a block) (NOTE 2)
- 1 tbsp oil (NOTE 3)
MARSHMELLOW
- 1 cup water
- 1 cup sugar
- 1 tbsp powdered gelatine (NOTE 4)
FAKE BLOOD
- 4 tbsp strawberry syrup or topping (NOTE 5)
- 1-2 tsp icing sugar (confectionary sugar)
- red food colouring (gel or liquid)
- 1 tsp vanilla extract
Instructions
COAT THE CONES IN CHOCOLATE
- Assemble the cones in an egg tray or an object that would help hold the cones up (NOTE )

- Place the chocolate and oil into a microwave-safe jug or bowl. Zap it for 30 seconds intervals until melted, make sure to stir each time.

- Carefully pour the melted chocolate halfway into the cone and swirl it to coat all of the insides of the cone. Empty the excess chocolate back into the jug and repeat with the remaining cones. Once done transfer the cones with the egg holder into the fridge to chill.
MAKE THE MARSHMALLOW
- In a saucepan on low heat add in sugar, water and gelatine. Stir the mixture until the gelatine has dissolved (3-4 mins) then turn up the heat slightly and simmer for 5 minutes. Stir regularly to prevent the gelatine from clumping. Transfer the gelatine mixture into a mixing bowl and let it cool for 10 minutes.
- Using 2 piping bags with a wide circle nozzle or disposal bags cut (2cm) from the tip. Open the bags over a tall cup ready to fill it in with whipped marshmallow.
- Using a balloon whisk on high-speed whip up the marshmallow mixture for 6-8mins. It is ready when the marshmallow is thick, fluffy and can just hold it's shaping for piping. Quickly divide the whipped marshmallow into the piping bags.
- Working fast push the whipped marshmallow down towards the tip of the piping bag. Squeeze firmly but gently upright and fill in all the cones. One done, chill the cones in the fridge for 30 minutes.

MAKE THE FAKE BLOOD
- In a small bowl sieve in the icing sugar then add syrup and food colouring and mix well. Depending on the syrup you have it may vary in colour so you may need to play around with these 3 ingredients to get the right colour that would resemble blood.
- Make a small hole in the marshmallow by using a wide straw (bubble tea straw). Gently press the straw into the top of the marshmallow and slowly push and twist down. Make sure to insert straw only halfway and not all the way down as the syrup will gather at the bottom of the cone.
- Use a piping bag or a teaspoon and fill in the holes with the syrup and spatter small amounts on the marshmallow and plate. If you prefer not to fill the syrup inside the marshmallow you can just dip the top of the marshmallow into the syrup.

Your article cracked me up?we will try this recipe next Halloween, this idea is bloody cool ?
Glad I made you laugh! If you end up making it I would love to hear how it went!