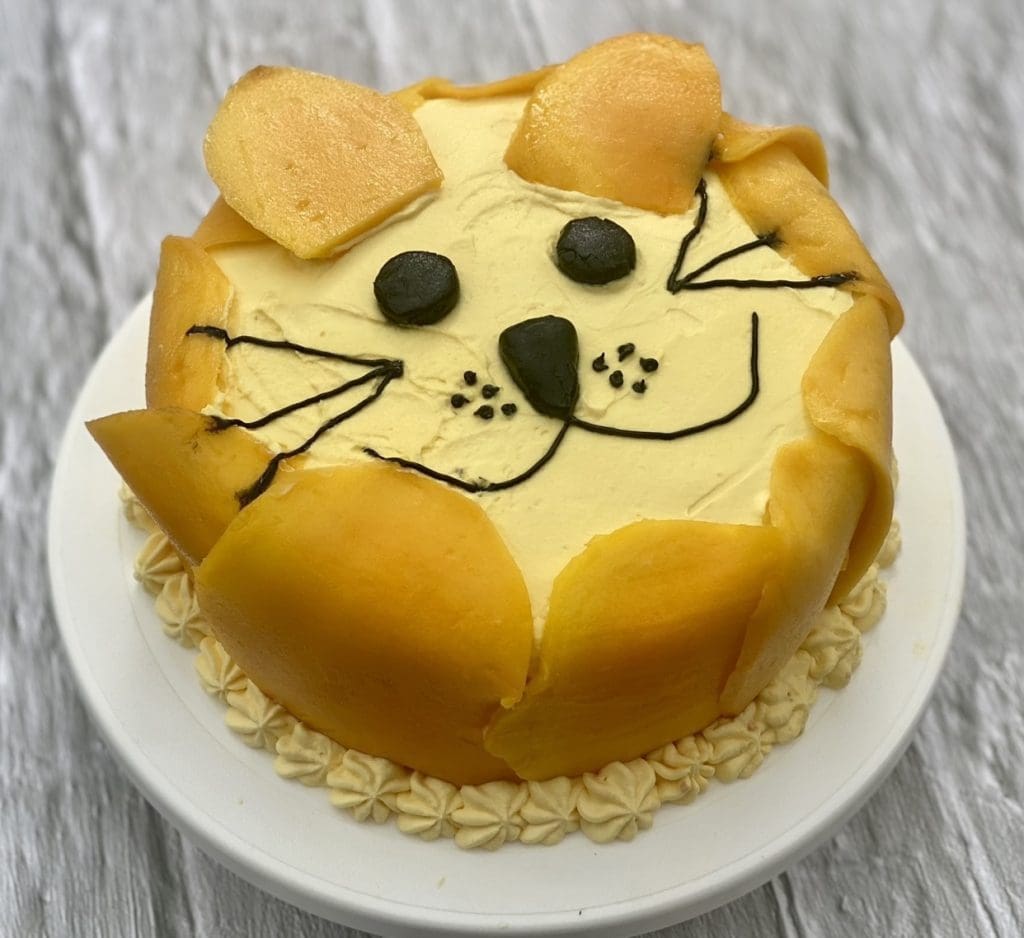
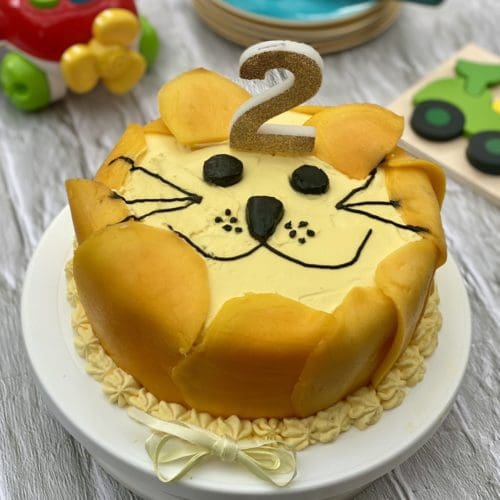
Lion Cake with Mango & Cream
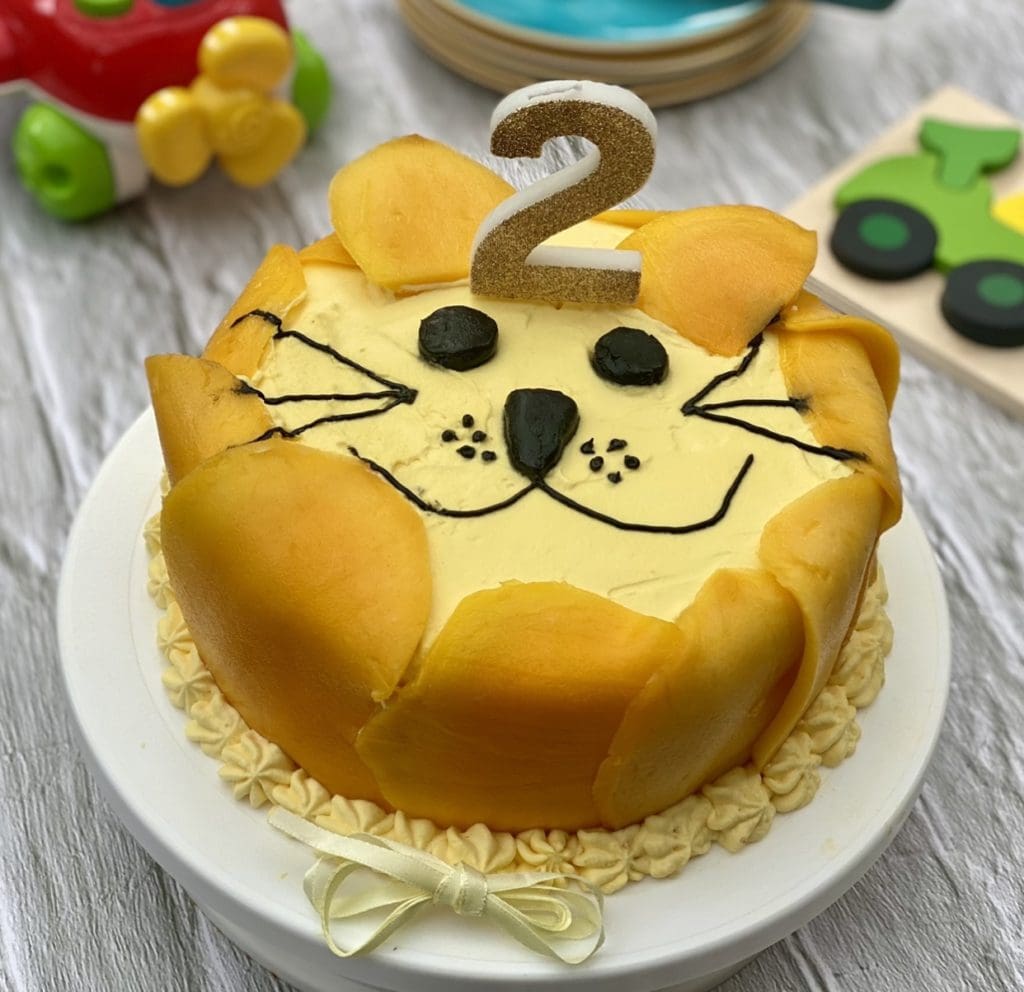
This adorable lion cake melts in your mouth. It loaded with juicy fresh mangos and whipped cream, it’s also lower in sugar than most cakes!
Kitties, mangoes and a toddler
Last year, exhaustion prevented me from baking a cake for my son’s first birthday. So, we bought him a cake from our local Cheesecake shop. How terrible of me because Kai will only turn 1 once!
This year I promised myself that I’ll make Kai a special little cake, even if I was again dying from exhaustion!
I spent weeks contemplating a theme for Kai’s cake. He loves his cars, planes, trains and Lego but above all this, he loves our kitties most. Or perhaps maybe it’s because I want him to love them the most. He says cat every time he sees them and awkwardly tries to pet them gently. Surely that means he must love our kitties more than his toys, right?
The cake theme wasn’t the only thing I thought about. I wanted to make an adorable cake, but I also wanted it to be tasty and pleasing to the kids and adults.

Teddie had an obsession with my mango box. He would lie on my mangoes like he was a hen, and the mangoes were his eggs. Summer, mangoes and cats were my inspiration for Kai’s birthday cake.
When I was at uni, my friends bought me a gorgeous mango and cream cake from a Chinese cake shop to celebrate my birthday. I instantly fell in love with it. The cake was so light and fluffy that it felt like I was eating clouds. I loved it wasn’t too sweet and that every bite had a burst of mango goodness. Definitely the taste of summer!
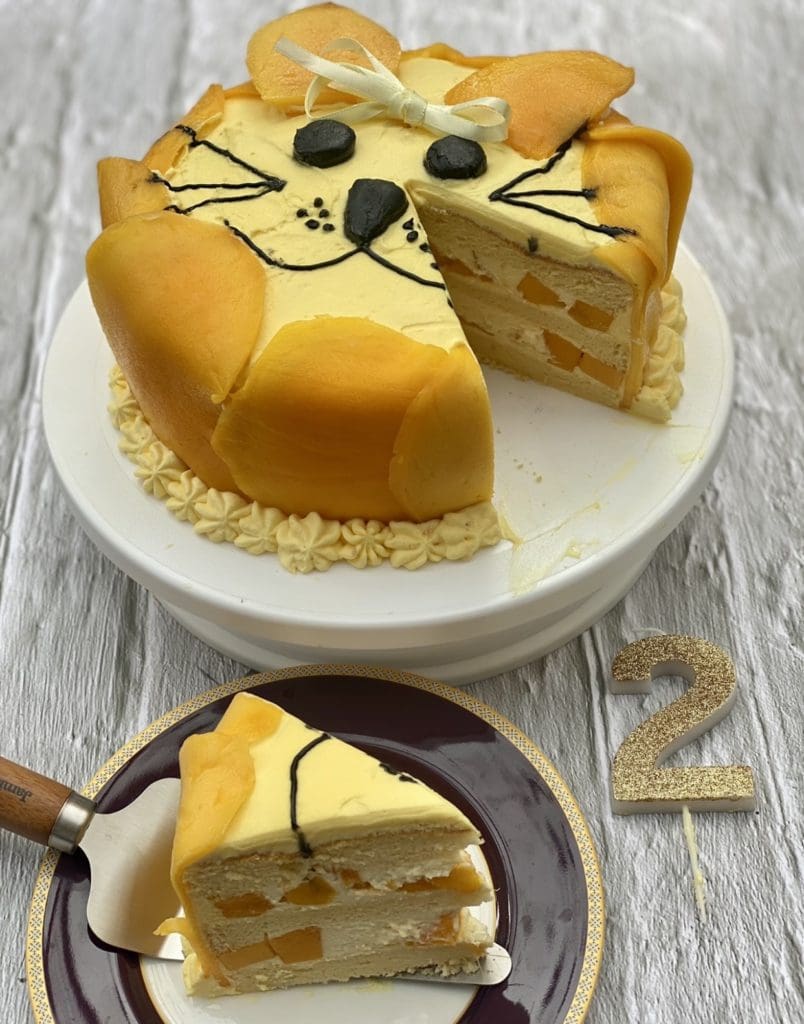
That memorable cake was my inspiration for this lion cake. So here we have it! 3 layers of plush vanilla cake filled with loads of whipped cream and fresh ripe juicy mangoes.
It’s a perfect cake for the little ones as it’s lower in sugar than cakes made with buttercream or fondant. Having the lion’s face there would light up any child’s face! Mine thought it was a cat, so I must’ve done an ok job with my Lion Cake decorations.
Subscribe to 3CatsFoodie’s FREE Newsletter
For the latest recipes and other fun stuff!
And just like that, my baby is 2!
This blog is a journal that I hold close to my heart. I hope I can keep it running forever because I have already shared so many special memories. So when I hit my granny days I can squint to read what I wrote and mumble to myself ‘Oh deary me, did that actually happen!’
Let me tell you about the recent road trip we had for Kai’s birthday. We booked a beautiful but old motel right on a beautiful lagoon. We just needed to open our gate and we would be by the sand and water.
After spending 2 hours on the road with a whiney toddler, we just wanted to collapse on the bed and rest. Unfortunately for us, Kai had a little nap in the car. This meant he was full of energy when we arrived.
Kai ran straight to the sliding doors leading to the balcony and started opening and closing them. Worried about his safety, I went over and I flicked down the latch. To my surprise, he flicked the latch back up and opened the door again! My hubby, Tomasi, tried to lock the door with the keys provided, but none of them matched.

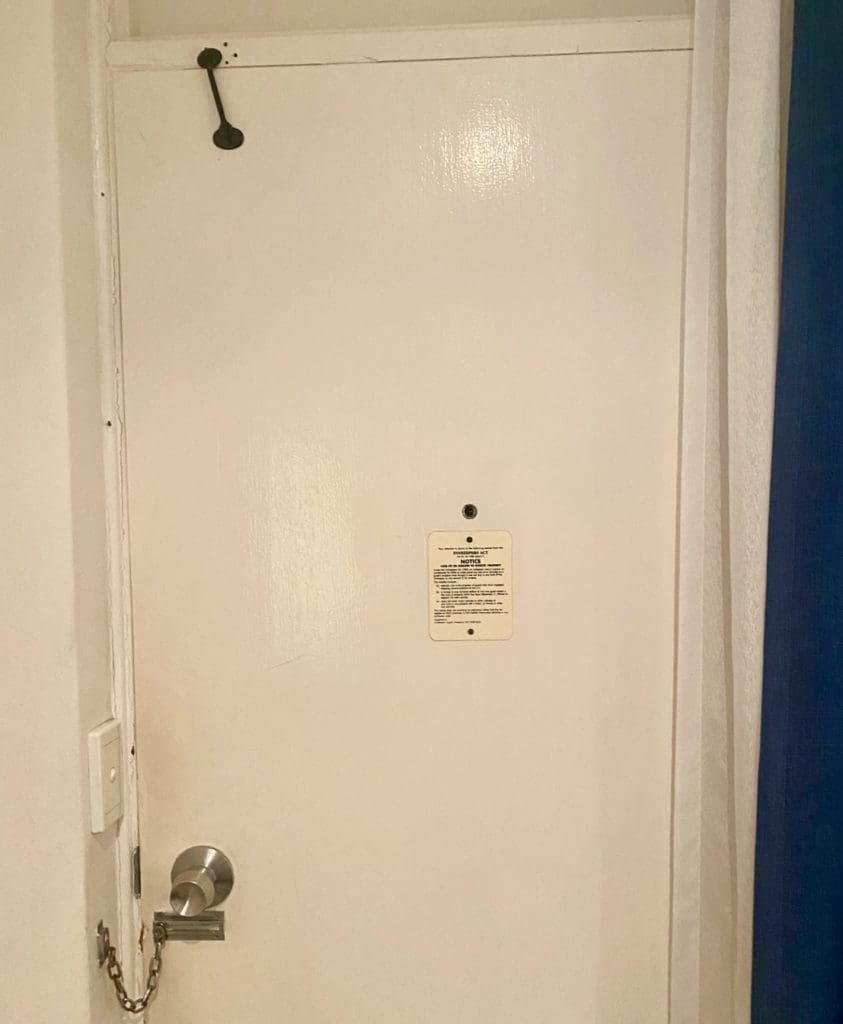
Left – Our motel was right near the beautiful lagoon. Right – The impromptu lock that was installed to stop Kai from escaping.
The lady at the fount desk told us there were no keys to the balcony door. Understanding our concerns for Kai, they swapped us to a room downstairs. This room had a key lock so we could lock access to the balcony.
The motel manager and her helper were fixing up the room and swapping funny hotel stories with us. It was then I noticed Kai with the hotel keys in his little hand, trying his best to insert them in the balcony door. All four of us looked at each other in shock before I removed the keys from him.
As the ladies were about to leave, Kai was playing with the chain lock on the front door. ‘I think he can open that too!’ I said. Tomasi carried Kai away so he couldn’t see and I put the chain in. As soon as Kai was free, he marched over to the door, examined it for a few seconds, then slide it open. Before we knew it, he sprinted towards the motel’s car park.
The ladies had to drill and a new lock on top of the door to prevent our little terror from escaping!
Some pressure points and useful tips
I felt so impressed with myself after creating this cake. However, I must stress there are a few ‘pressure points’ that come with making this cake. The ingredients for this cake are simple, but it’s the method that proves a little difficult.
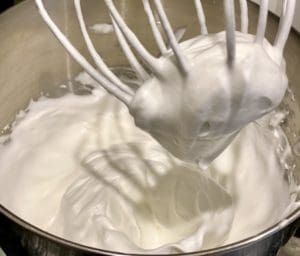
It’s critical to get the egg whites whipped to the right consistency. If they’re too soft, the cake may sink in the middle and if they’re over whipped, the cake may split. After making the sponge a few times, I found that medium to stiff peaks works best. This is when the whites should be stiff enough to stand up firmly but have a little curl at the tip when you lift the whisk.
Folding the egg whites into the batter may be a little difficult too because it’s very easy to crush the air from the whipped egg whites. This may lead to a dense cake, as it’s the fluffy egg whites that make the sponge so lovely and soft. Therefore, have to be ultra-careful with our folding technique. I use a spatula and go over and under several times whilst spinning the bowl until combined. The batter should look light and airy before it’s poured into the baking tin.
We then baked the sponge in a hot water bath, doing this will add moisture to the cake whilst baking and may help prevent the top from splitting.
I know, right? All the above is enough to make your head spin, and that’s why it’s okay to cheat. Grab a store-bought vanilla sponge or a pre-cake mix because I won’t tell if you won’t! It’ll still be incredibly delicious but it won’t have that luxurious chiffon-like texture, but that’s okay! The bonus is can just focus on making the filling and decorating the cake!
Lastly, let’s talk about mangoes. The thin slices of mangoes used to place around the sides of the cake may be a little tricky to make. My slices were definitely not perfect, but I don’t mind because they gave my cake character. I’m making a Lion Cake for a very messy 2-year-old, so I don’t think he minds if my mangoes slices are lopsided!
More beautiful cakes to try:
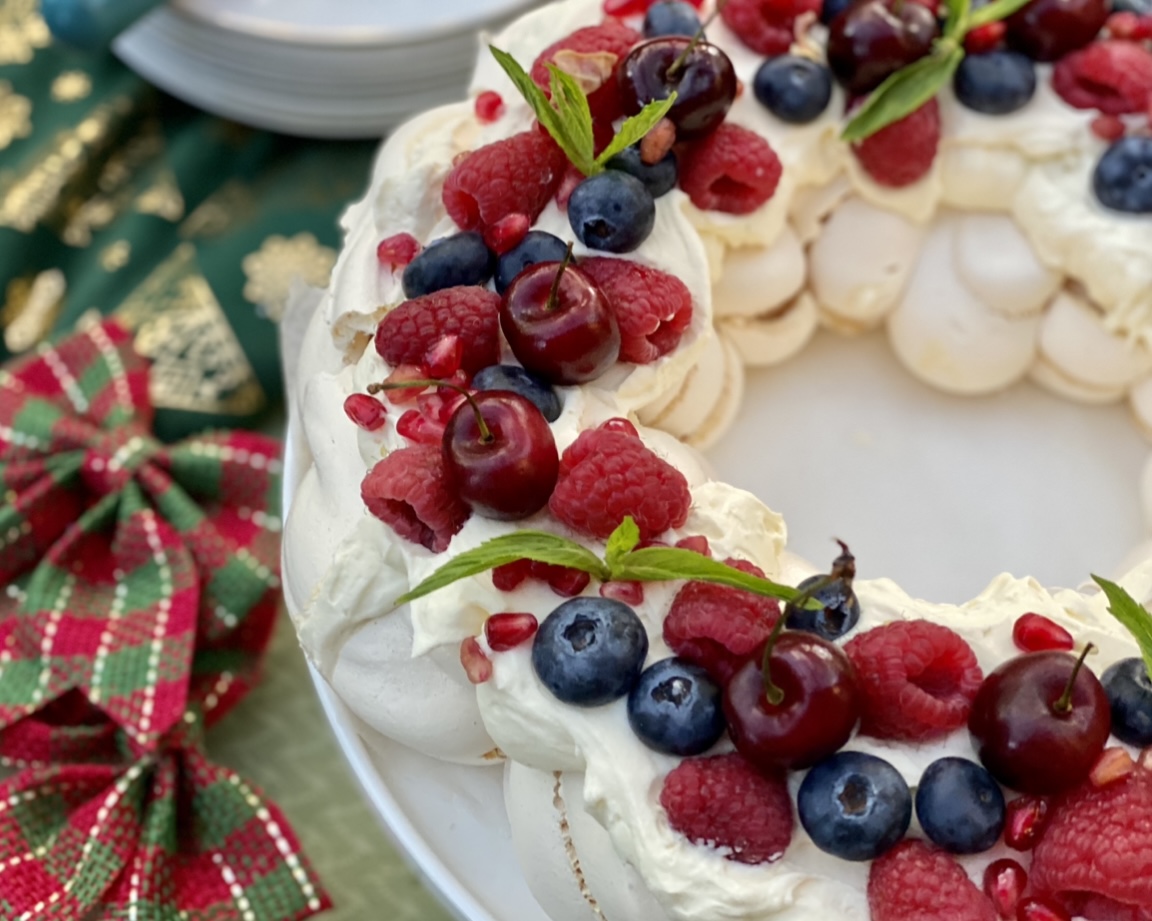
Pavlova Wreath
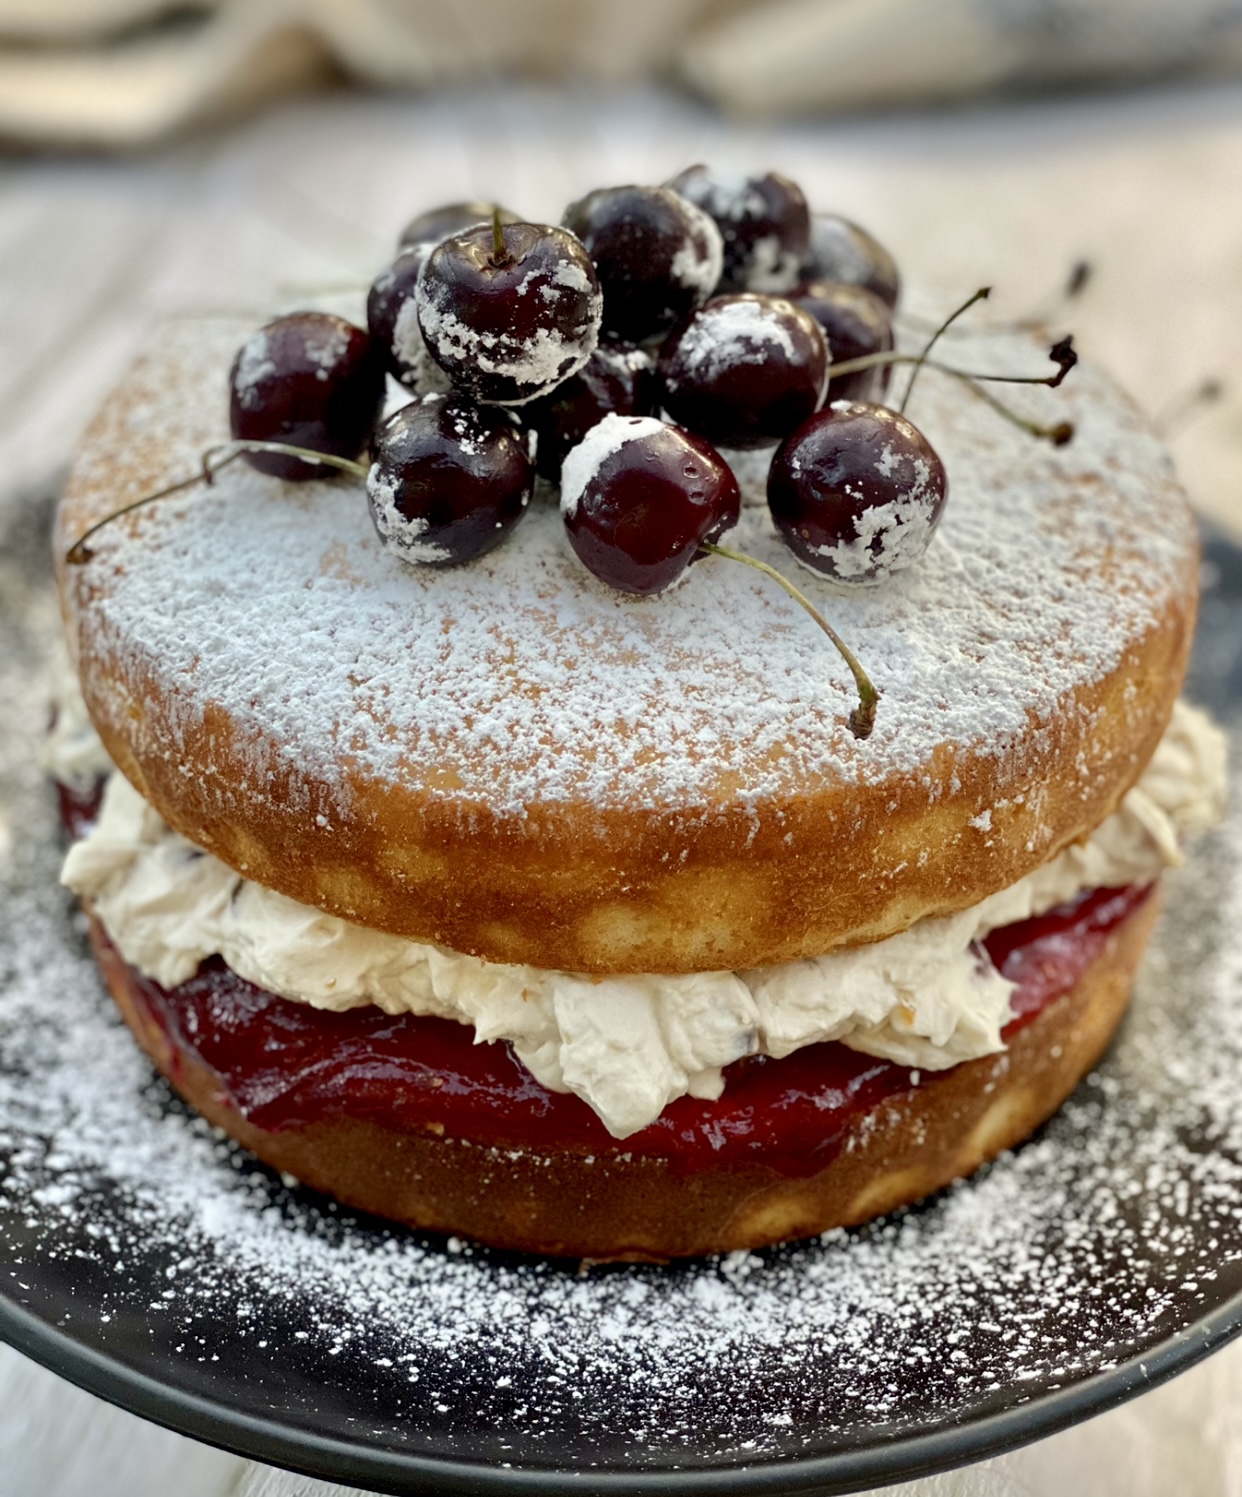
Cherry Victoria Sponge Cake
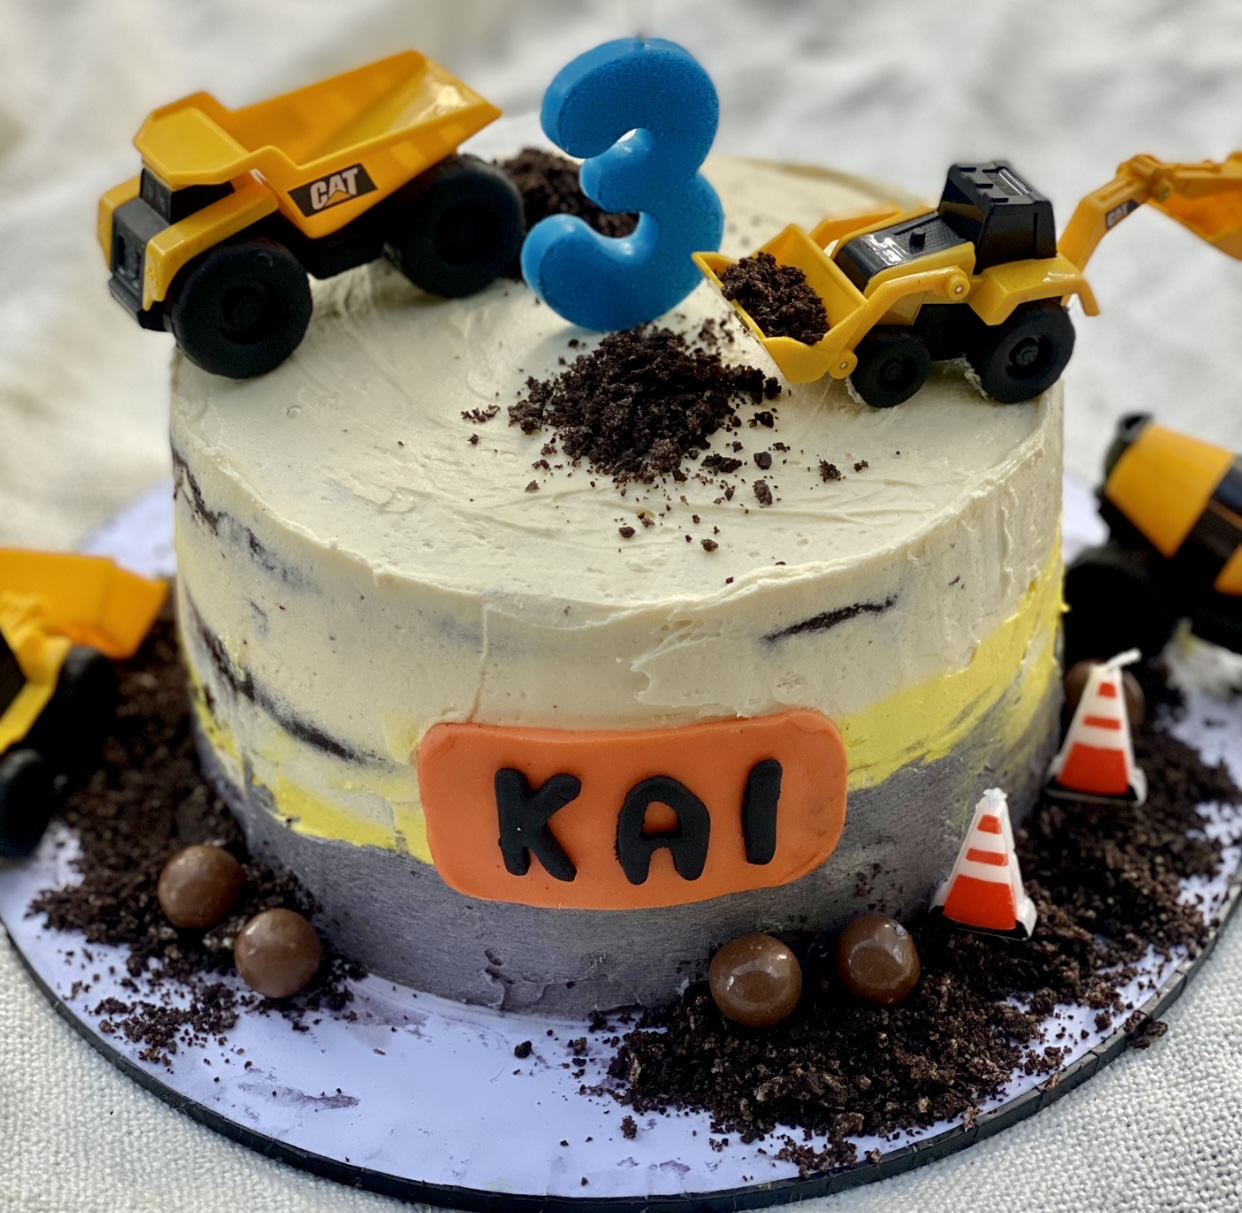
Construction Cake
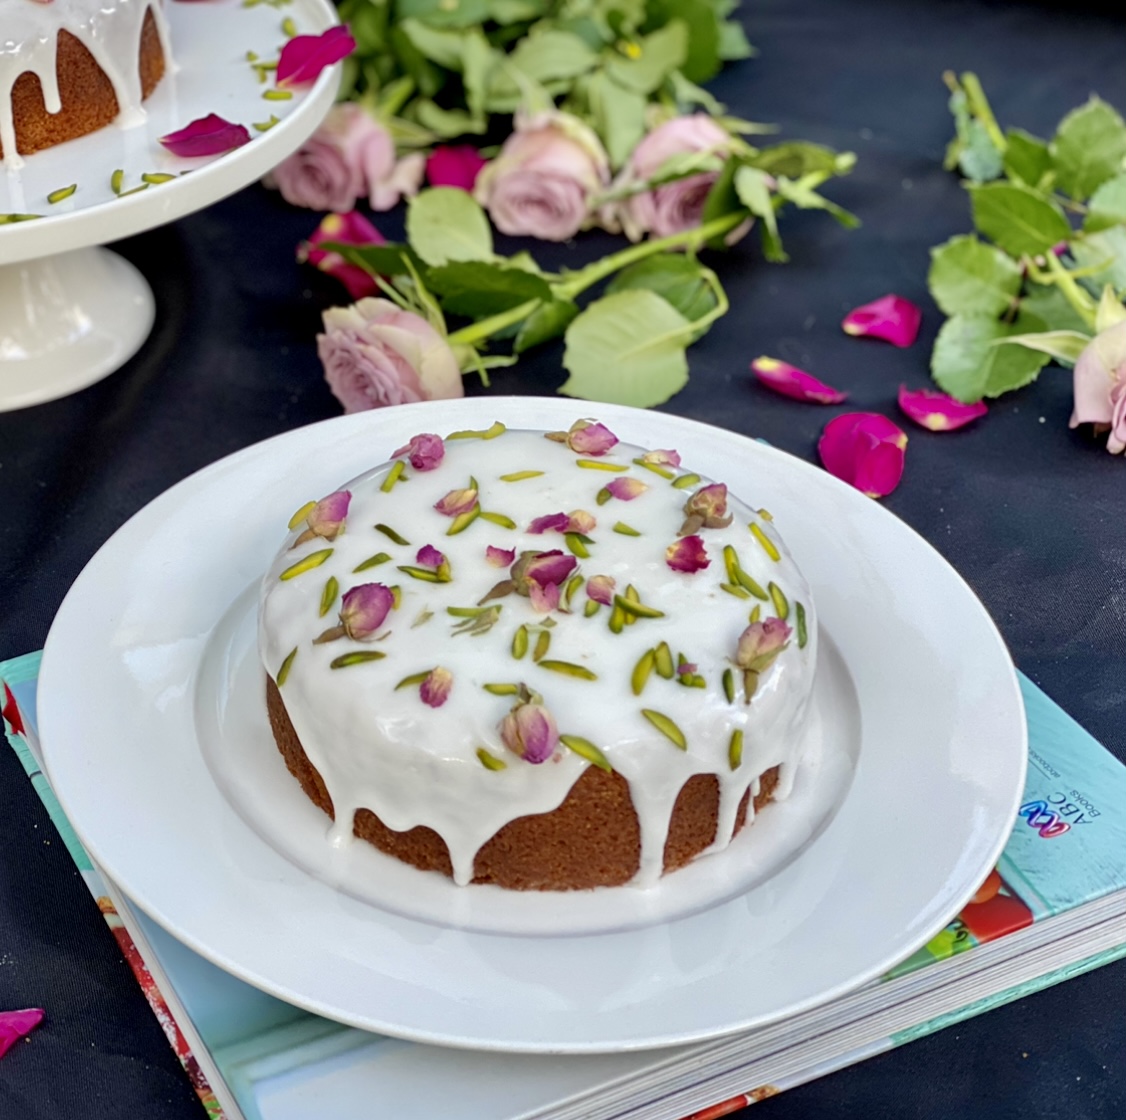
Persian Love Cake
Ingredients for Lion Cake with Mango & Cream
For the sponge cake
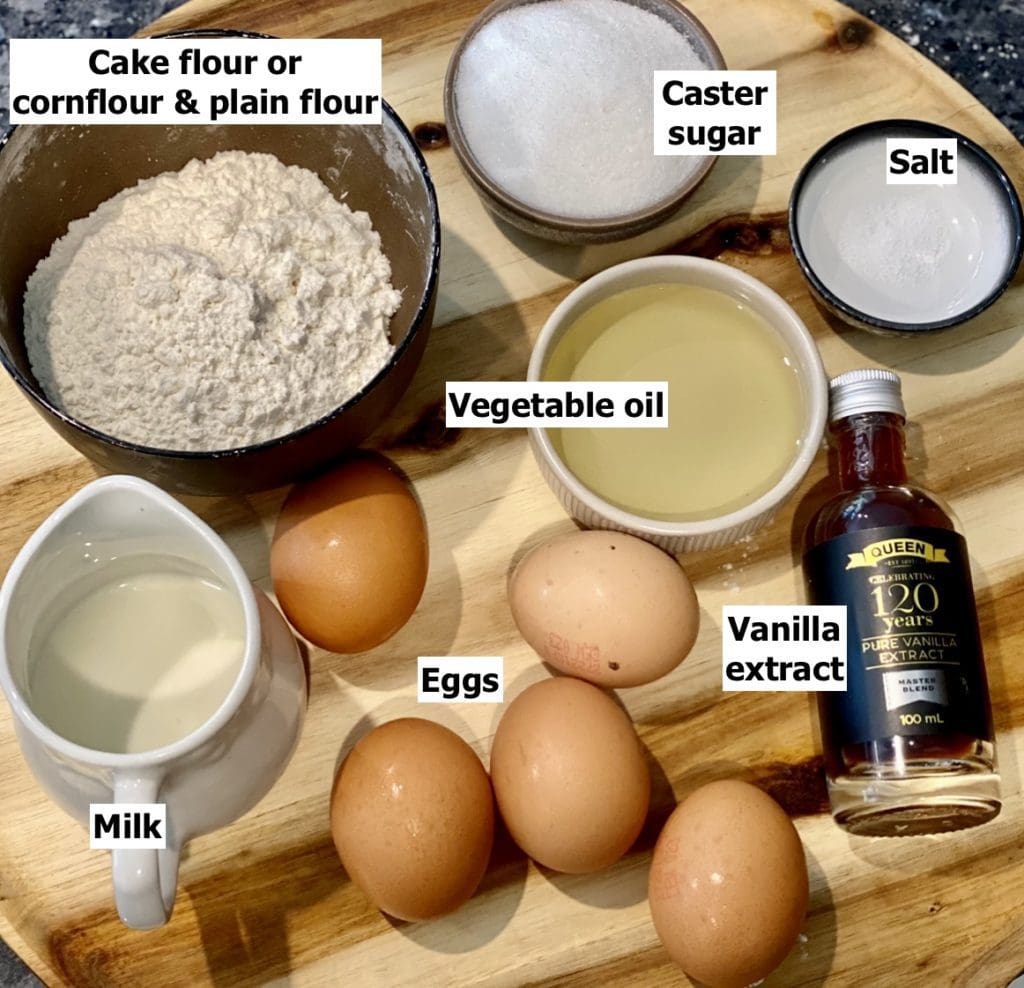
Cake flour – It’s hard to find cake flour here in our supermarkets. Some Asian grocers sell cake it but if you can’t get cake flour, you can make your own substitute as I did. To make a cup of cake flour substitute: Place a cup of plain four (all-purpose flour) into a bowl, then remove two tablespoons. Replace it with two tablespoons of cornflour or cornstarch the sift the flours a few times to make sure it’s distributed evenly.
Caster sugar (superfine sugar) – Caster sugar has finer granules than regular white sugar. However, it’s not the same as confectionary, icing, or powdered sugar. Many baking or candy recipes call for caster sugar as it dissolves faster and better into mixtures. If you can’t find caster sugar, you can make your own by placing regular sugar in a food processor or blender. Pulse the sugar a few times until it looks finer, but take care not to over-blitz it so a powder consistency.
For the Lion Cake filling and decorations
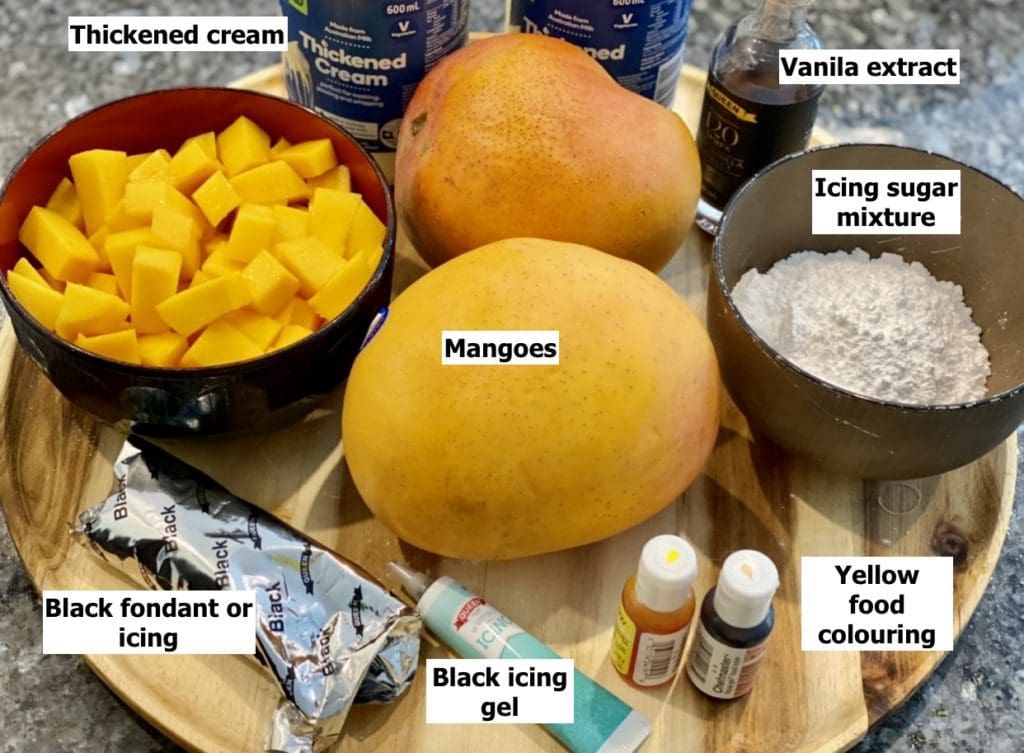
Mangoes – You may need 3 large or 4 medium mangoes. It’s better to purchase more than less, just in case the seeds are big and there’s not much flesh. Also, make sure the mangoes are just ripe and sweet.
Thickened cream (whipping cream) has gelatine added to it and contains 35% milk fat. I don’t recommend using low-fat cream because it may not whip up well and be too runny to use.
Icing sugar (powdered sugar, confectionary sugar) – Icing sugar usually comes in two forms, icing sugar mixture and pure icing sugar. Icing sugar mixture is softer than pure icing sugar because there’s starch or flour added to it. For this recipe, I prefer using icing sugar mixture because the starch helps stabilise the whipped cream.
Decorations – I used Queen’s icing writing gel and black icing for the eyes and mouth of the lion. I also use a few drops of yellow gel food colouring in the whipped cream. These are optional, as you may wish to use candies or other edible stuff to make the face.
How to make Lion Cake with Mango & Cream
Step-by-step guide with photos

Preheat oven to 170°C (340°F) or 150°C (300°F) for fan-forced ovens. Line and grease the base (not the sides) of a round 20cm (8in) baking tin with baking paper (parchment paper)
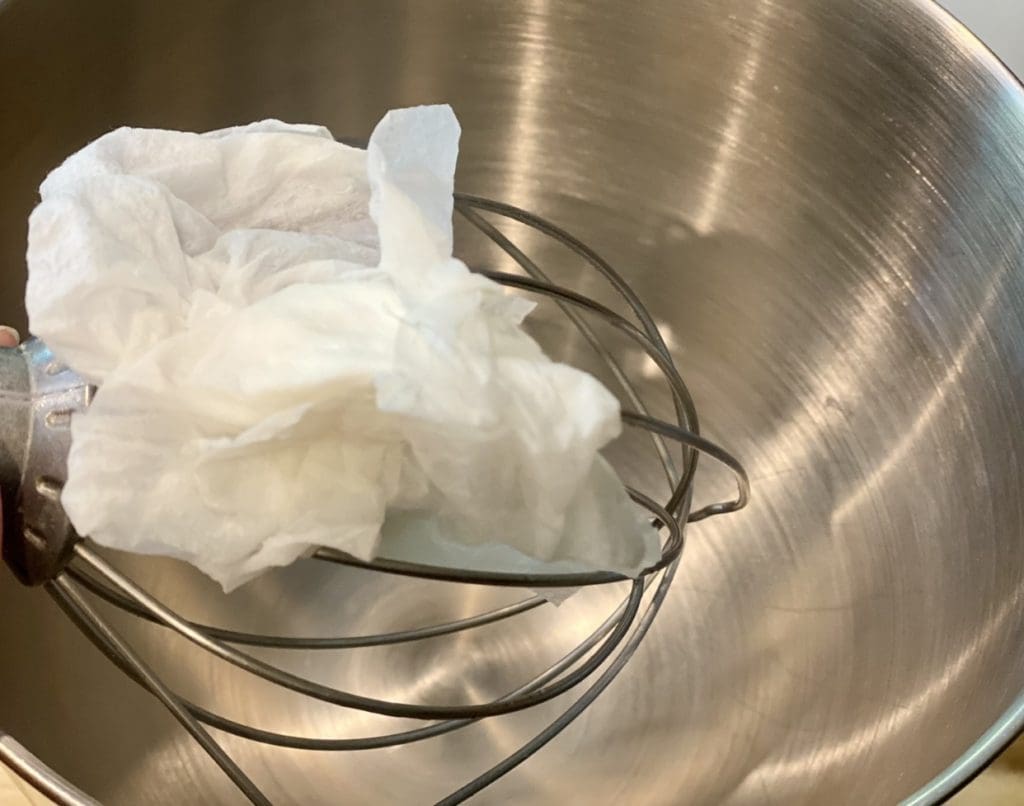
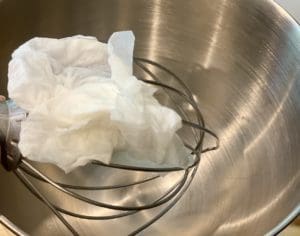
Make sure your stand mixer bowl and balloon whisk are free from fat. To do this, lightly dampen a paper towel with white vinegar or lemon juice and wipe the inside of the bowl and all over the whisk.
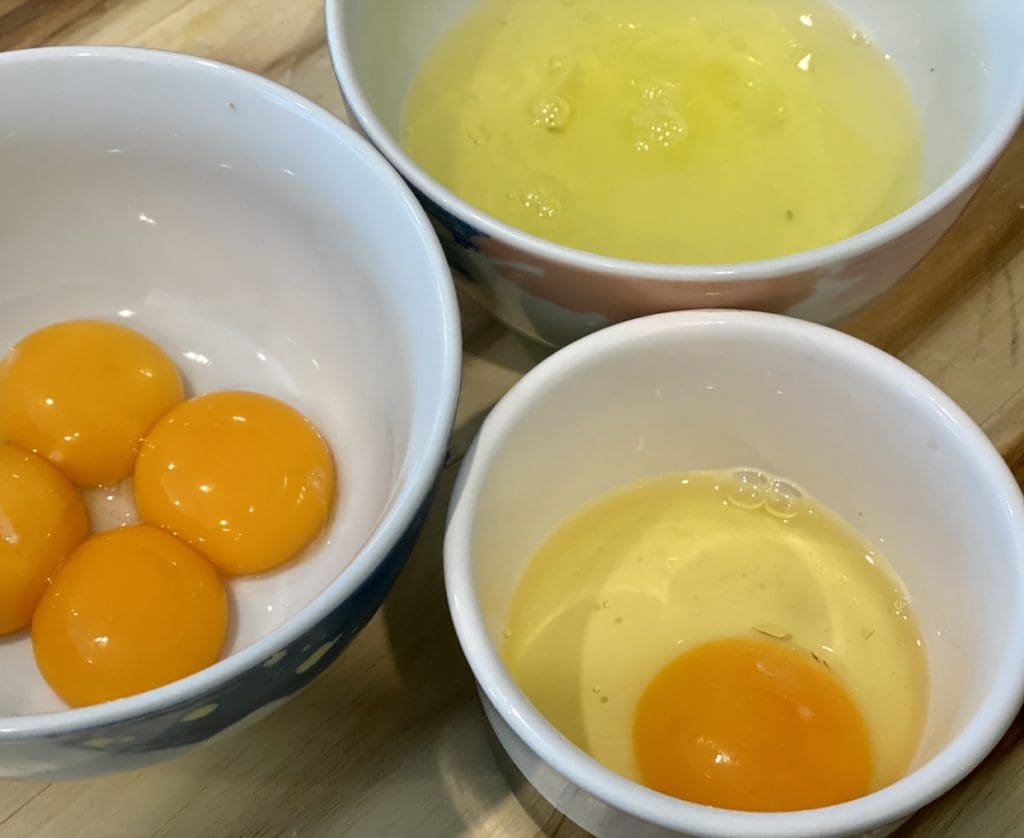
Use 3 bowls to separate the eggs. One bowl to collect the yolk, one to collect the whites and one for separating the egg. Doing this will help prevent contamination of the whites if a yolk breaks. A tiny amount of yolk can prevent the whites from whipping up.
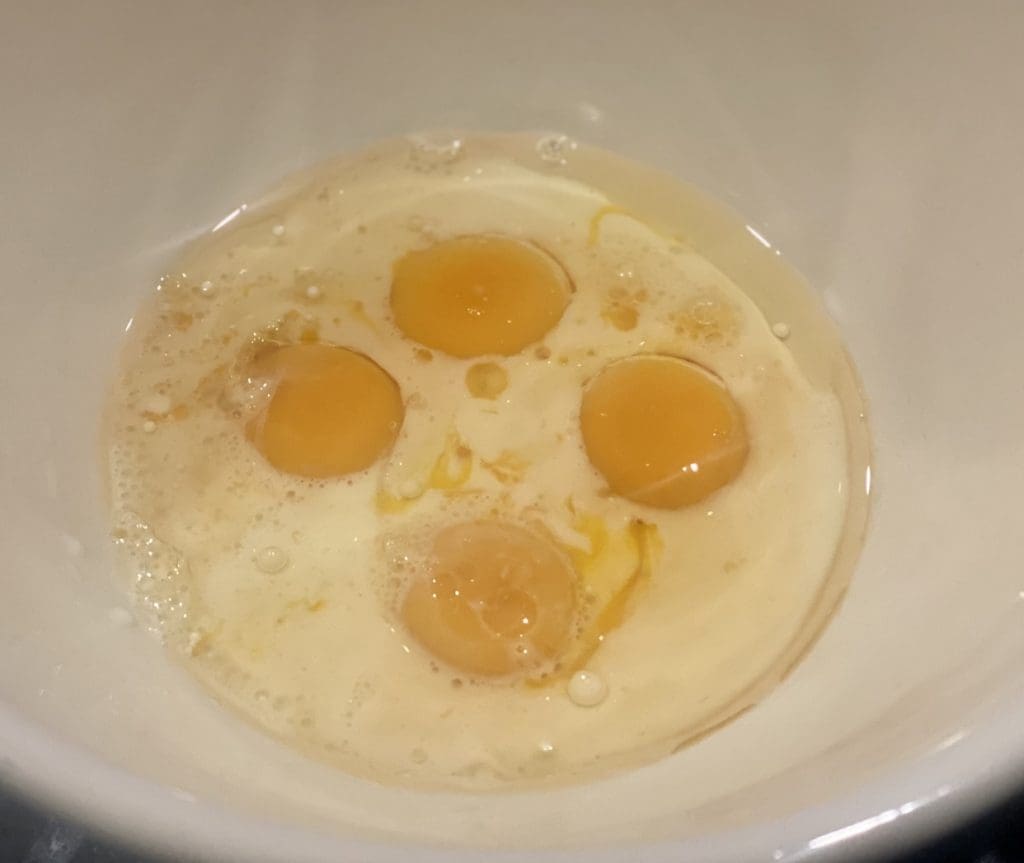

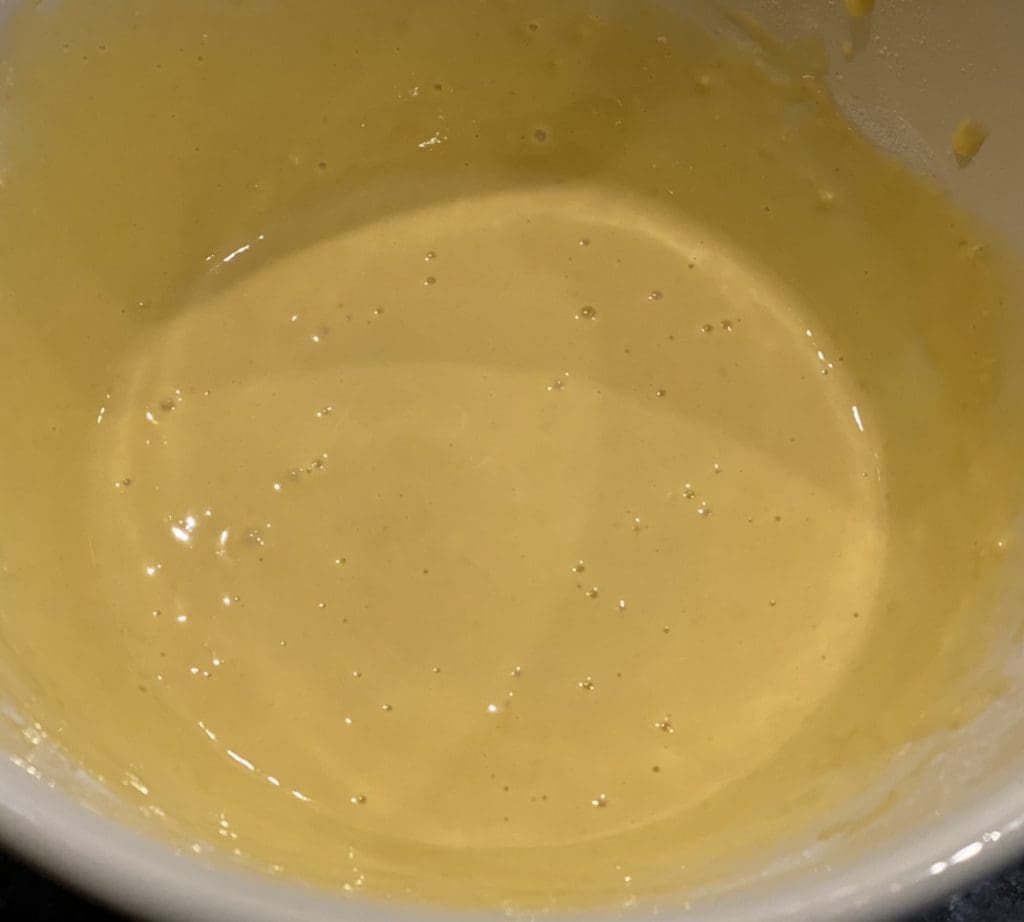
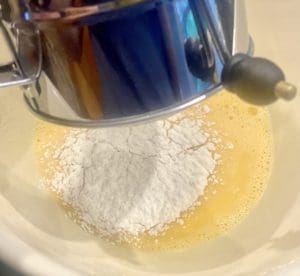
In a large bowl, combine the yolks, milk, oil and vanilla extract and whisk until smooth. Sift in the flour and salt into the mixture and whisk again until there are no clumps. Set aside for later.

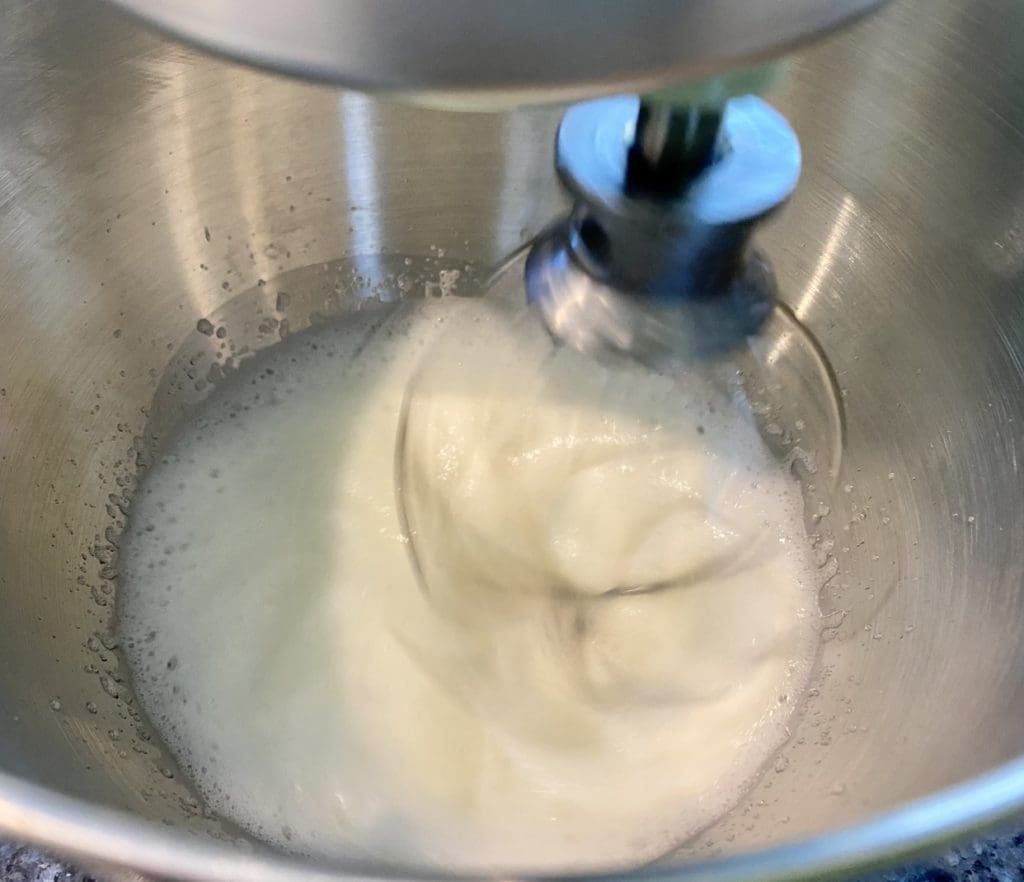
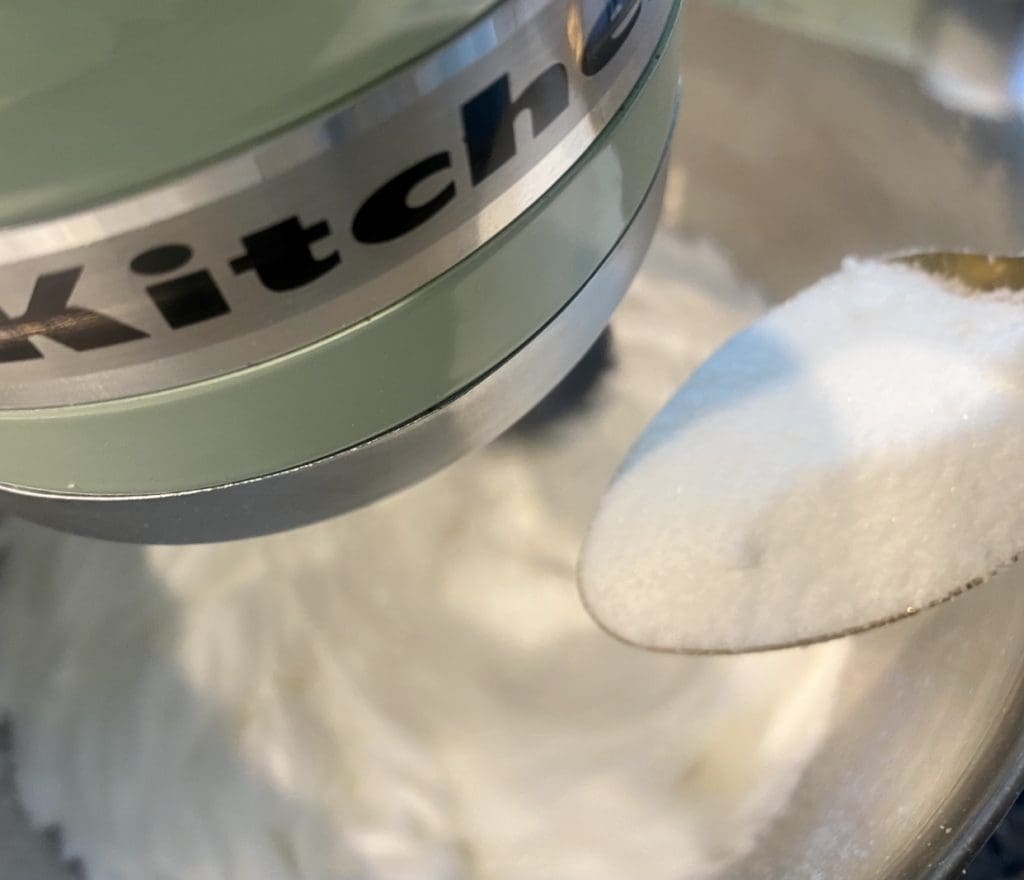
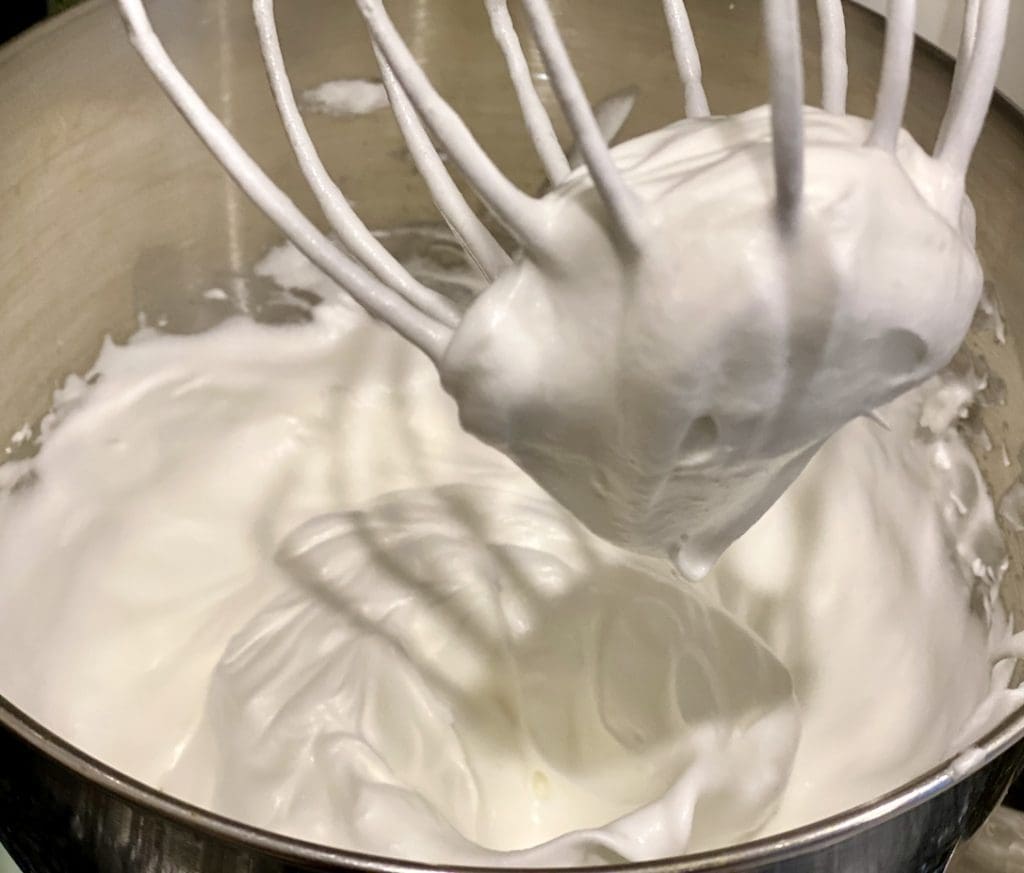
Pour the egg whites into the stand mixer. Start at slow speed, then gradually increase to medium-high. Once foam forms, drizzle in the sugar very slowly. Once the sugar is all in, increase the speed to high. Whip the whites until it reaches medium to firm peaks. This is when the whites should be stiff enough to stand up firmly but have a little curl at the tip when you lift the whisk.
Fold in the egg whites
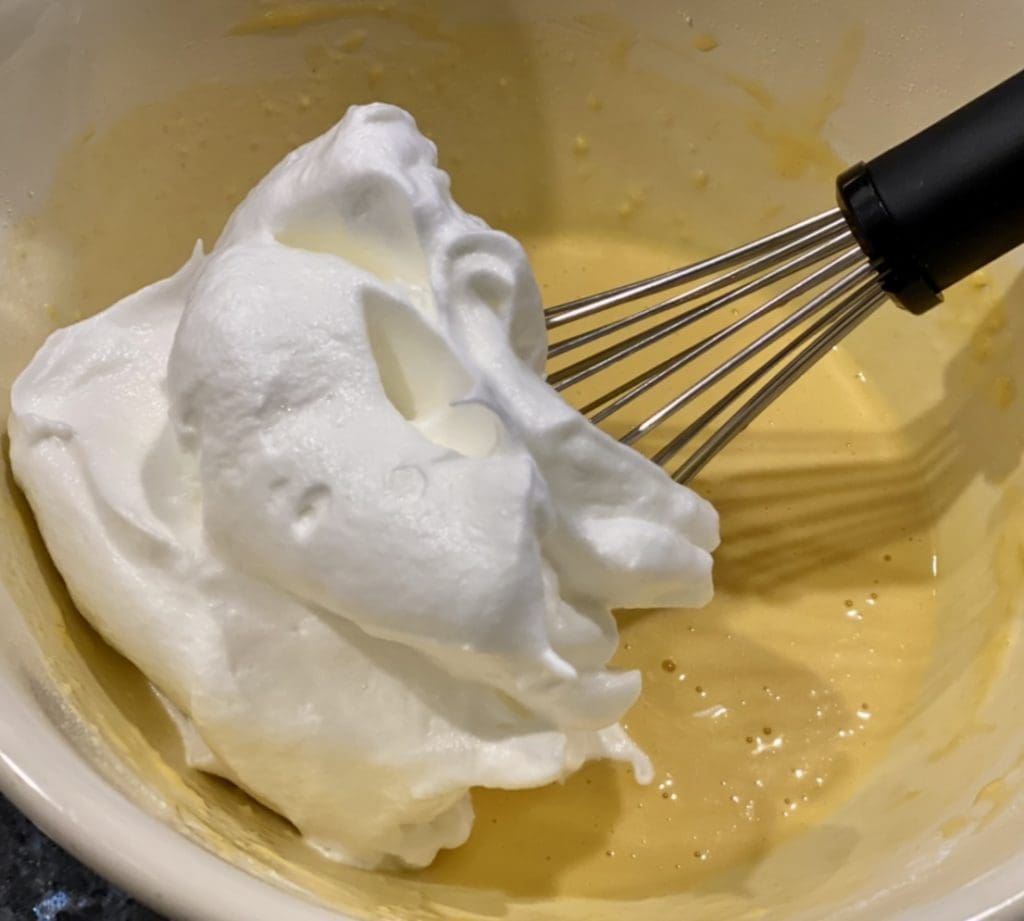
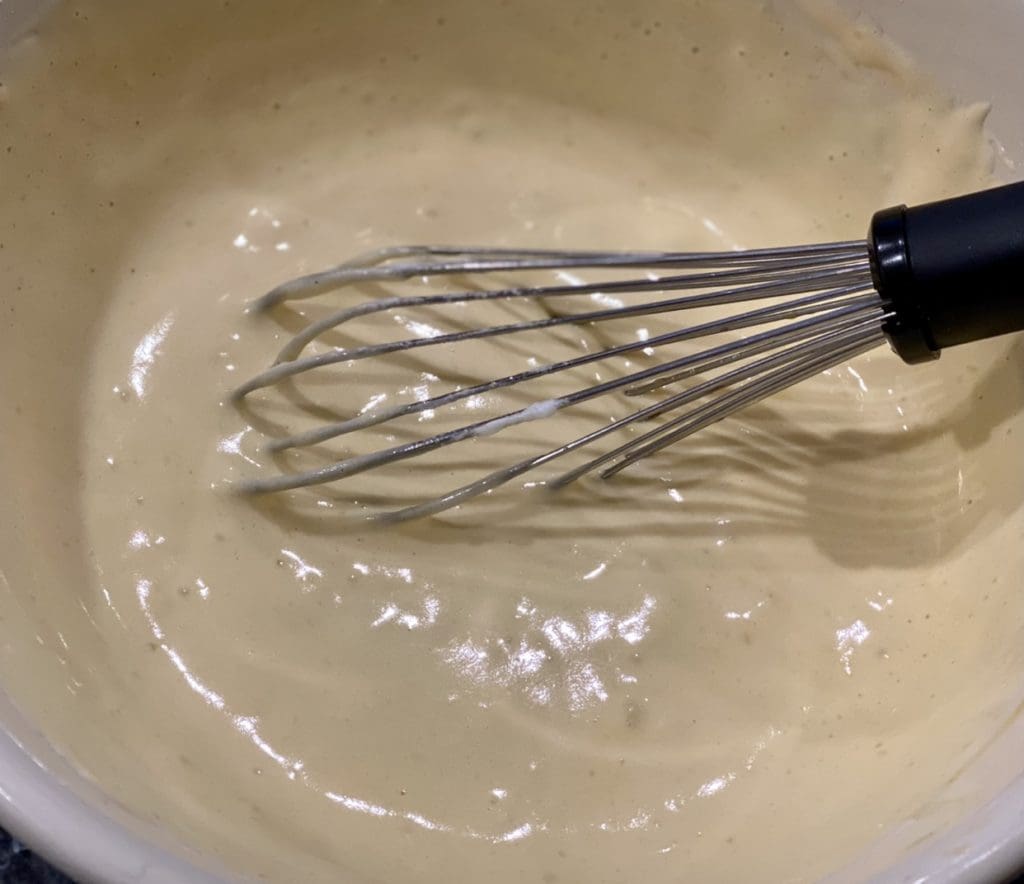
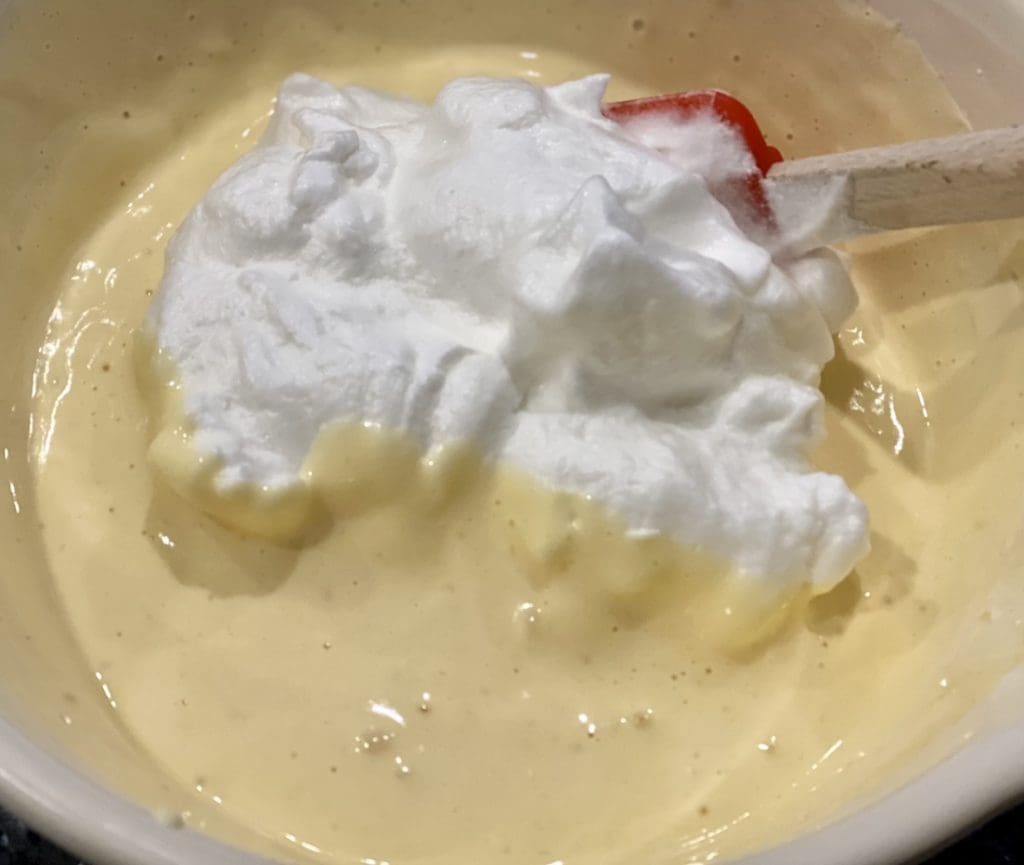
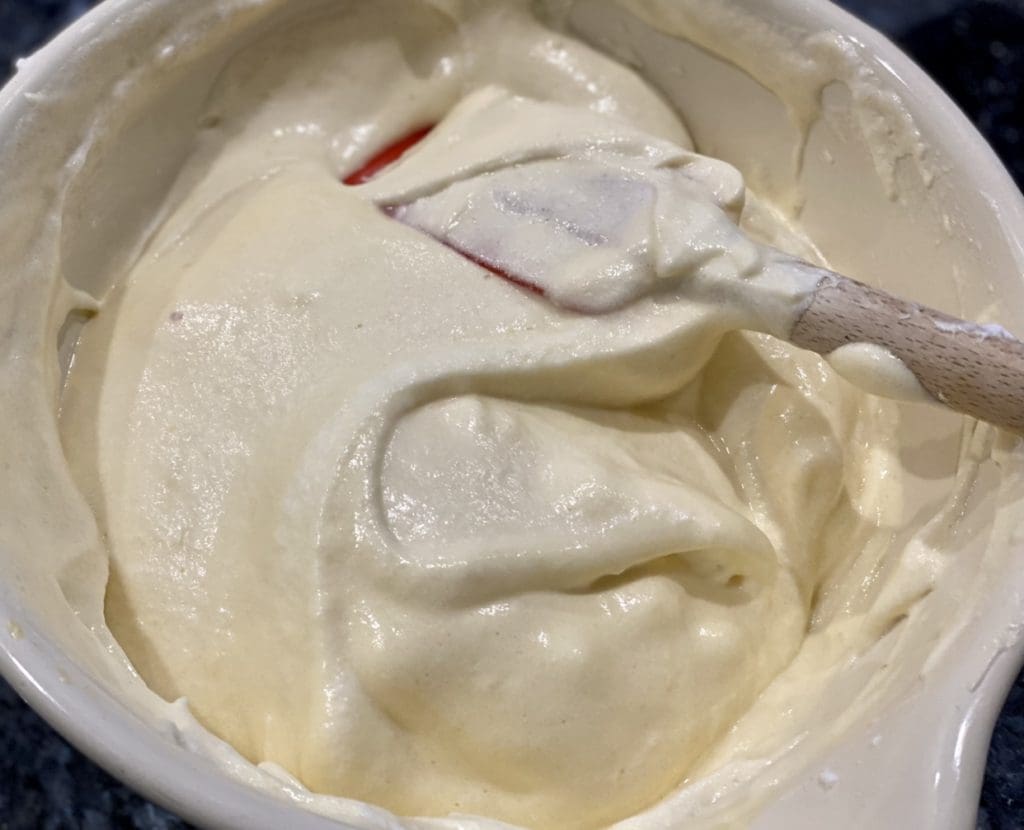
Place a third of the egg whites into the batter and whisk until smooth. Add another third of the egg whites and gently fold it through the batter with a spatula. Take care not to remove the air from the egg whites. Once incorporated, gently fold in the remaining egg whites. The combined batter should look airy but smooth.
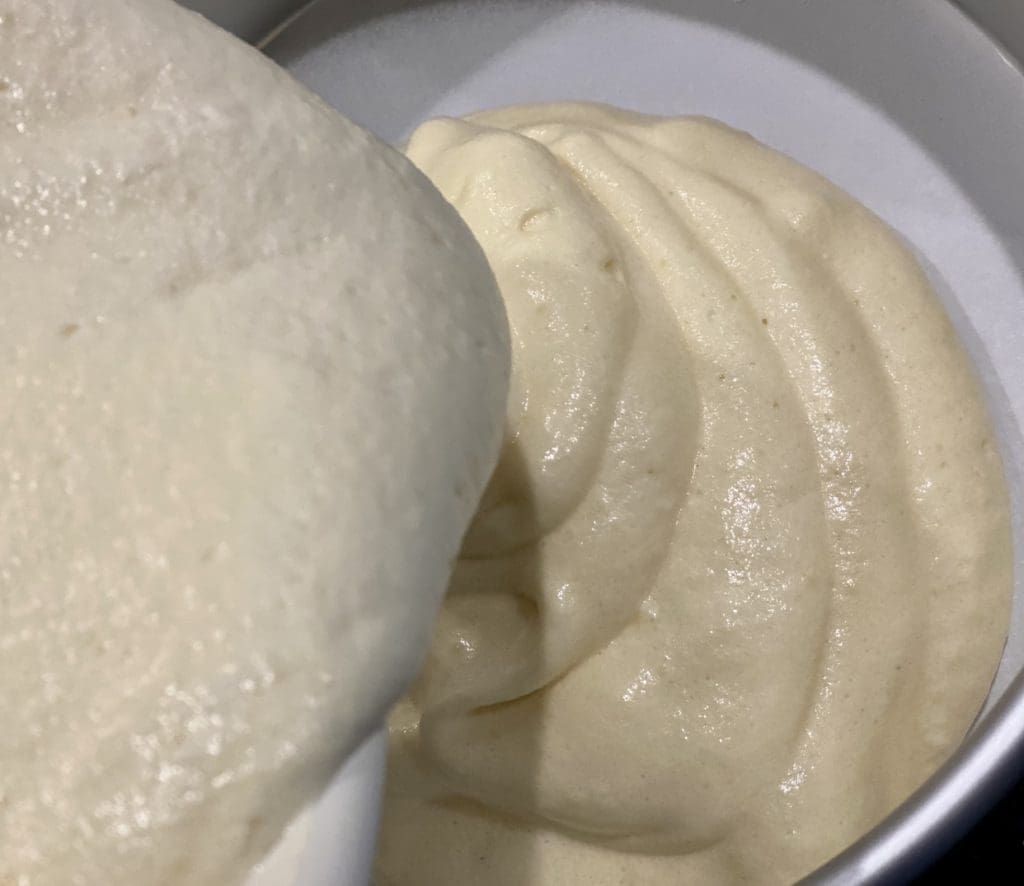
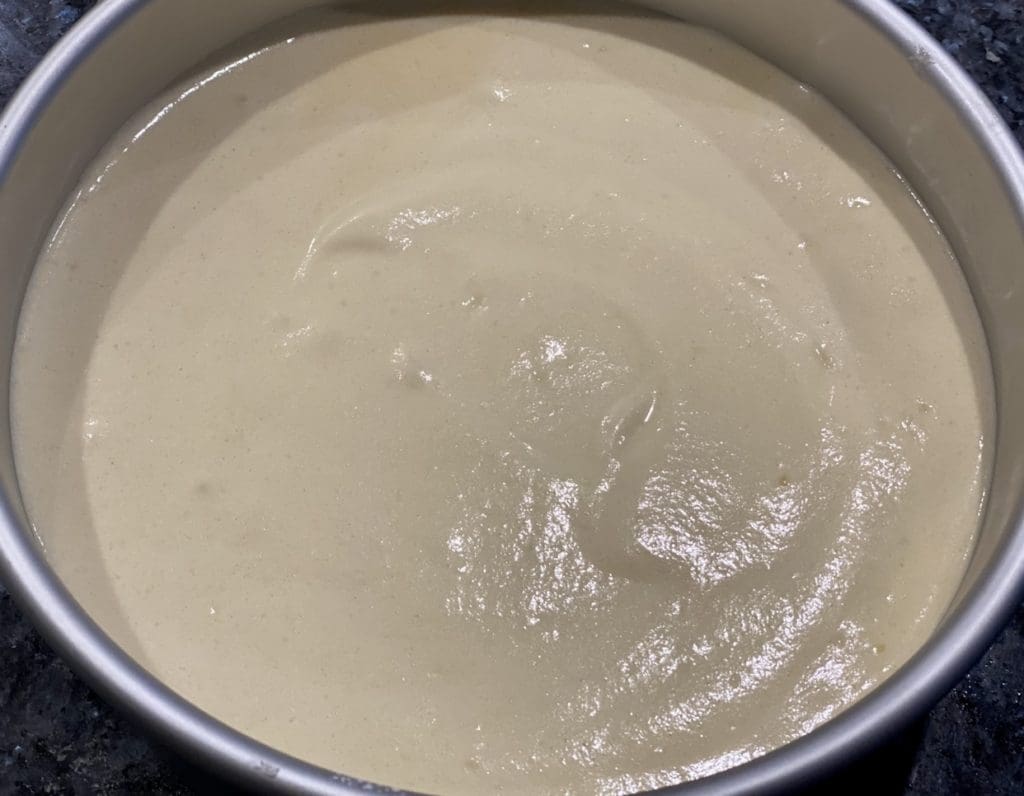

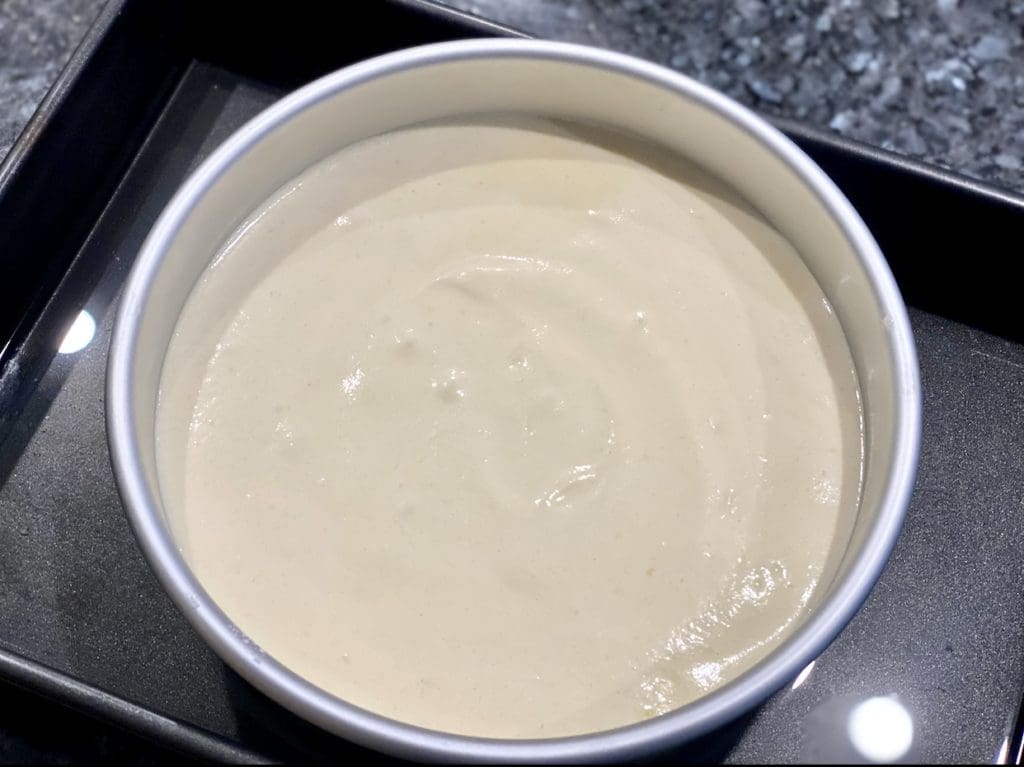
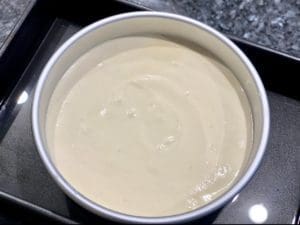
Pour the batter into the tin. Tap the tin against the kitchen bench a few times to remove air bubbles. Place the cake tin into a larger baking tin and pour in boiled water until it reaches approximately 2cm (.8in) from the base of the cake tin. Bake for 45 to 50 minutes or until a skewer comes out clean when inserted in the middle of the cake.
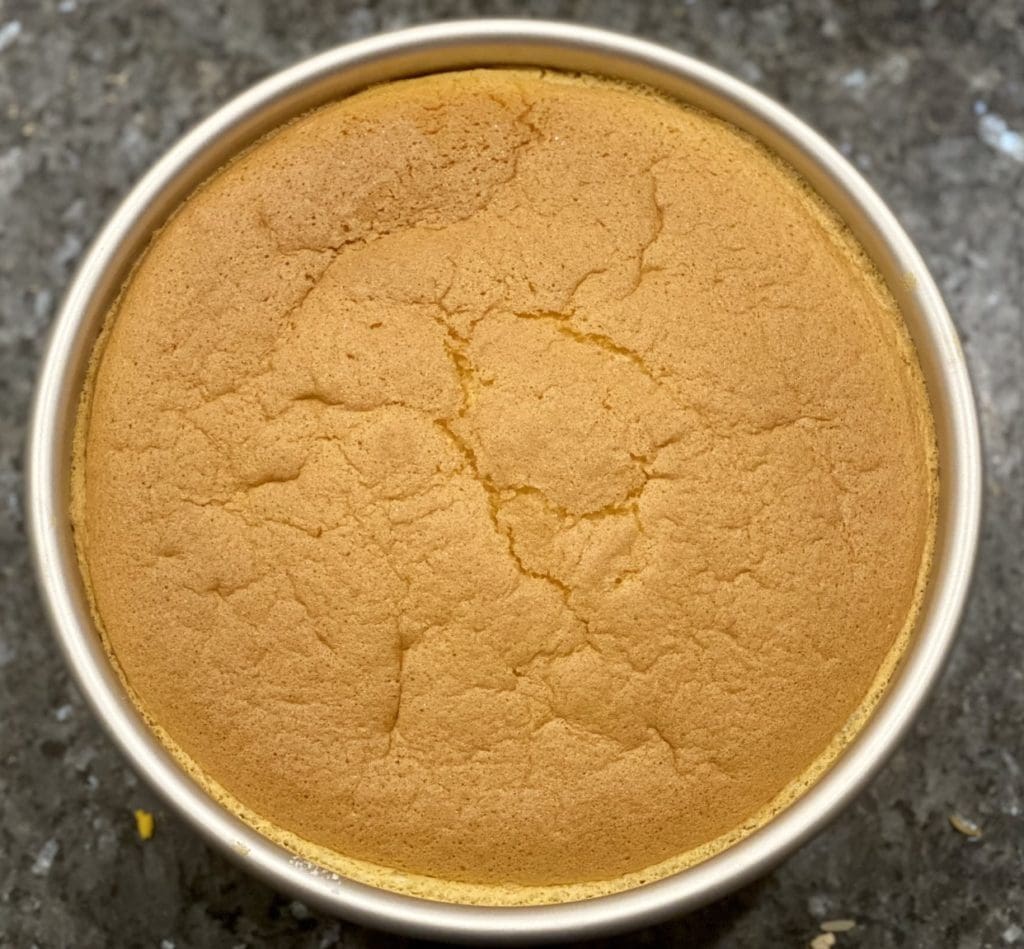
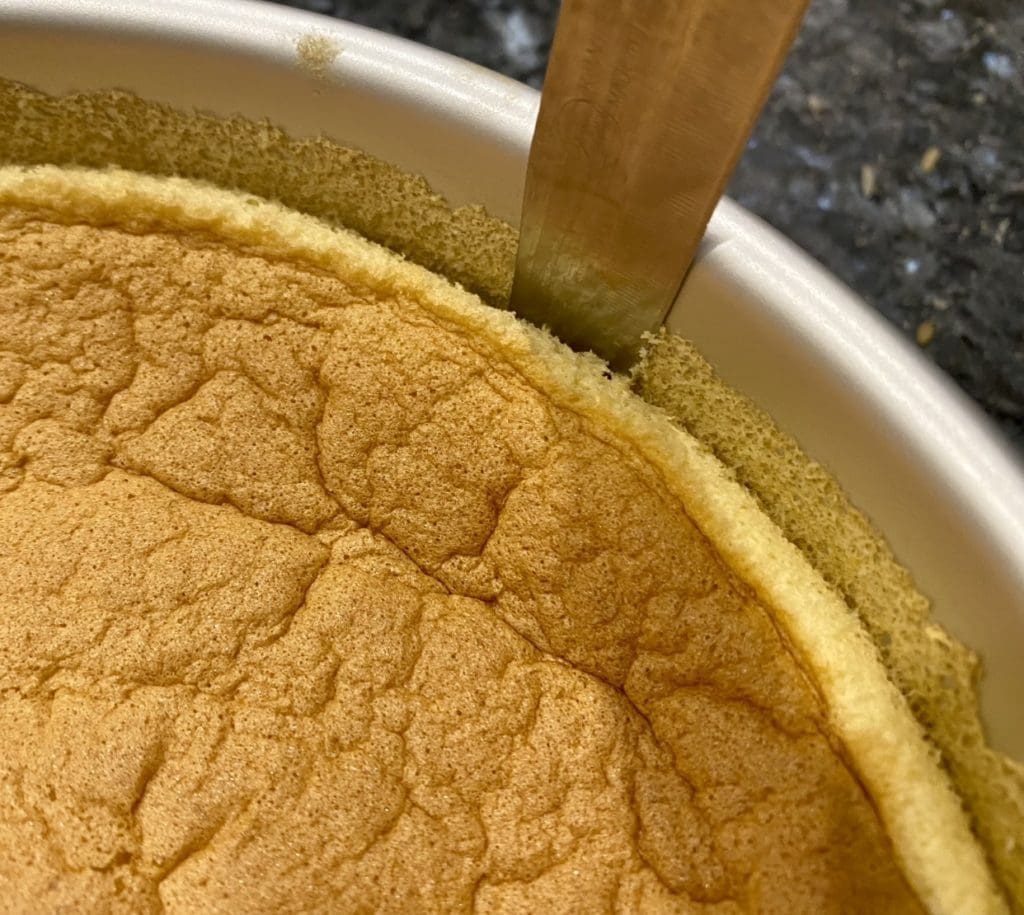
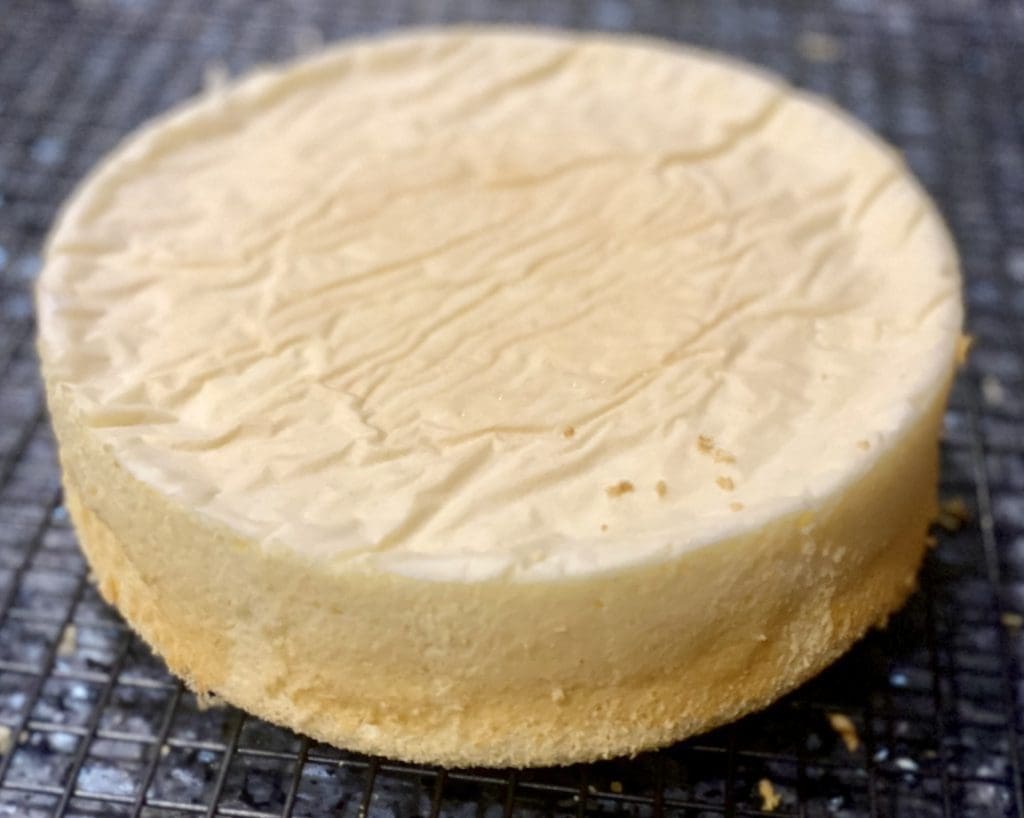
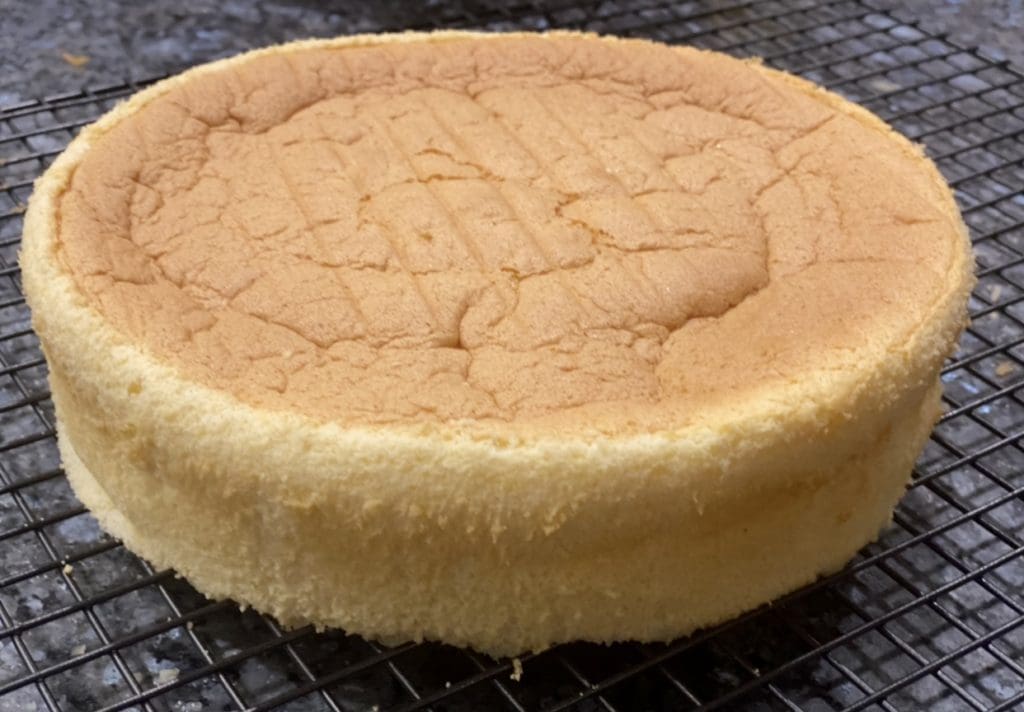
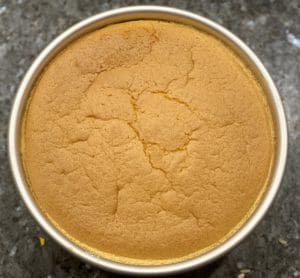
The cake will deflate a little once it’s out of the oven with little wrinkles on the top. Don’t worry because the decorations will cover it up and it won’t affect the taste or texture of the cake. Leave the cake to cool in the tin for ten minutes, then run a blunt knife or an offset spatula around the sides of the cake. Turn the cake onto a cooling rack and allow it to cool completely.
Prepare the mangoes
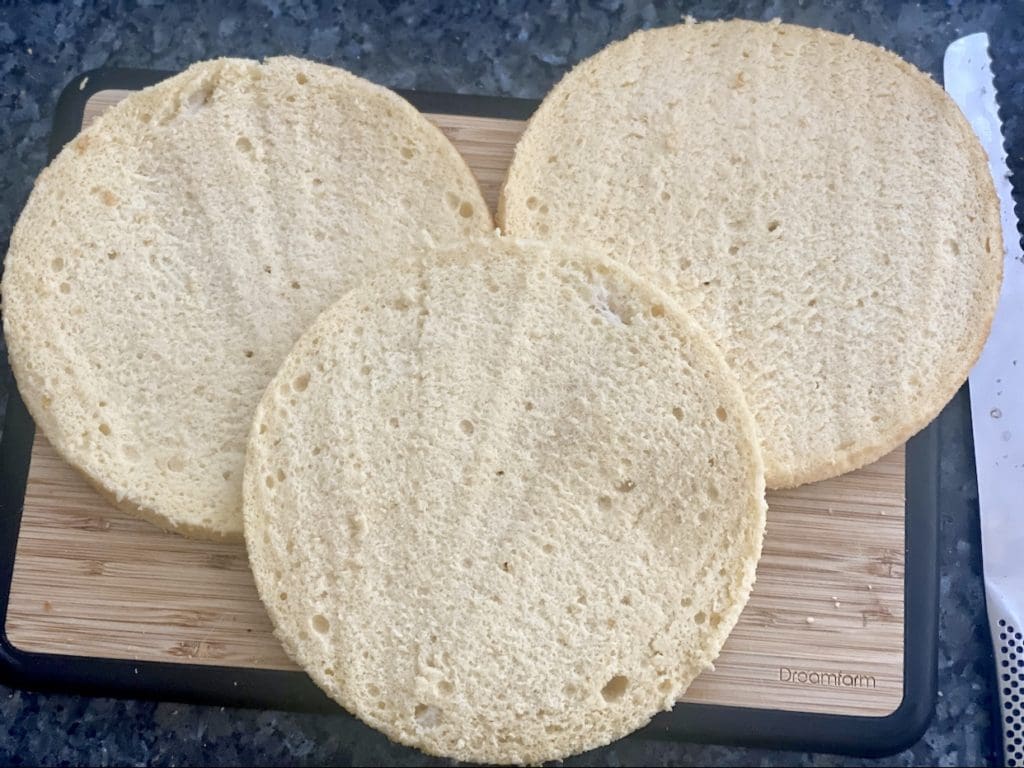
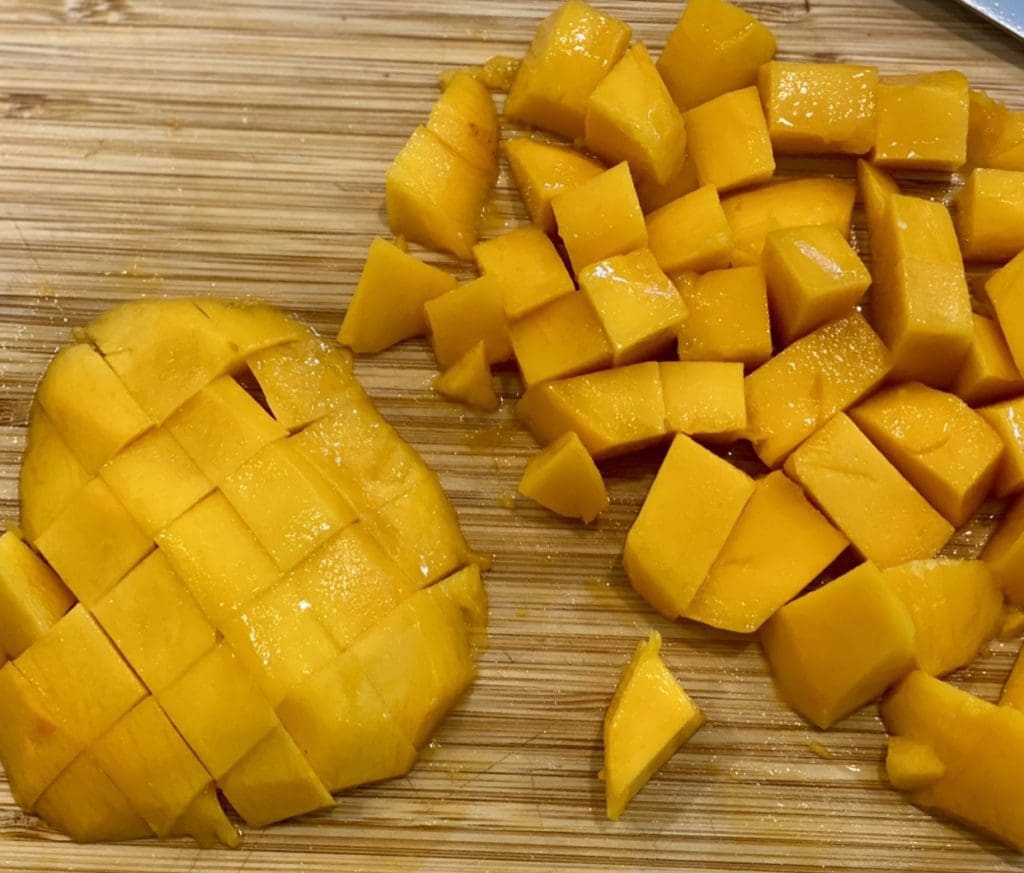
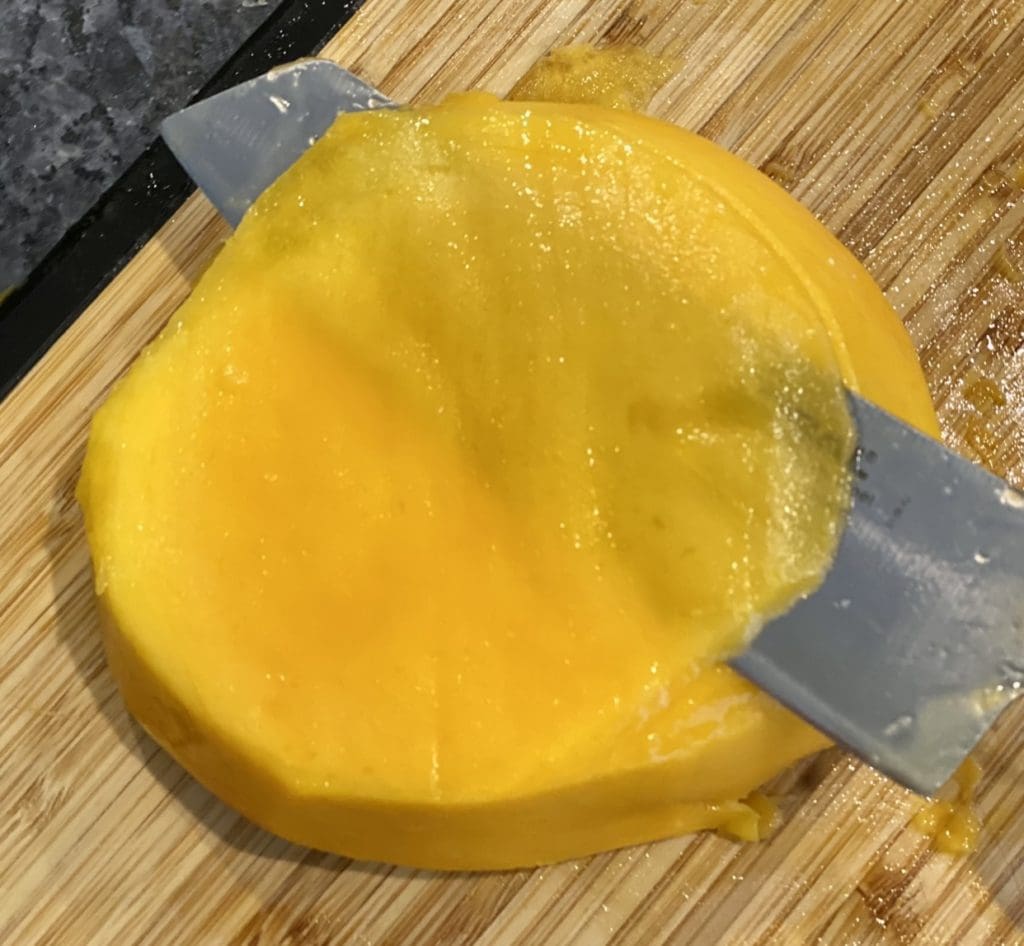
Once the cake has cooled, carefully use a bread knife or a cake leveller to cut the cake into 3 even layers. Peel the mangoes and cut 3 cheeks roughly into 1cm cubes (.4in) For the mango slices, use a sharp knife to cut thin slices. Lay the slices on a chopping board or plate and set them aside. Depending on the size of the mangoes, you may need more or fewer slices and cubes.
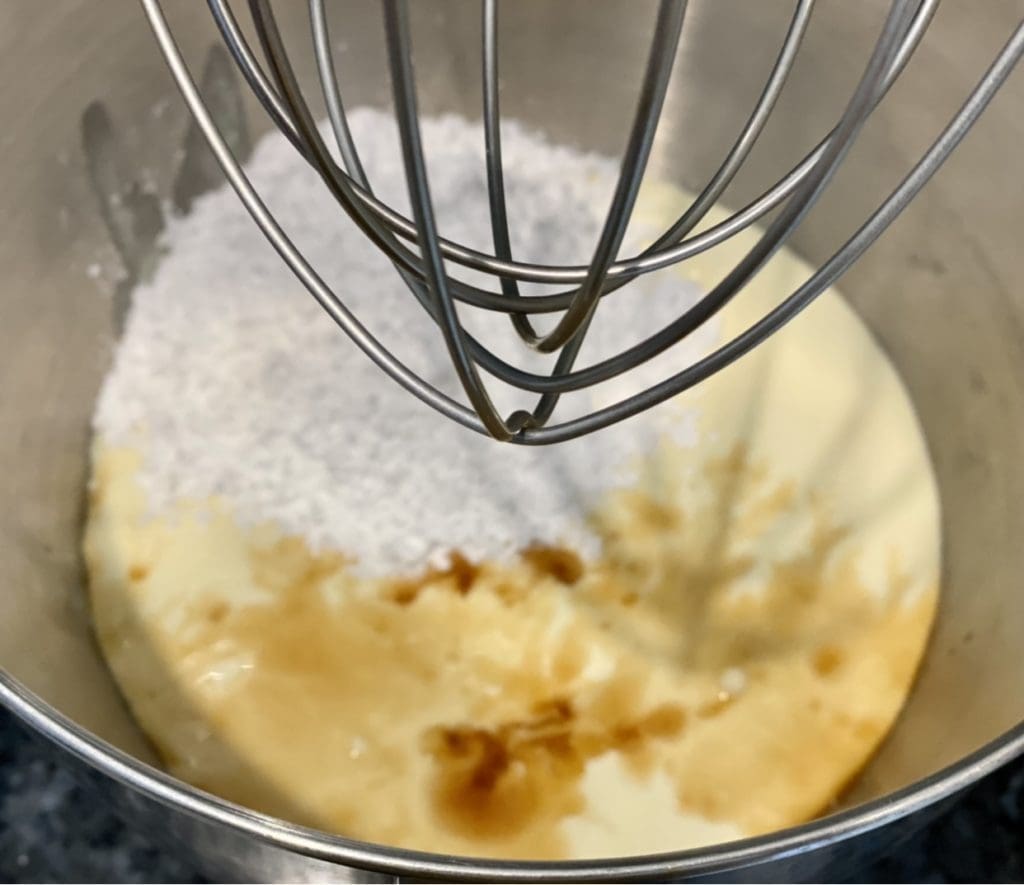
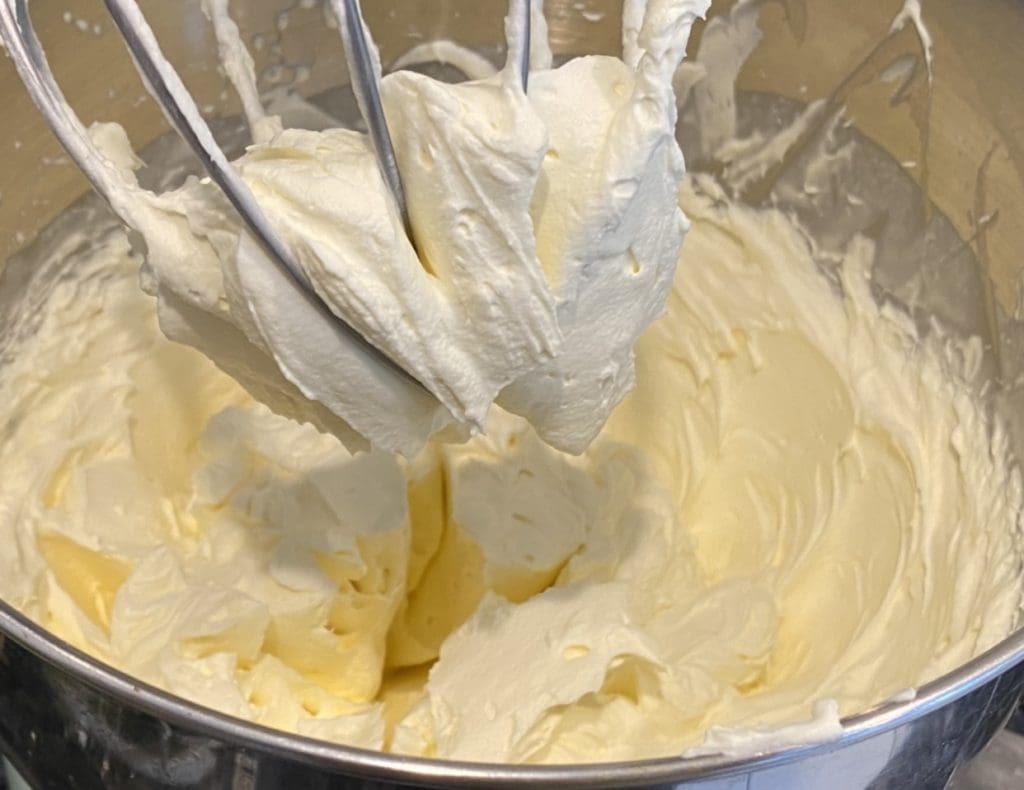
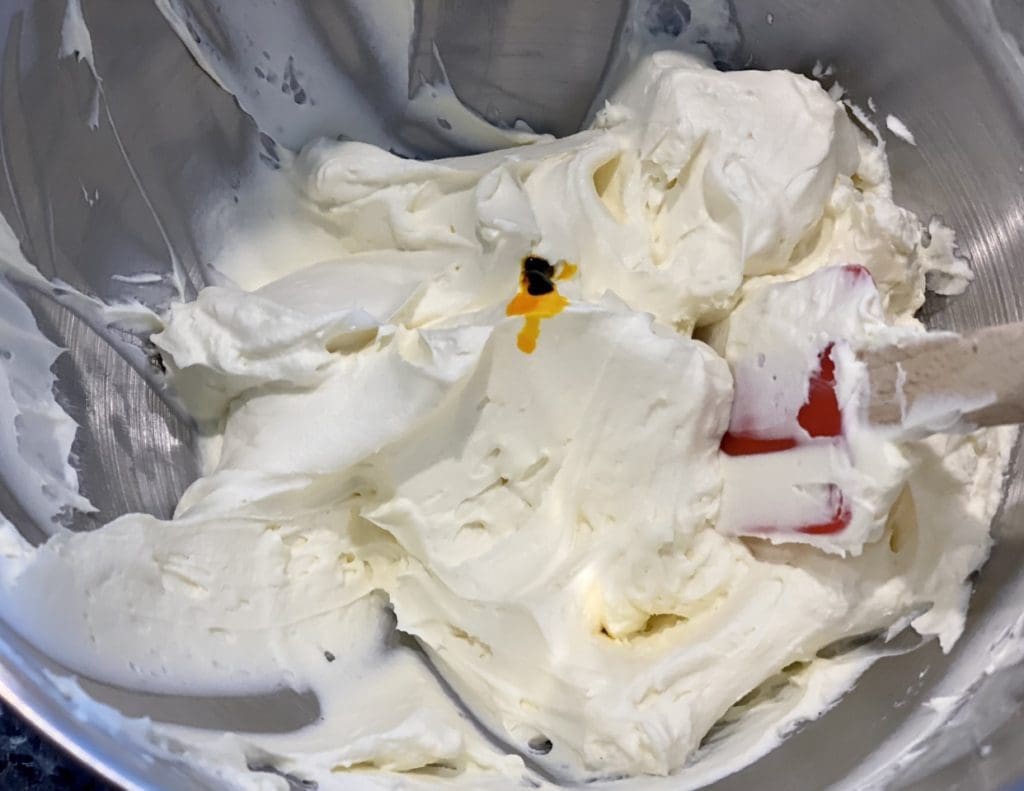

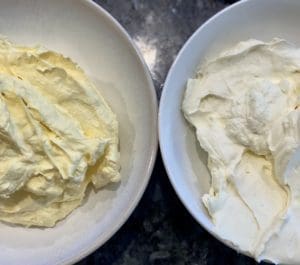
Place cream, vanilla extract and icing sugar into the bowl and whip at high speed until the cream is fluffy and holds its shape. Divide the cream evenly in two separate bowls. Add a few drops of yellow food colouring into one bowl and fold gently until the colour is even.
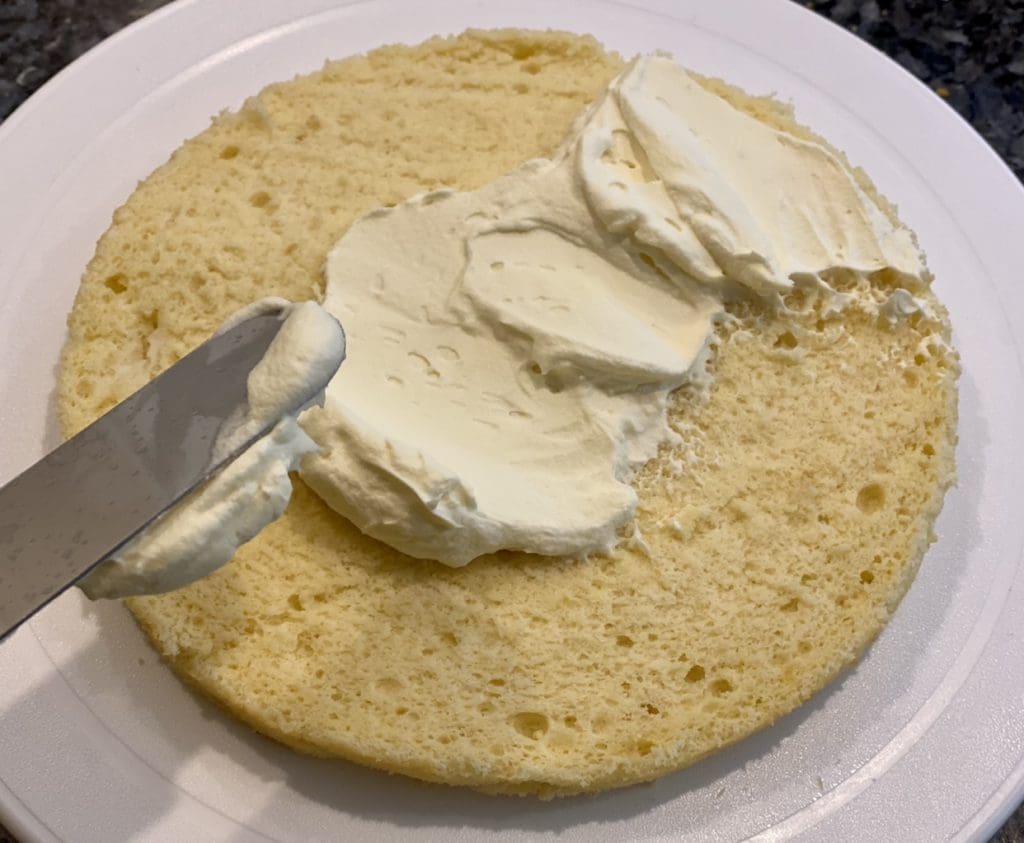
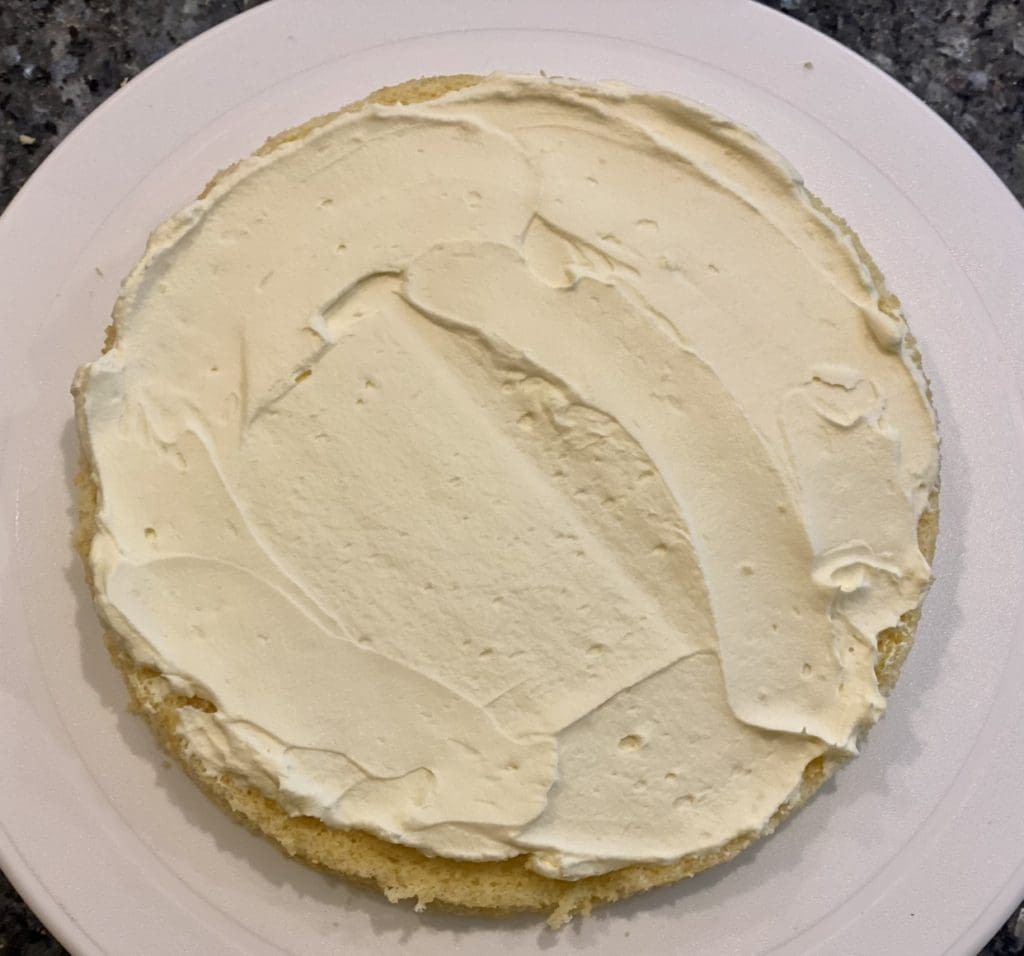
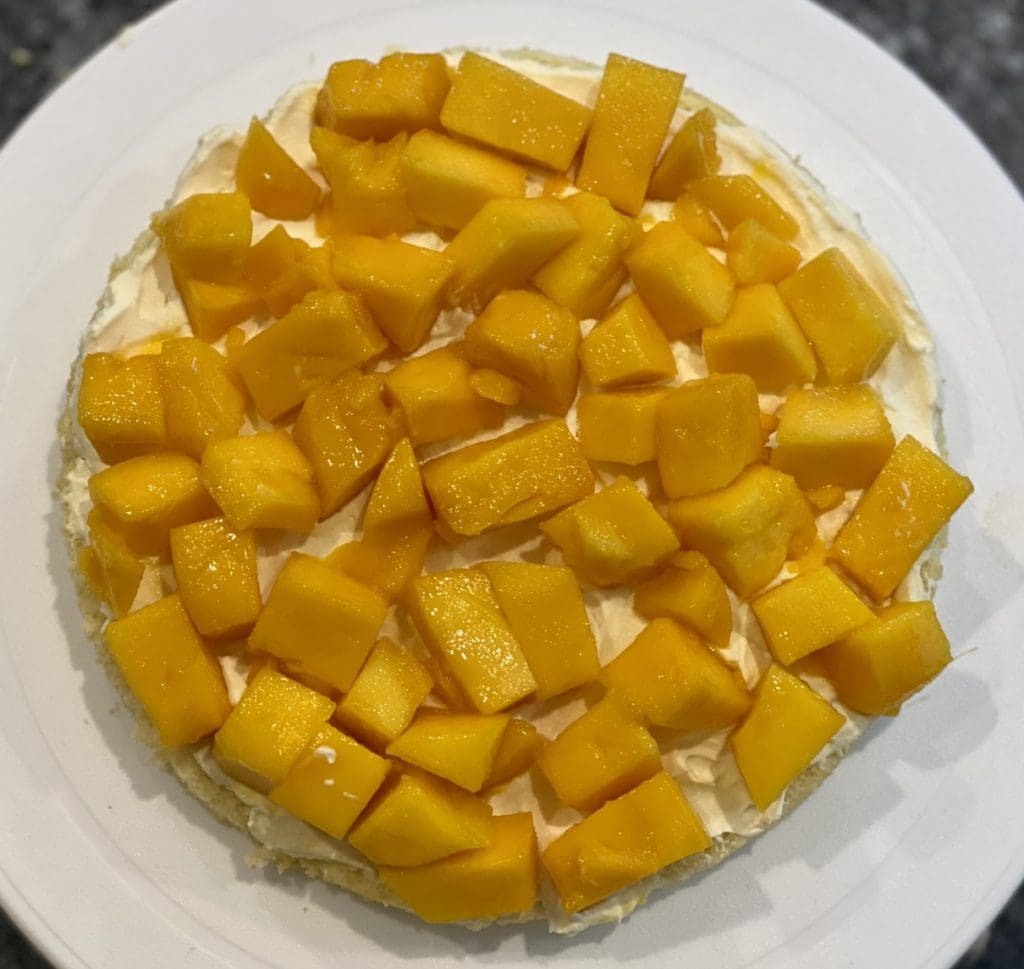
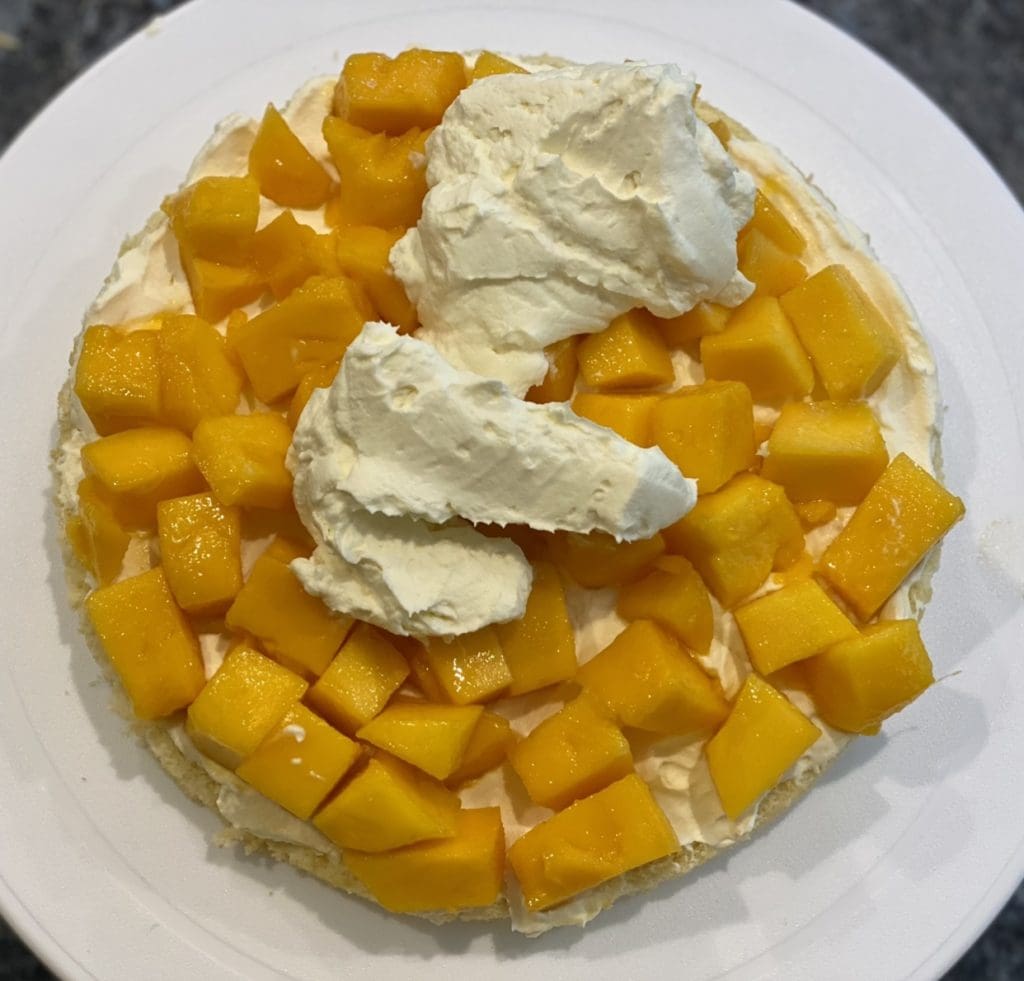

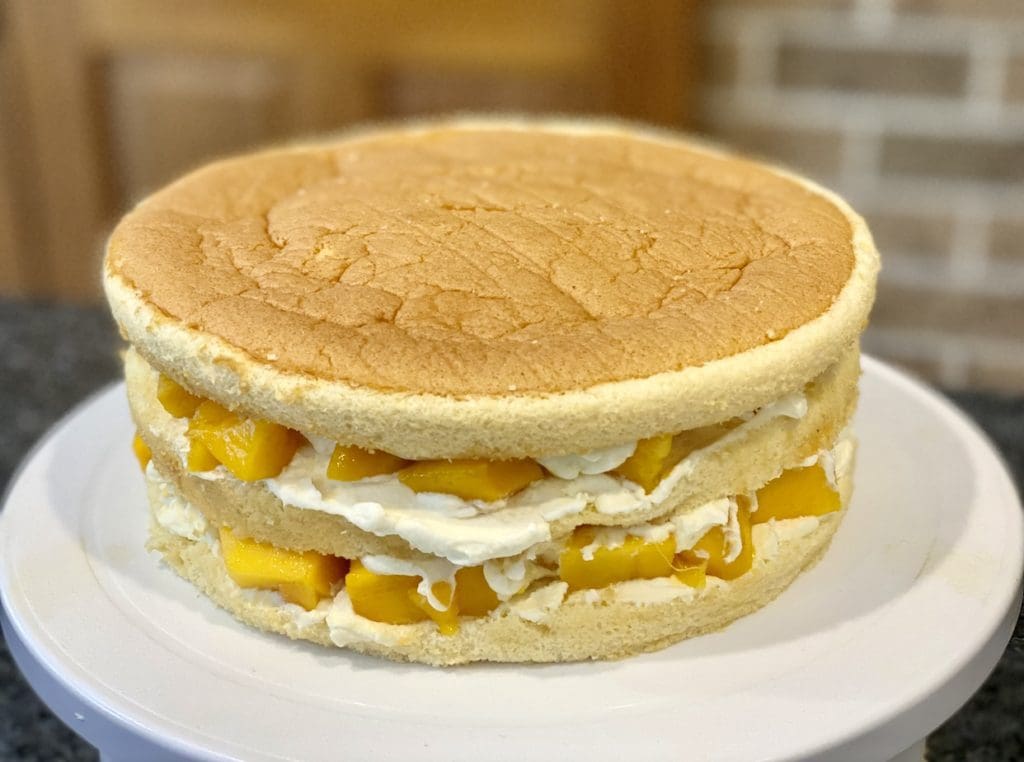
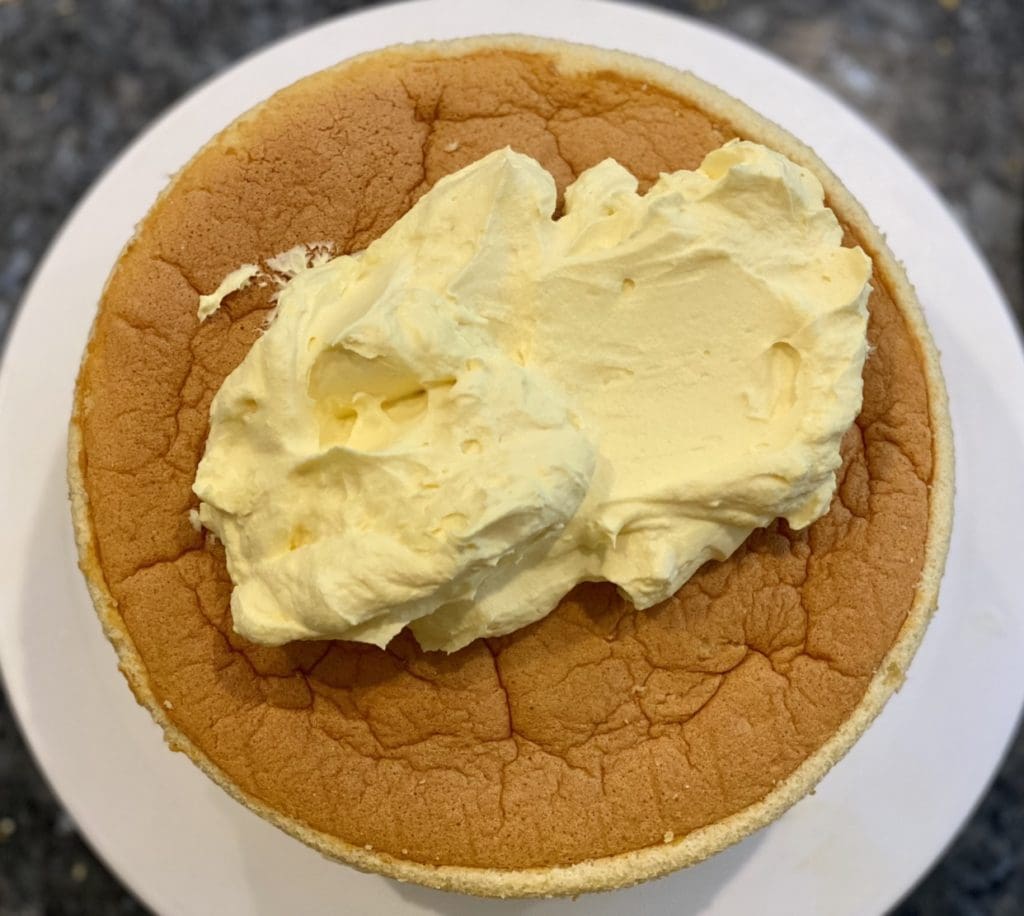

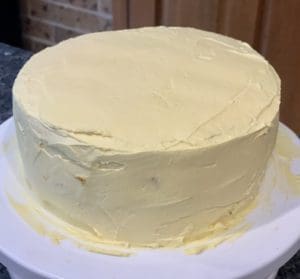
Place a layer of cake on a cake stand or board. Spread the white cream over the cake with a spatula, then place half of the diced mangoes on top. Cover the mangoes with more cream, then place on another layer of cake. Repeat the same process for the next layer. Use the yellow cream to cover the entire outside of the cake. Smooth it out evenly, but don’t worry if it doesn’t look perfect as the mangoes will cover the sides. Optional – leave approximately 1/2 cup of cream to pipe around the base of the cake.
Assemble the Lion Cake

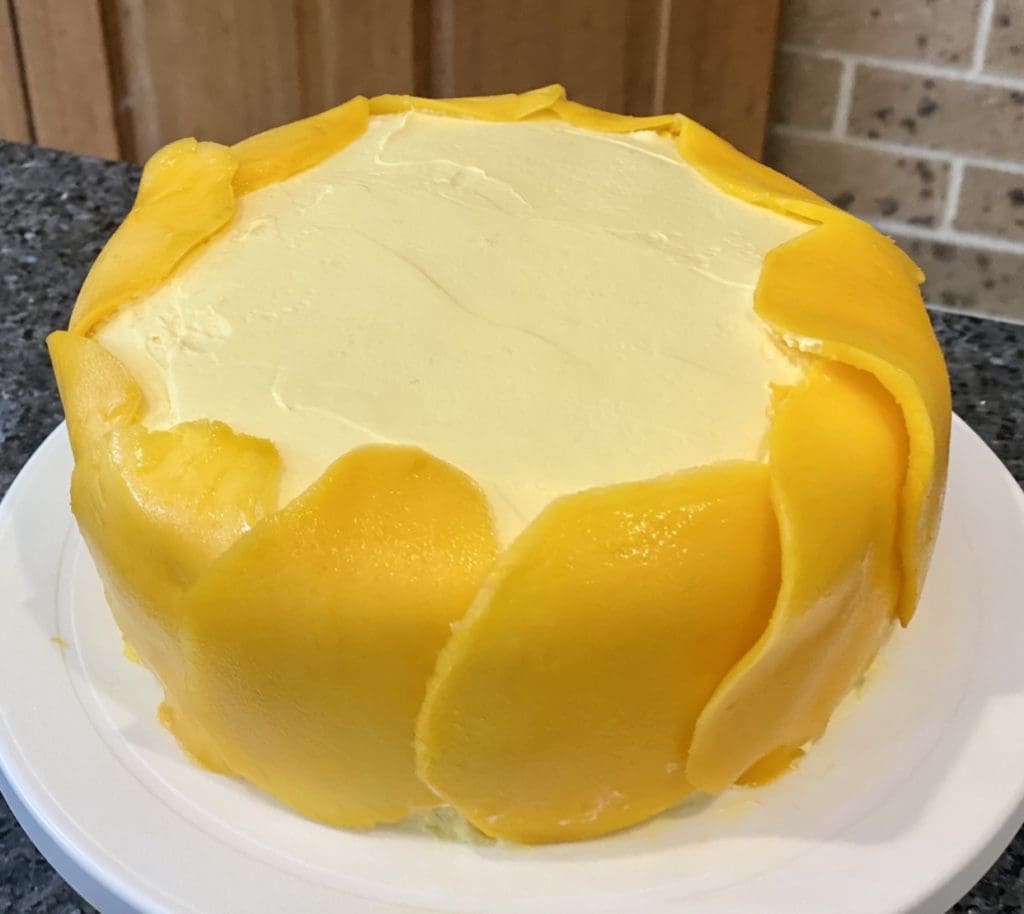
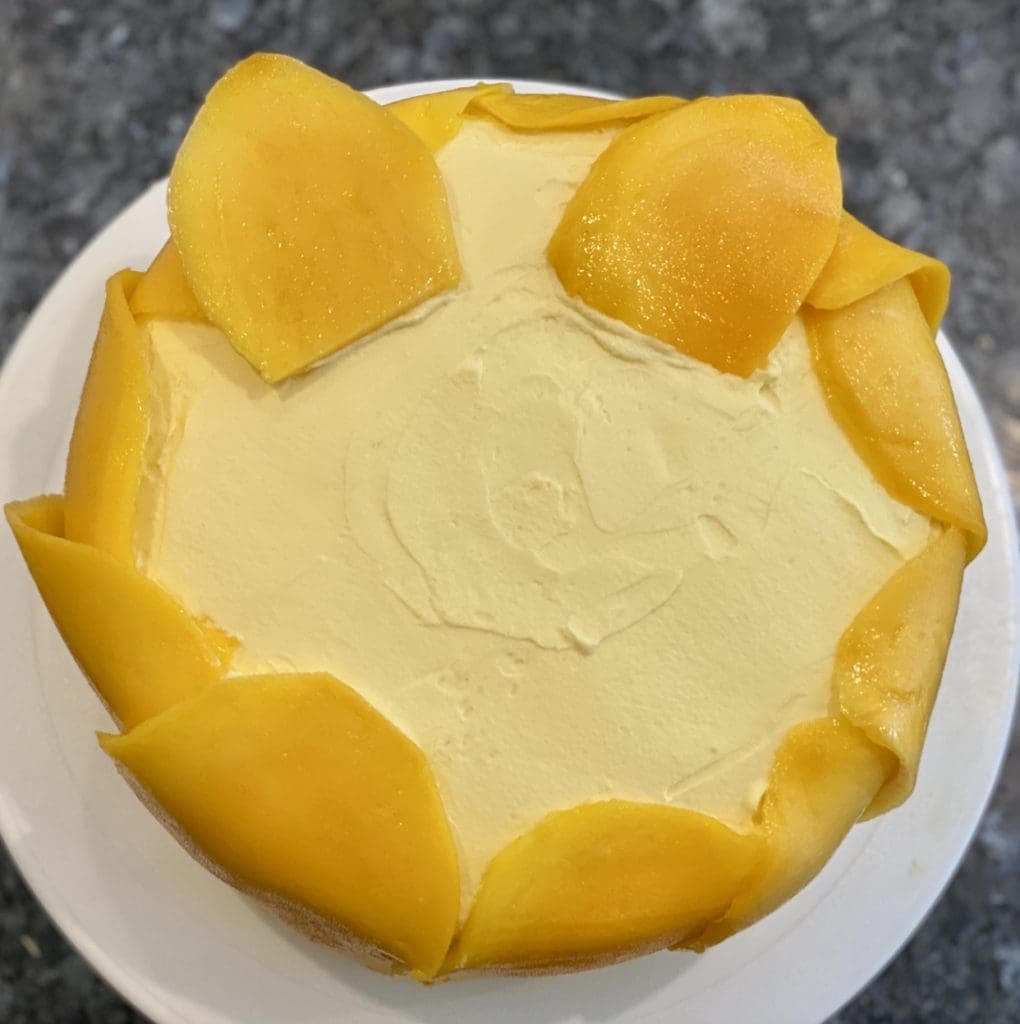
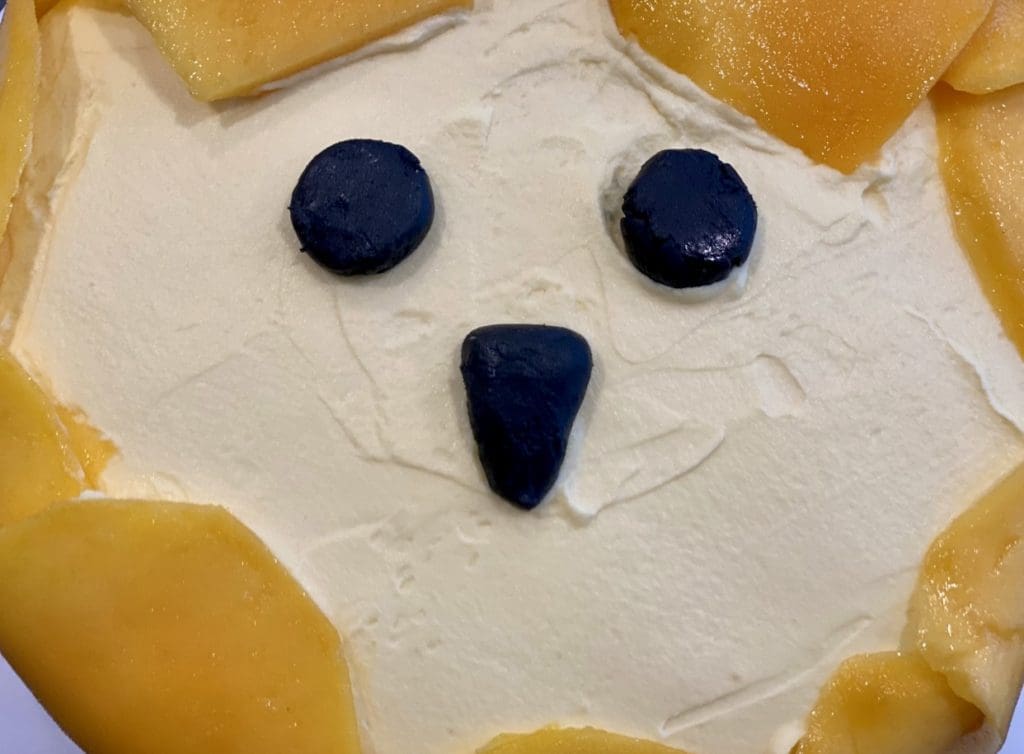
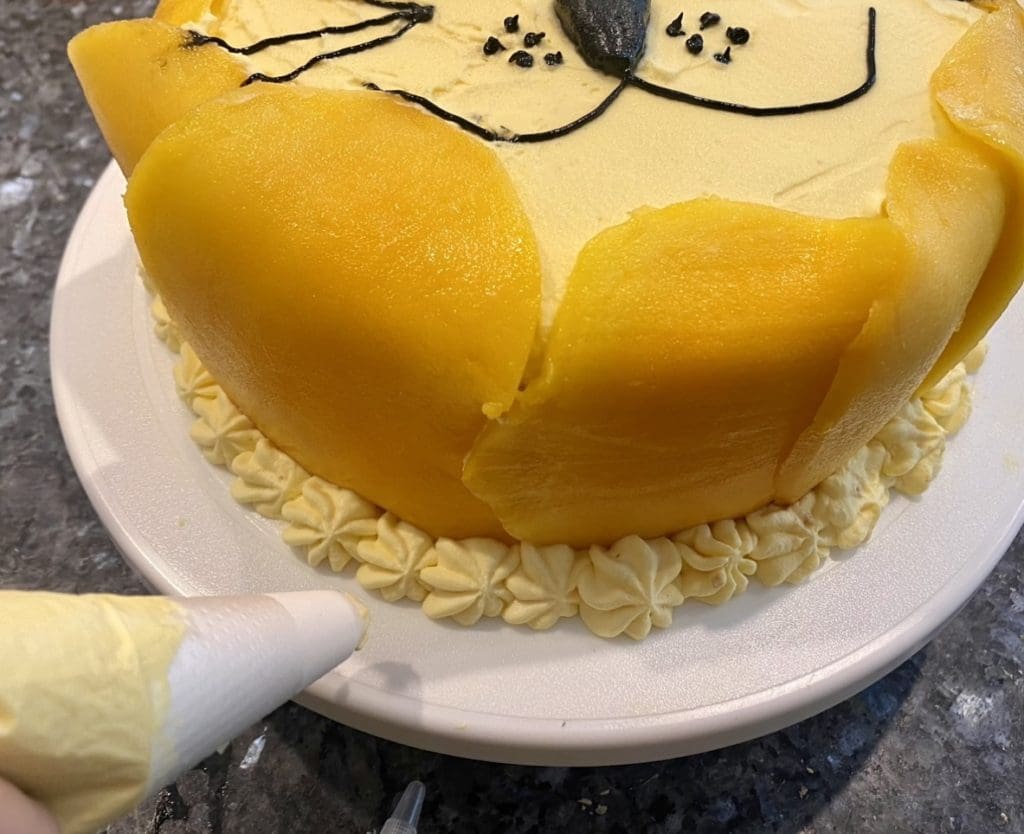
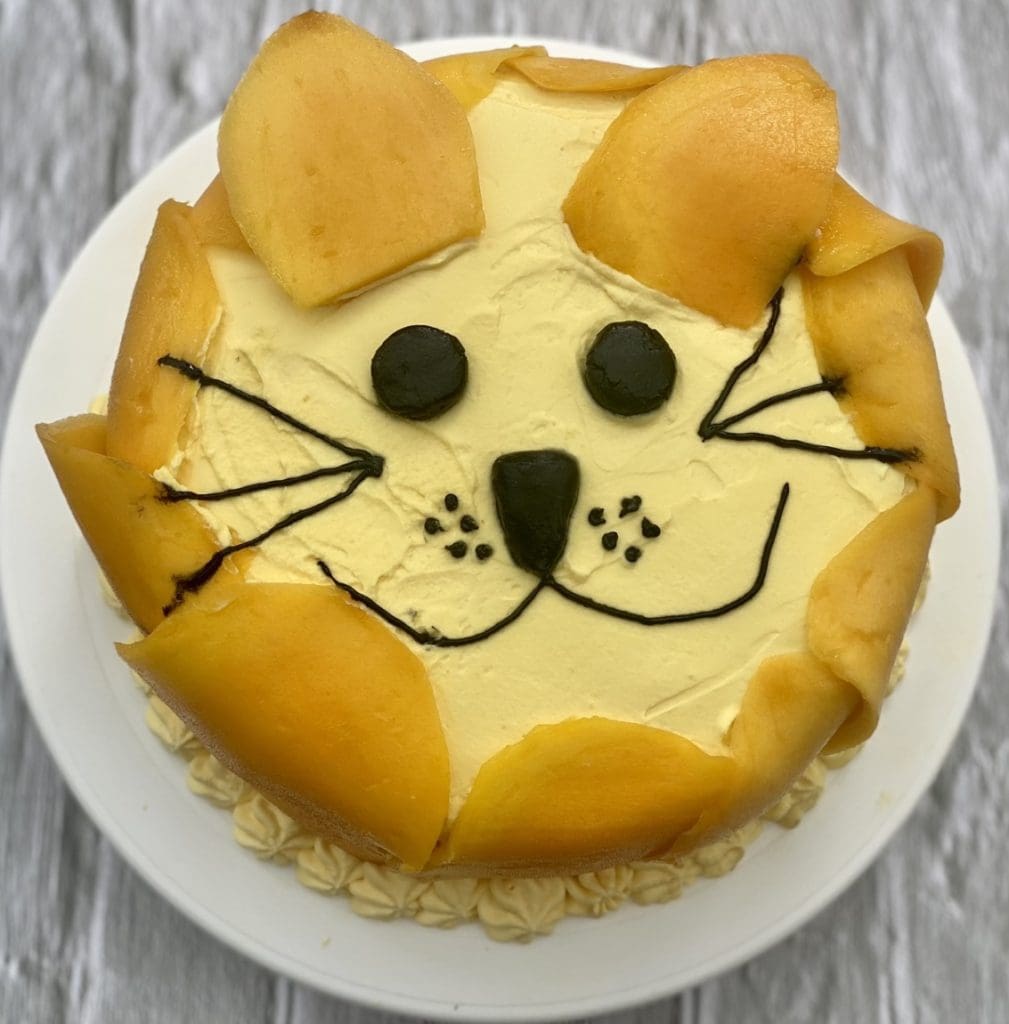
Place the large slices of mangoes on the side of the cake, overlapping them slightly. The cream should help hold them in place. Use the smaller slices of mango for the ears, however, you may need to trim them to the right size and shape. Do the lion’s face just before serving or the black icing may run and ruin the look of the cake. Shape the black icing with your hand. Make two flat circles for the eyes and a long triangle for the nose. Use an icing gel to draw on the whiskers. Optional – Place the remaining yellow cream into a piping bag and pipe around the base of the cake.
Leftovers – Transfer the Lion Cake into an airtight container and refrigerate. It’ll be good for up to 3 days.
I’ve used a third-party application to calculate the calories and nutritional information, so please use this as an approximate guide only.
Cooking measurements are in Australian standard spoon and cup measurements. For specific details and conversions, visit our Australian Cooking Measurements page.
I would love your feedback and support if you made this recipe. To do this, please rate this recipe and provide a comment by scrolling down this page or by clicking that green circle on the bottom left. An email address is required (for spam), but it won’t be published. I would also love to see your dish, so don’t forget to tag me on my Instagram account ‘3catsfoodie’
Cheers – Cat T
Lion Cake with Mango & Cream
Ingredients
For the sponge cake
- 5 large eggs (separated)
- 80 ml milk
- 50 ml oil
- 1 tsp vanilla extract
- 80 gm cake flour (NOTE 1)
- 1 pinch salt
- 100 gm caster sugar (NOTE 2)
For the filling and decorations
- 4 large mangoes (NOTE 3)
- 3 cup thickened cream (NOTE 4)
- 1 tsp vanilla extract
- ⅓ cup icing sugar mixture (NOTE 5)
- yellow food colouring
- black fondant or icing (for the eyes and nose)
- black icing gel (for the mouth and whiskers)
Instructions
- Preheat oven to 170°C (340°F) or 150°C (300°F) for fan-forced ovens. Line and grease the base (not the sides) of a round 20cm (8in) baking tin with baking paper (parchment paper)
- Make sure your stand mixer bowl and balloon whisk are free from fat. To do this, lightly dampen a paper towel with white vinegar or lemon juice and wipe the inside of the bowl and all over the whisk.
- Use 3 bowls to separate the eggs. One bowl to collect the yolk, one to collect the whites and one for separating the egg. Doing this will help prevent contamination of the whites if a yolk breaks. A tiny amount of yolk can prevent the whites from whipping up.

- In a large bowl, combine the yolks, milk, oil and vanilla extract and whisk until smooth. Sift in the flour and salt into the mixture and whisk again until there are no clumps. Set aside for later.
- Pour the egg whites into the stand mixer. Start at slow speed, then gradually increase to medium-high. Once foam forms, drizzle in the sugar very slowly. Once the sugar is all in, increase the speed to high. Whip the whites until it reaches medium to firm peaks. This is when the whites should be stiff enough to stand up firmly but have a little curl at the tip when you lift the whisk.
- Place a third of the egg whites into the batter and whisk until smooth. Add another third of the egg whites and gently fold it through the batter with a spatula. Take care not to remove the air from the egg whites. Once incorporated, gently fold in the remaining egg whites. The combined batter should look airy but smooth.

- Pour the batter into the tin. Tap the tin against the kitchen bench a few times to remove air bubbles. Place the cake tin into a larger baking tin and pour in boiled water until it reaches approximately 2cm (.8in) from the base of the cake tin. Bake for 45 to 50 minutes or until a skewer comes out clean when inserted in the middle of the cake.
- The cake will deflate a little once it's out of the oven with little wrinkles on the top. Don't worry because the decorations will cover it up and it won't affect the taste or texture of the cake. Leave the cake to cool in the tin for ten minutes, then run a blunt knife or an offset spatula around the sides of the cake. Turn the cake onto a cooling rack and allow it to cool completely.
- Once the cake has cooled, carefully use a bread knife or a cake leveller to cut the cake into 3 even layers. Peel the mangoes and cut 3 cheeks roughly into 1cm cubes (.4in) For the mango slices, use a sharp knife to cut thin slices. Lay the slices on a chopping board or plate and set them aside. Depending on the size of the mangoes, you may need more or fewer slices and cubes.

- Place cream, vanilla extract and icing sugar into the bowl and whip at high speed until the cream is fluffy and holds its shape. Divide the cream evenly in two separate bowls. Add a few drops of yellow food colouring into one bowl and fold gently until the colour is even.
- Place a layer of cake on a cake stand or board. Spread the white cream over the cake with a spatula, then place half of the diced mangoes on top. Cover the mangoes with more cream, then place on another layer of cake. Repeat the same process for the next layer. Use the yellow cream to cover the entire outside of the cake. Smooth it out evenly, but don't worry if it doesn't look perfect as the mangoes will cover the sides. Optional – leave approximately 1/2 cup of cream to pipe around the base of the cake.
- Place the large slices of mangoes on the side of the cake, overlapping them slightly. The cream should help hold them in place. Use the smaller slices of mango for the ears, however, you may need to trim them to the right size and shape. Do the lion's face just before serving or the black icing may run and ruin the look of the cake. Shape the black icing with your hand. Make two flat circles for the eyes and a long triangle for the nose. Use an icing gel to draw on the whiskers. Optional – Place the remaining yellow cream into a piping bag and pipe around the base of the cake.