
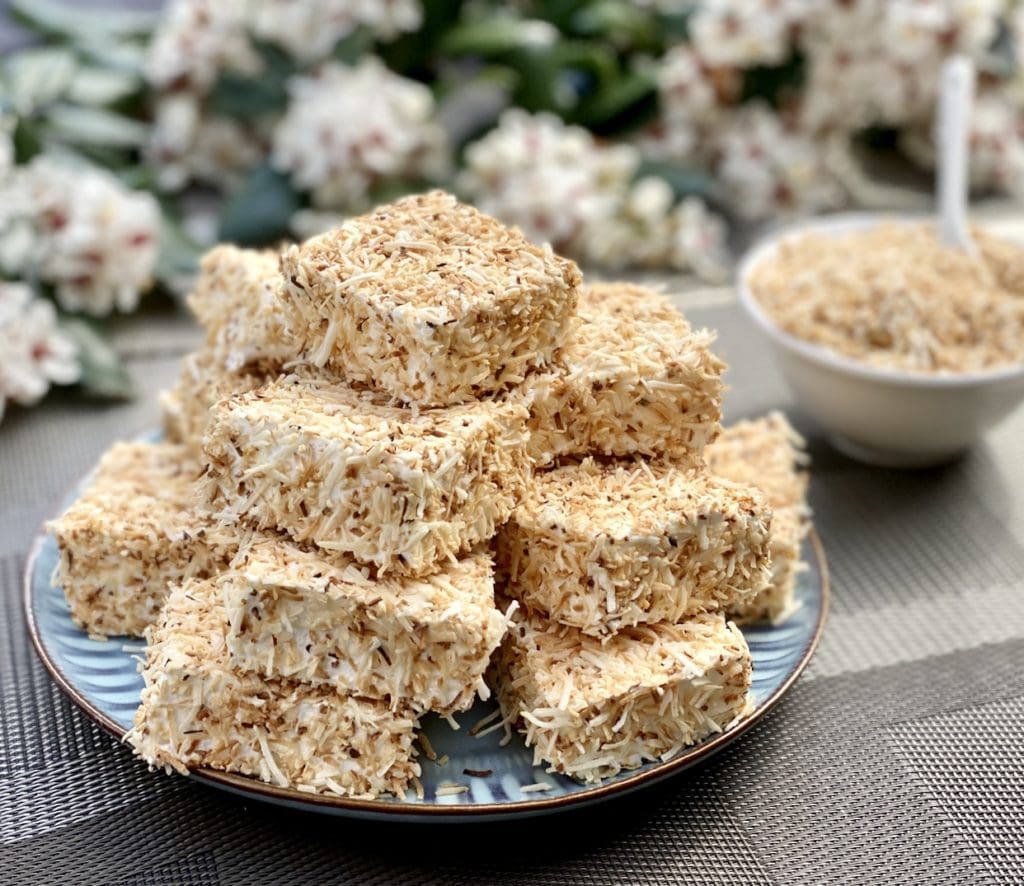
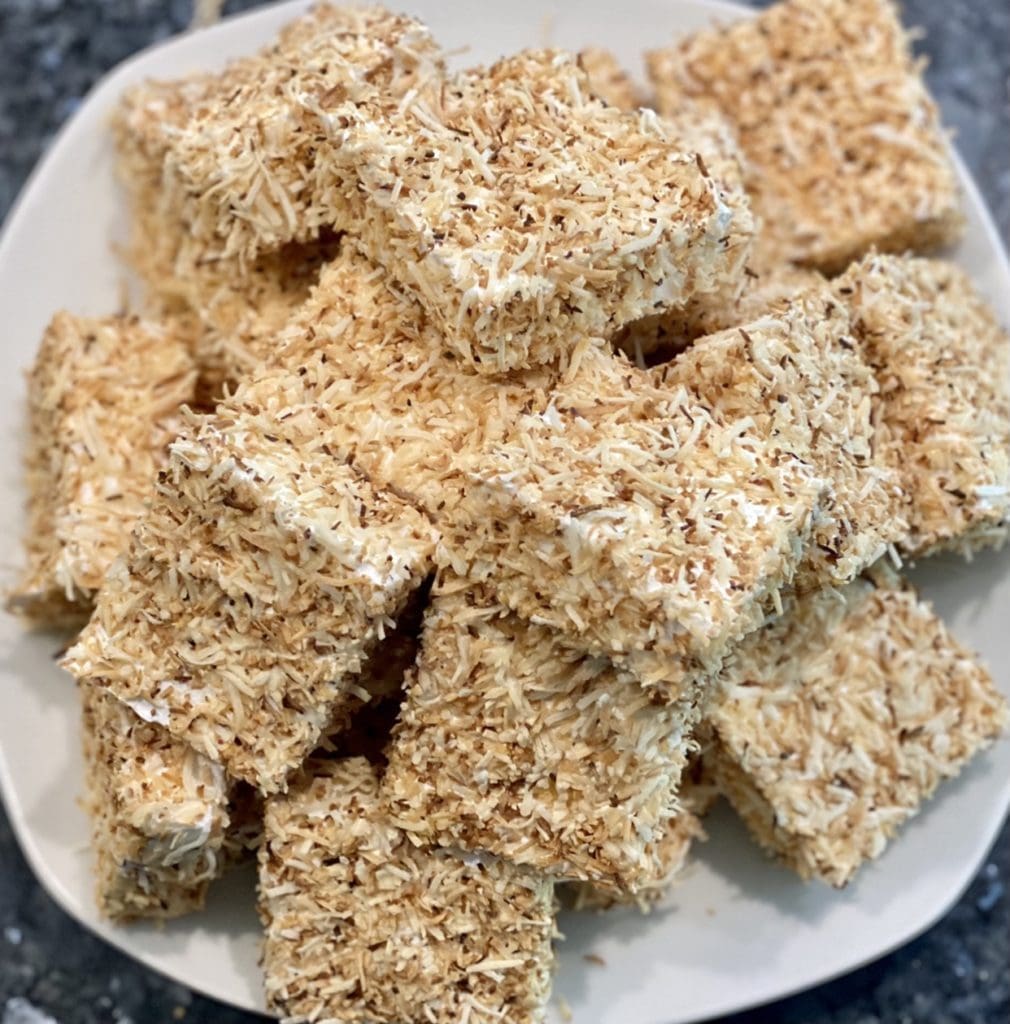
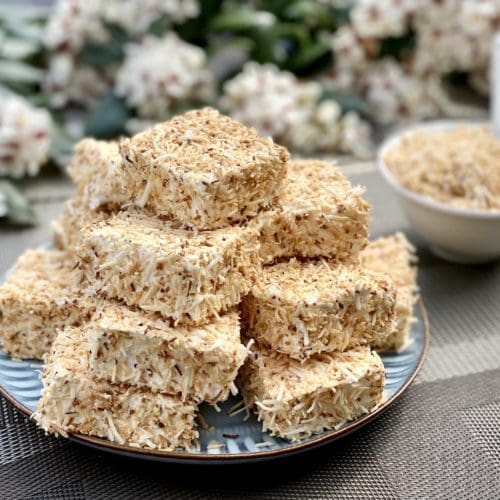
Toasted Coconut Marshmallows
Bite into these soft and pillowy Toasted Coconut Marshmallows and fall madly in love again with these old school treats
Childhood memories are the best
When life sometimes gets a little challenging, I think back to how easy it was being a young child. Zero responsibility and having fun was my primary goal. Oh, if only my life could be like that now.
That’s why I love food so much because some foods can evoke memories and can take me back in time into my childhood. These Toasted Coconut Marshmallows are one of them!
Don’t you just hate it when your favourite foods get discontinued? I certainly do! Many of my childhood favourites have disappeared off shelves. If you’re Australian, you would surely remember Space Food Sticks, Deli Cups and simple pineapple doughnuts. Some stuff is still around, but it doesn’t quite taste the same, like Chomp, Curly Wurly chocolate bars and Bubble O Bill ice cream. It’s annoying, right?
Growing up, they sold toasted coconut marshmallows everywhere for around a dollar. They were in large packets and there were heaps in there. Fast forward to the present and guess what? No supermarkets are selling them.
Our supermarkets do stock marshmallows. You can get pink, white, chocolate and mini ones, but there are no toasted coconut ones. Only speciality stores sell them and you have to pay around $10 or more for a small bag. That’s outrageous! What kind of sucker would buy them? Me, that’s who! Yes, I’m a big fat sucker for the foods I love.
Dangerously addictive, I’m so glad that I’ve learned how to make my own Toasted Coconut Marshmallows. The good news is, they ain’t that hard to make. It’s also cheap to make and only a few ingredients.
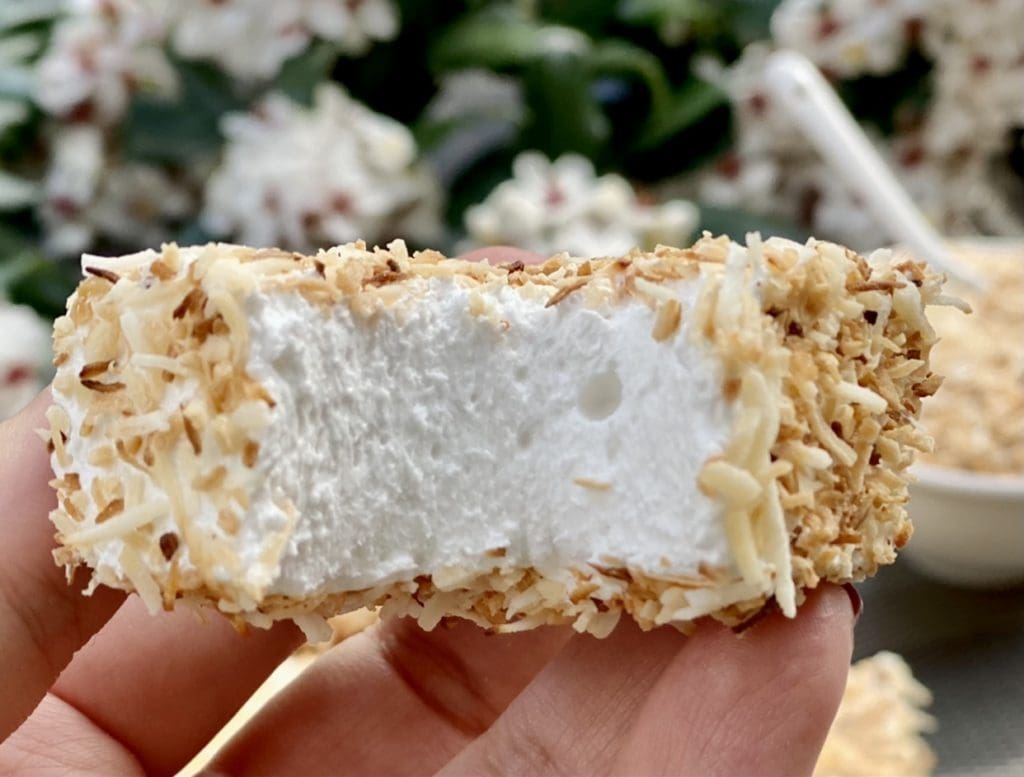
Treat yourself to a large batch of this irresistible homemade marshmallow. They’re impressively soft, airy and oh so delightful. The toasted coconut provides a beautiful nutty flavour and delivers a perfect texture that complements the delicate marshmallows. The best part is you get to keep it all to yourself!
For the latest recipes, join our FREE 3CatsFoodie mailing list
Kai loves marshmallows
Before we were parents, my husband, Tomasi, enjoyed teasing a close friend of his for ordering his toddler babycinos. He thought it was very unnecessary and a rip off because it’s just foam. I admit I had a chuckle too.
Now let’s fast forward to the present. Our little fella Kai is a babycino connoisseur because we have been buying him babycinos since he could hold his own cup. Big facepalm right? I don’t know when it started, but we surely have created a monster. Kai expects his babycino with a marshmallow every time we have our coffee.
When his babychino arrives, he would bounce up and down excitedly on his highchair and squeals out ‘ES ES’ which means YES YES. They usually serve it in an adorable mini coffee cup and saucer with a marshmallow on the side. Before I even have time to place it on top of his tray or say anything, Kai would reach out for the marshmallow and pop the entire thing in his little mouth, causing his cheeks to blow up like a chipmunk.
So do you want to know how Kai feels about my Toasted Coconut Marshmallows?
Shockingly, he spat out my marshmallow. I’m surprised because he loves everything sweet! I then tried feeding him the marshmallow without the coconut and, sure enough, he loved it. Unlike his mummy, Kai is yet to develop a love for everything coconut.
Homemade toasted coconut marshmallows
Homemade candies always make impressive gifts. The look on people’s faces when I tell them I’ve made it is so satisfying! A mixture of astonishment and amazement. I love it, makes me feel so proud as a cook!
I’ll let you in on a secret, homemade marshmallows look impressive but it’s not that hard to make! To take out the guesswork, we’ll need a candy thermometer and a stand mixer because I’m a lazy cook.
I recommend using a stand mixer to whip up the sugar mixture because it can take up to 10 to 15 minutes to whip the sugar mixture. You could do this with a hand mixer, however, your hands may get a little tired. Just think, the reward at the end is worth it as you’ll have plenty of gorgeous marshmallows to gobble up.
I left my marshmallow while, however, if you would like some colour, add a few drops with the vanilla extract. You could also experiment with other flavours, such as adding a few drops of food-grade lemon or orange essence.
If you rather skip on the coconut, you can still follow the recipe but omit coconut. Once set, lightly dust the marshmallow pieces in icing sugar (powdered sugar) or cornflour to prevent them from sticking together.
Ingredients for Toasted Coconut Marshmallows

Glucose syrup (or substitute for corn syrup) – Glucose is not super sweet, but it’s thick and sticky. It’s used to make different sweets such as marshmallows, toffee and caramel. Supermarkets usually stock containers of glucose syrup near the cake decoration section.
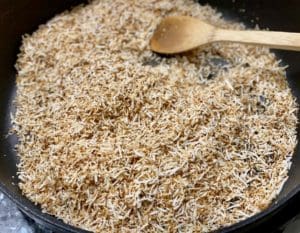
Dried coconut – I used unsweetened shredded coconut this time round as I wanted to produce marshmallows as I remembered as a kid. Unfortunately, this texture was too coarse. It overwhelmed the delicate marshmallow, so I wasn’t very fond of it. I prefer desiccated coconut or finer flakes.
Caster sugar (superfine sugar) – Caster sugar has finer granules than regular white sugar. However, it’s not the same as confectionary, icing, or powdered sugar. Many baking or candy recipes call for caster sugar as it dissolves faster and better into mixtures. If you can’t find caster sugar, you can make your own by placing regular sugar in a food processor or blender. Pulse the sugar a few times until it looks finer, but take care not to over-blitz it so a powder consistency.
How to make Toasted Coconut Marshmallows
Step-by-step guide with photos
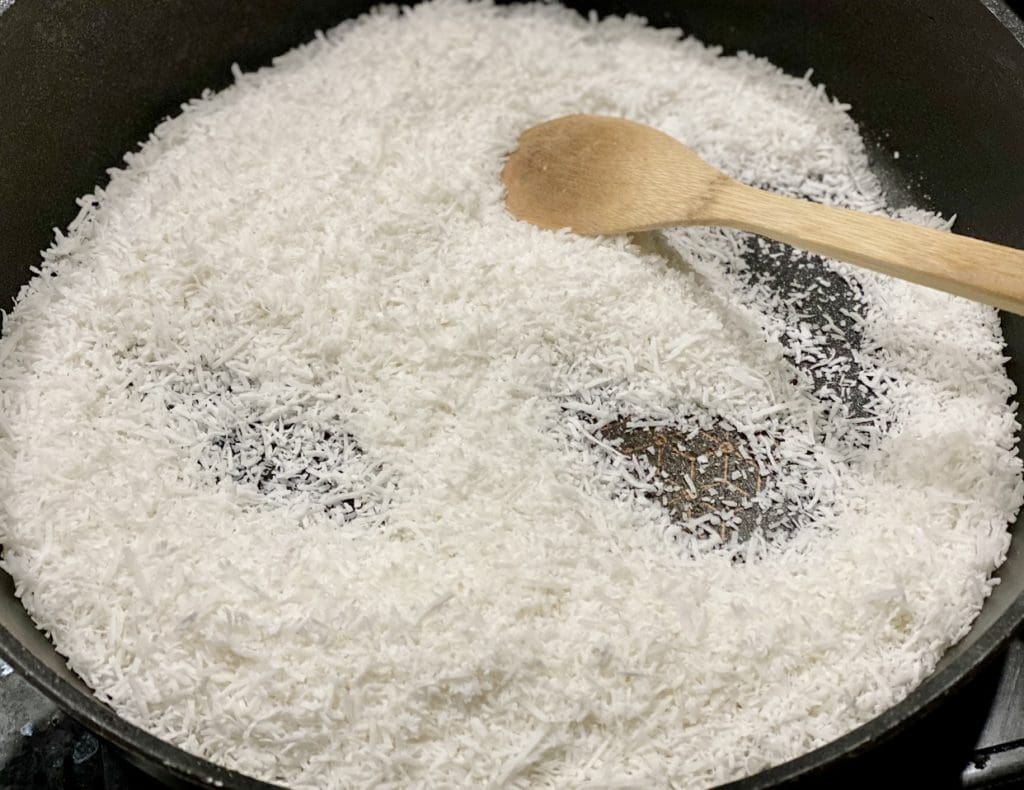
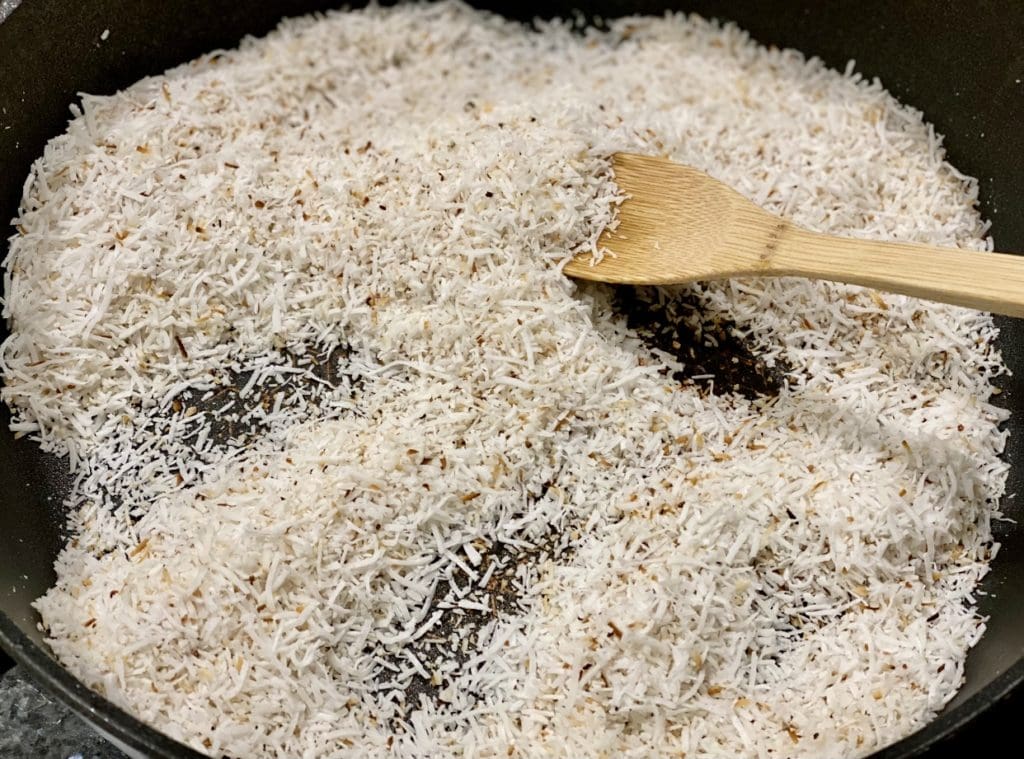
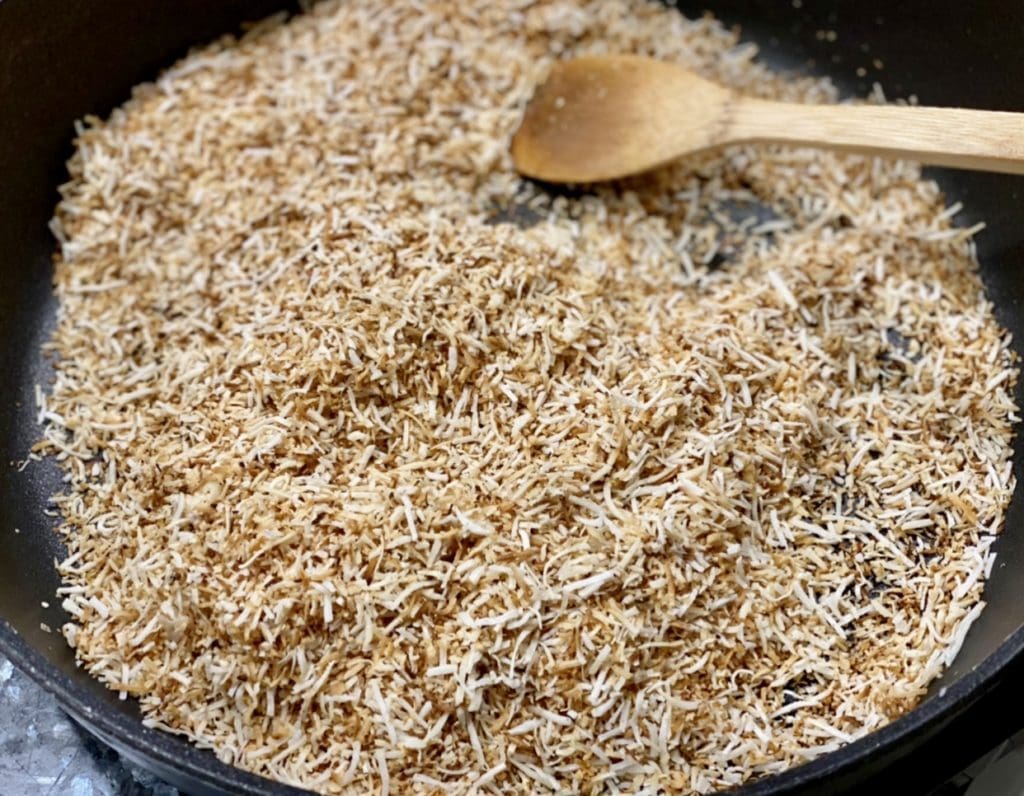
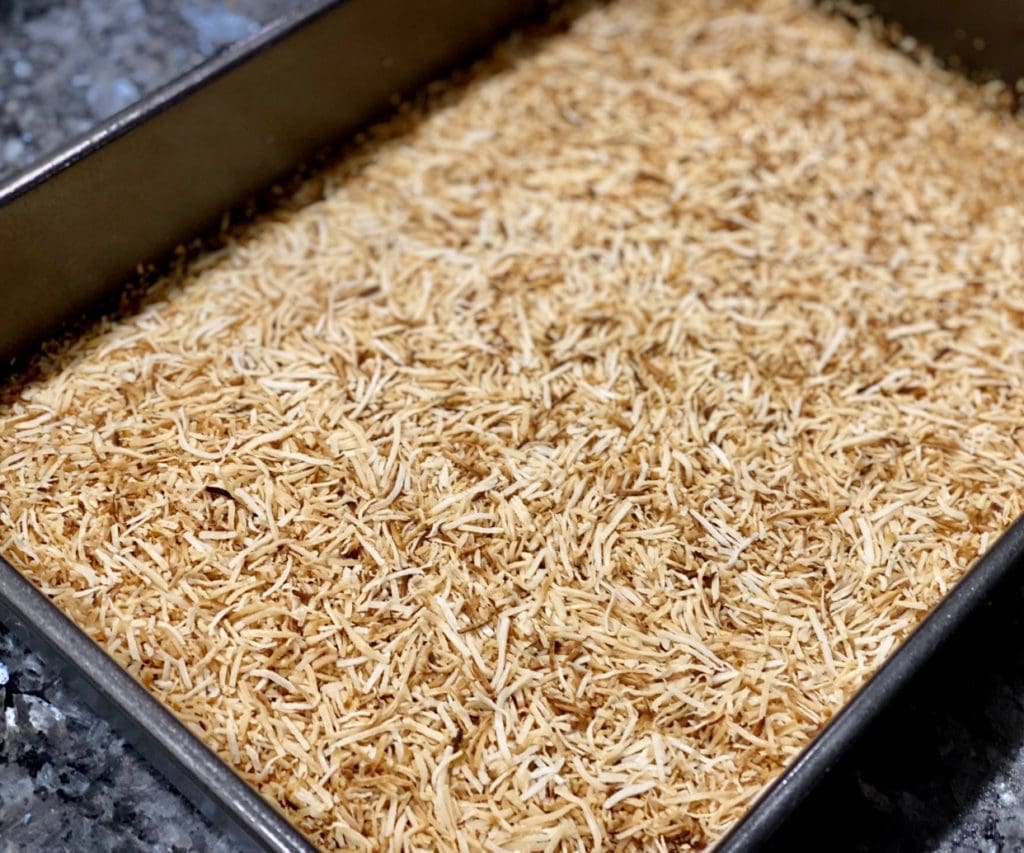
Lightly grease the bottom and sides of a 23x33cm (9x13in) tin and line the base with non-stick baking (parchment) paper. Heat a frying pan over high heat, then add in the coconut. Stir regularly to toast the coconut for 3 to 4 minutes or until golden. Place enough coconut to cover the base of the tin evenly. Store the remaining coconut in an air-tight container for later.

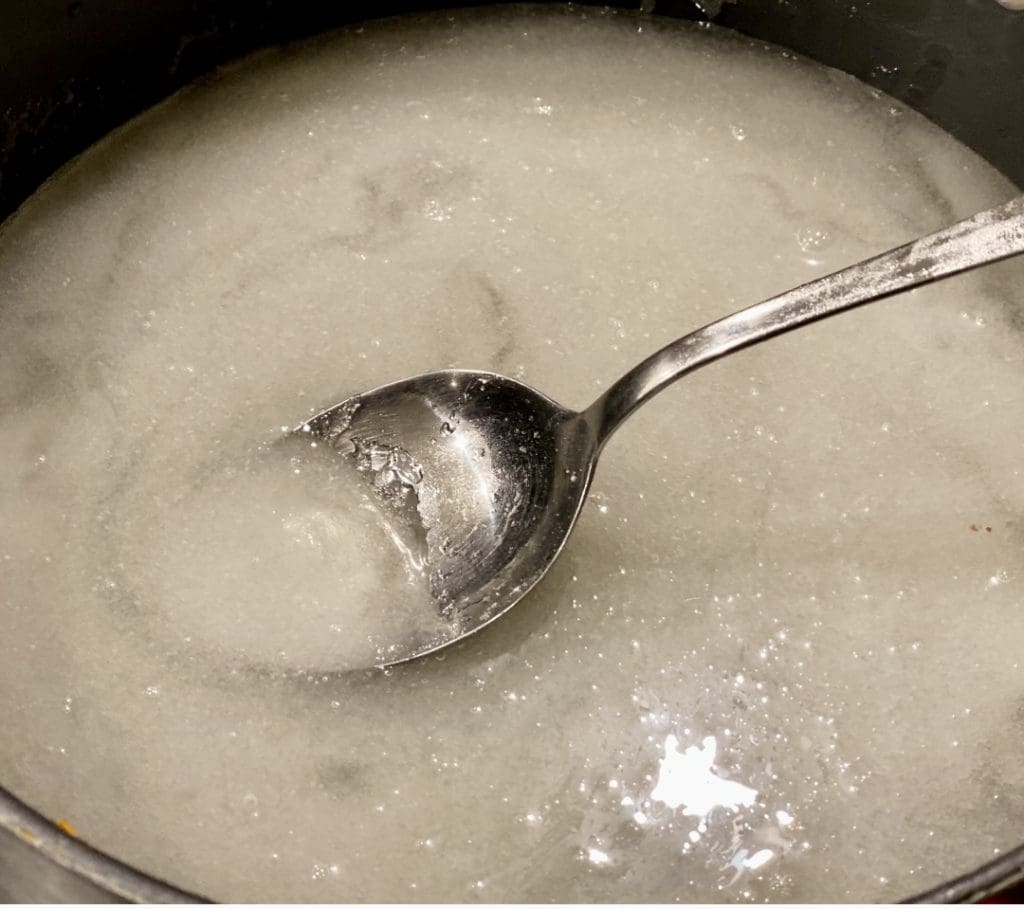
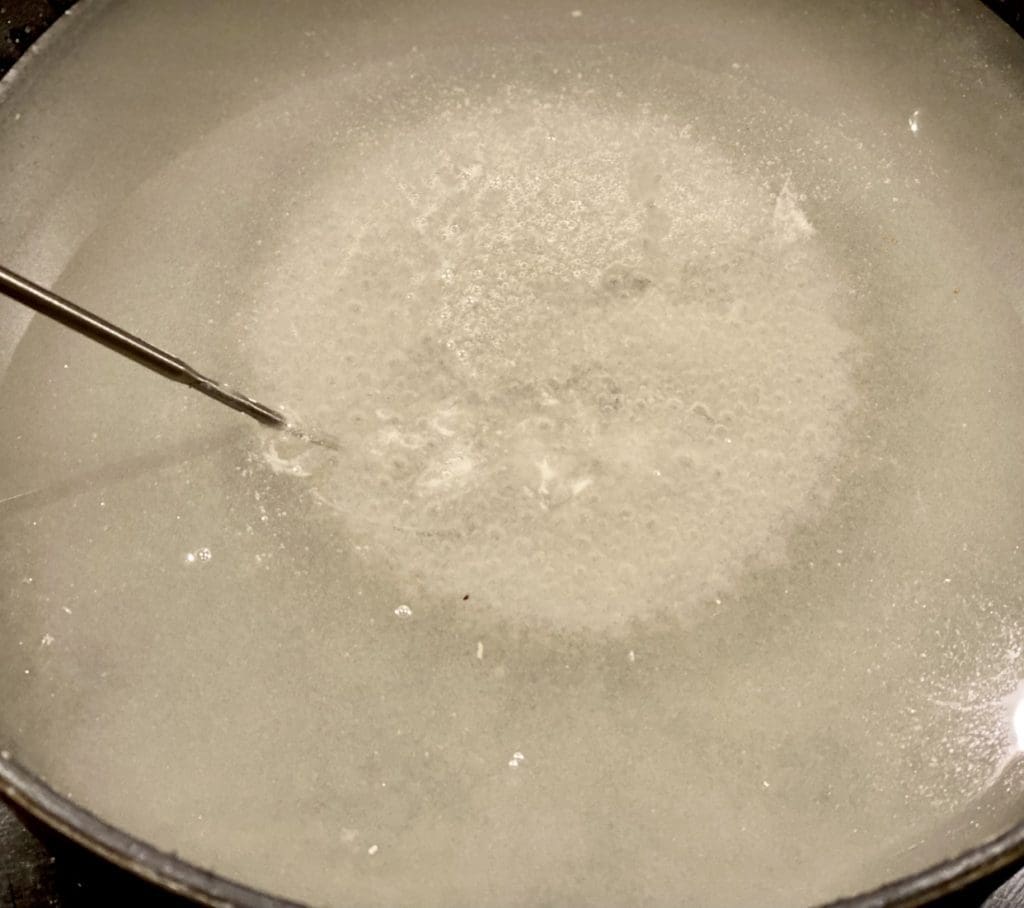
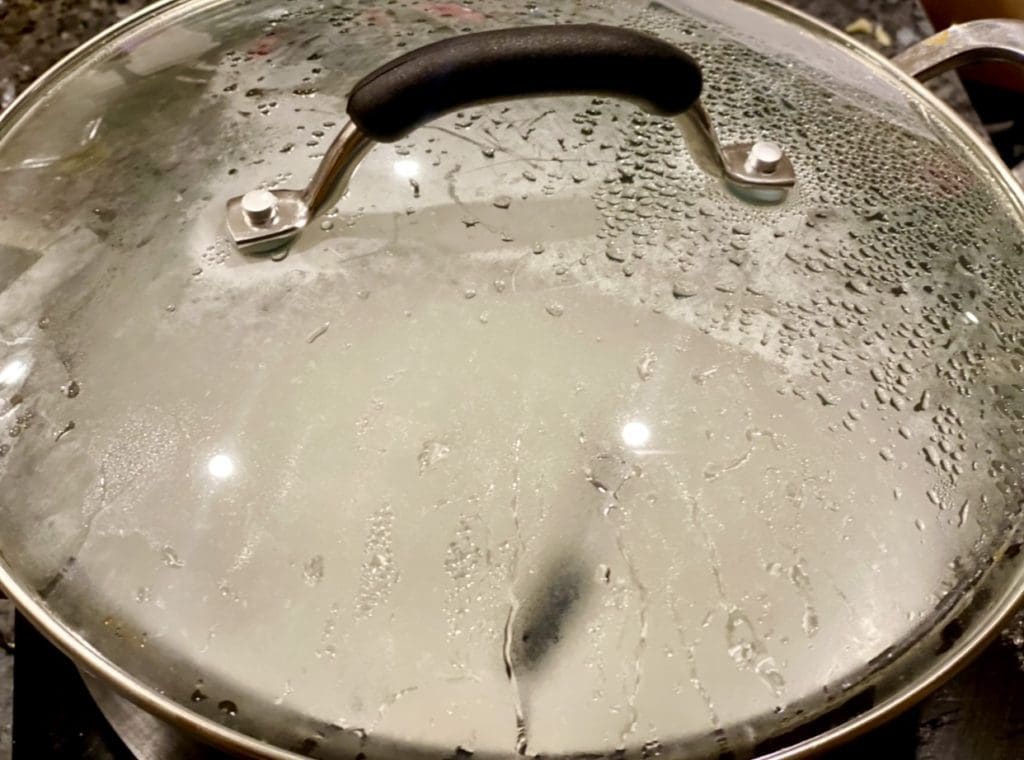
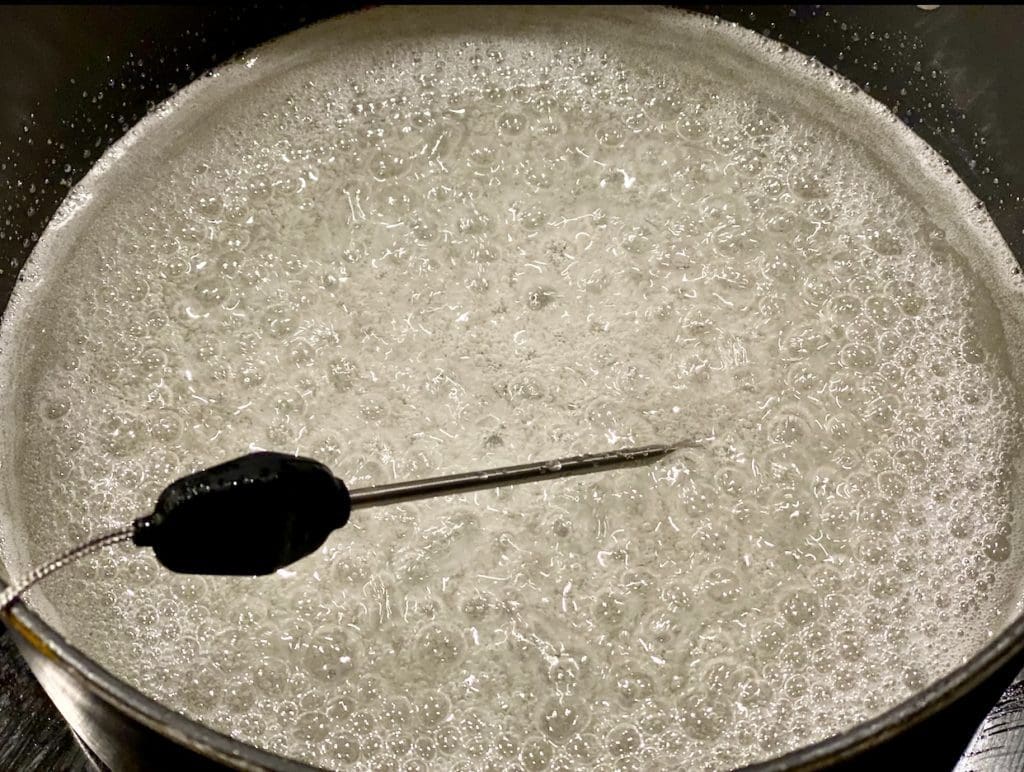
In a medium heavy-based saucepan; place in the glucose syrup, sugar, salt and 1/2 cup of water. Place the pan over medium heat and stir slowly just until the sugar dissolves, then stop stirring. Allow the sugar mixture to come to a boil.
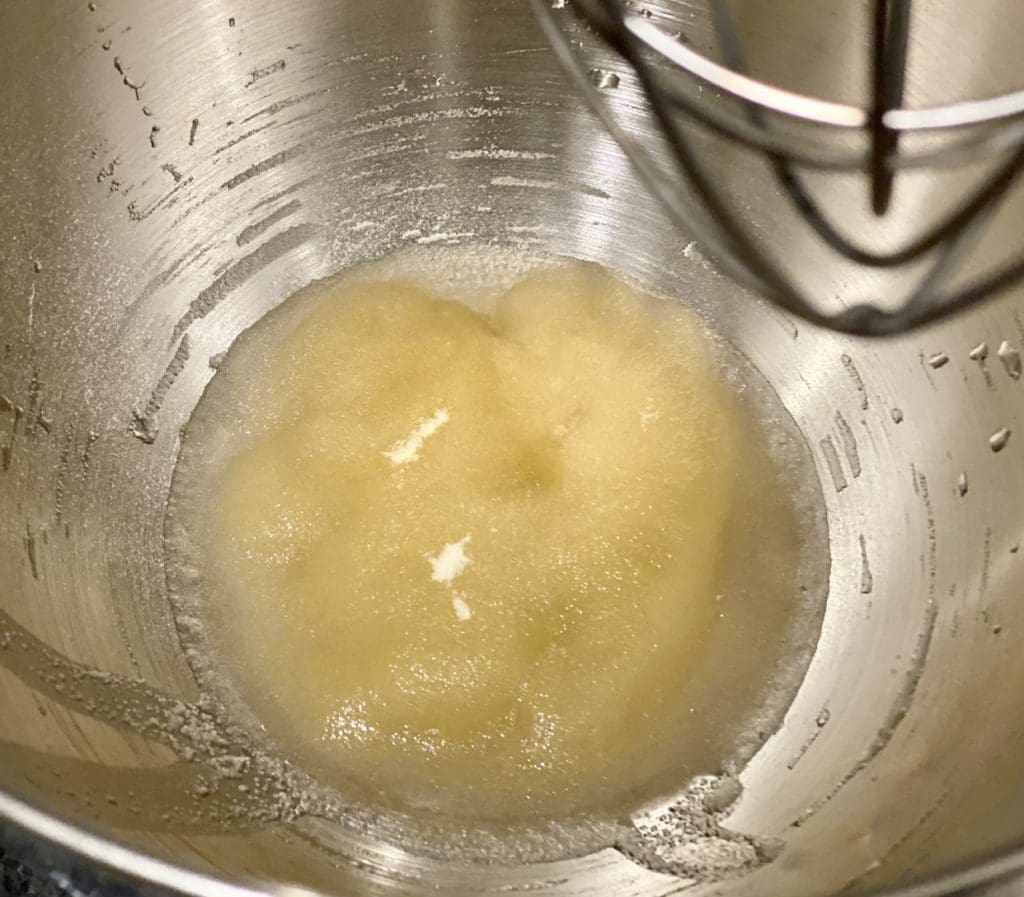
Meanwhile, bloom the gelatine – Pour 1/2 cup of cold water into the bowl of a stand mixer and sprinkle the gelatine on top. Give it a quick mix and leave it to bloom whilst finishing the sugar mixture.
Once the mixture comes to a boil, cover the saucepan for a minute. Doing this will help get rid of any sugar crystals stuck on the side of the pan. Uncover the pan and boil until it the temperature is between 115 – 118°C (239 – 244°F). Remove the pan from the heat.

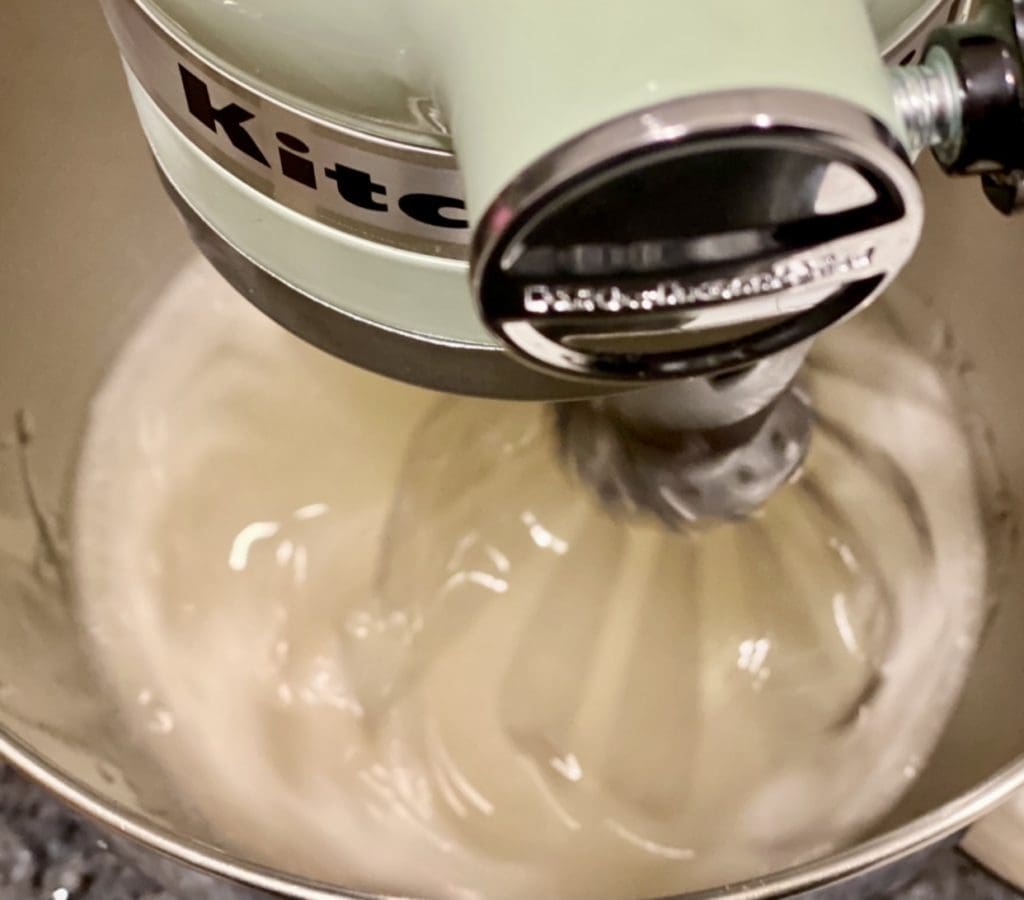
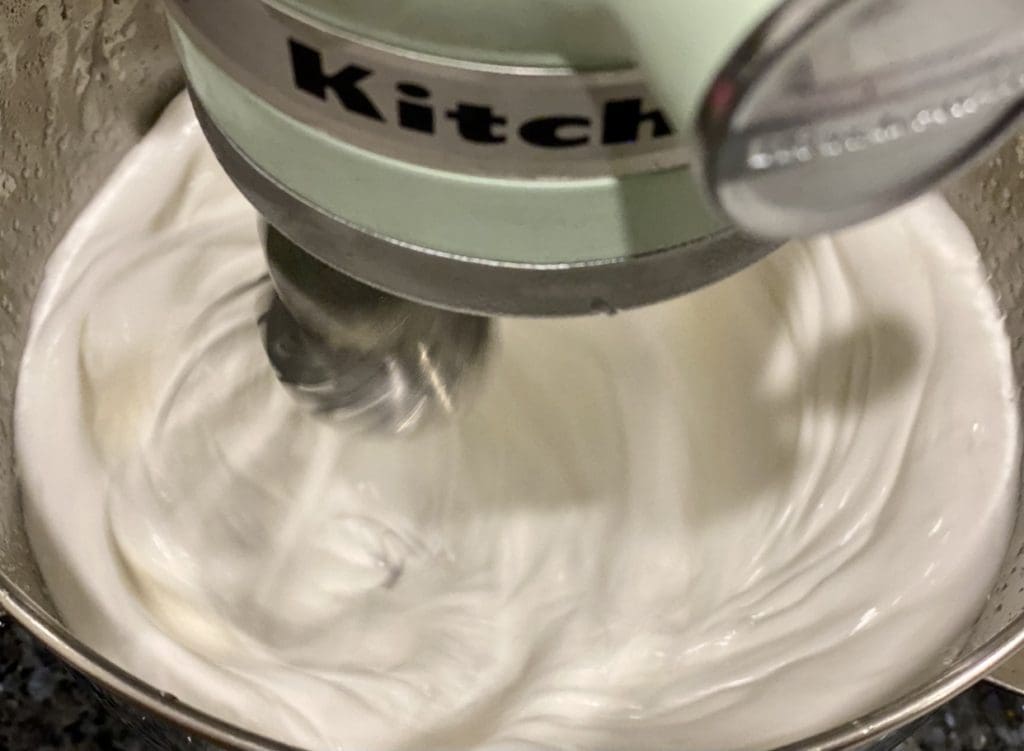
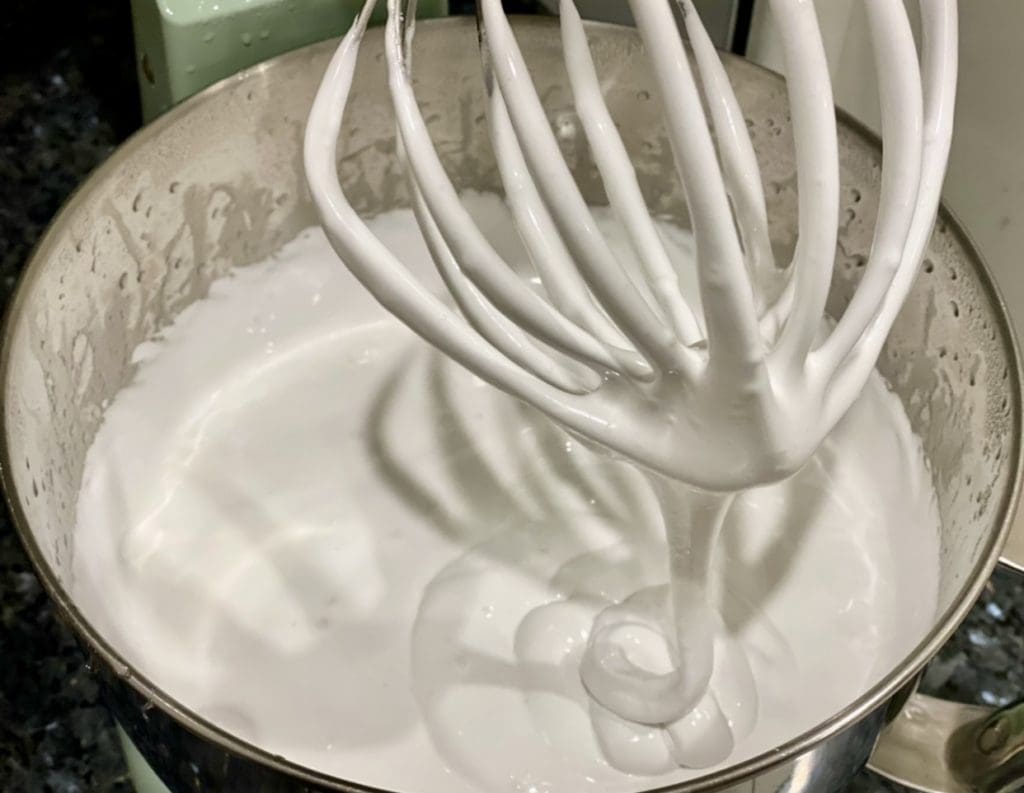
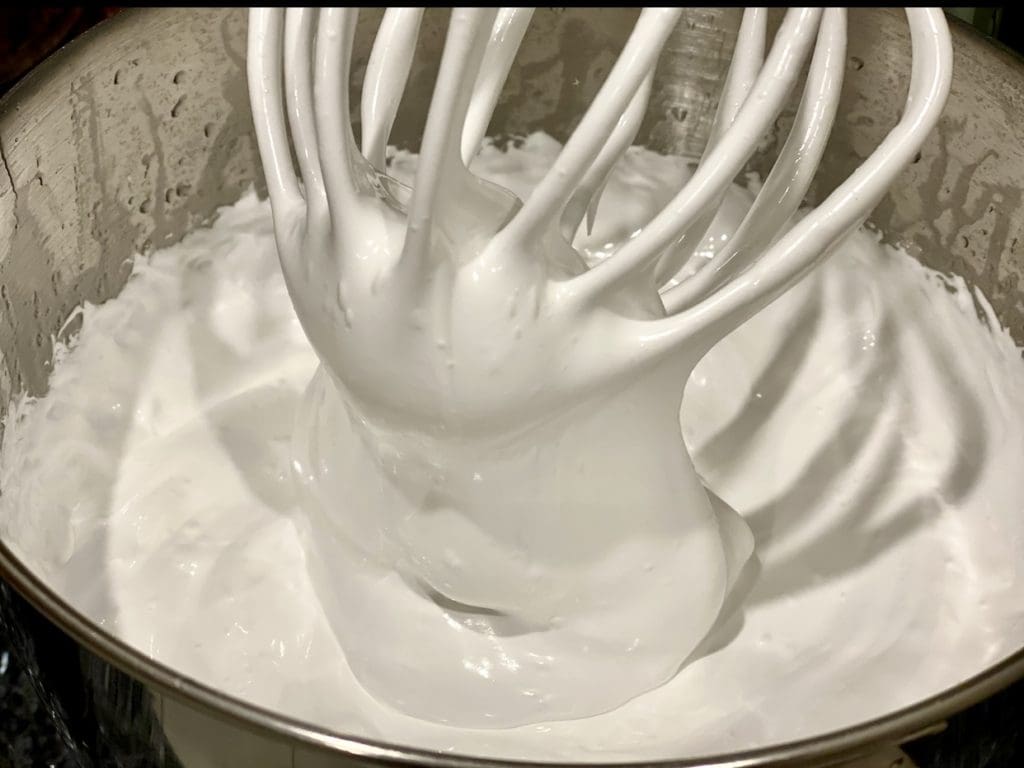
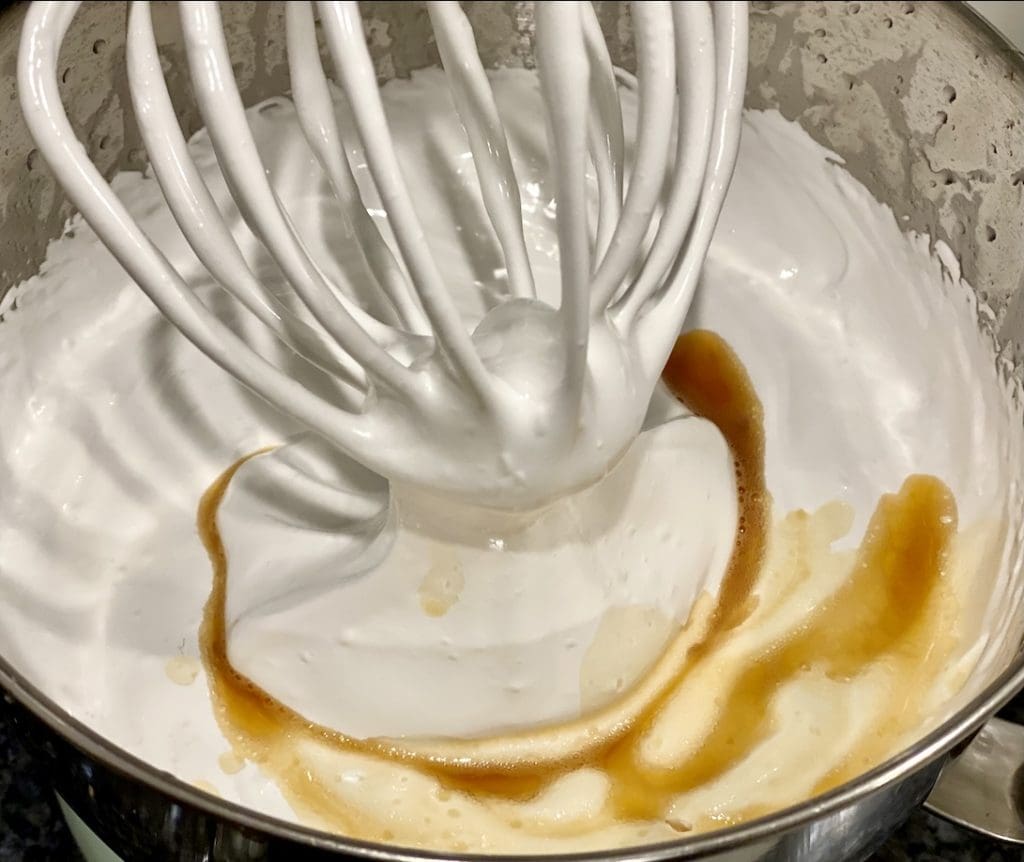
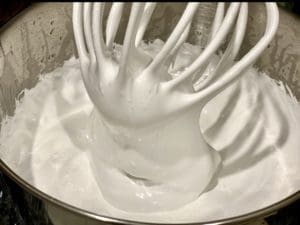
Place the stand mixer at low speed. Carefully pour in the sugar mixture slowly into the gelatine with the mixer running. Once the sugar mixture is all in, gradually increase the speed of the mixture to high. Whip the marshmallow mixture for approximately 10 to 15 minutes or until thick and glossy. Pour in vanilla extract and whip on high for another 30 seconds or until combined.
The hardest part is waiting for the marshmallow to set

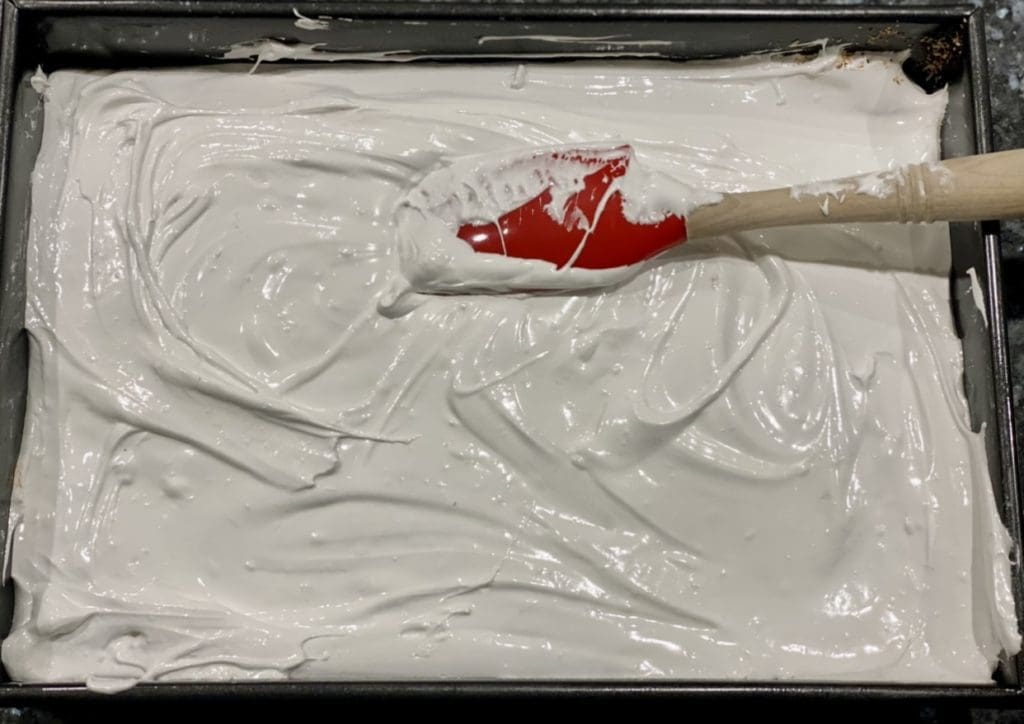

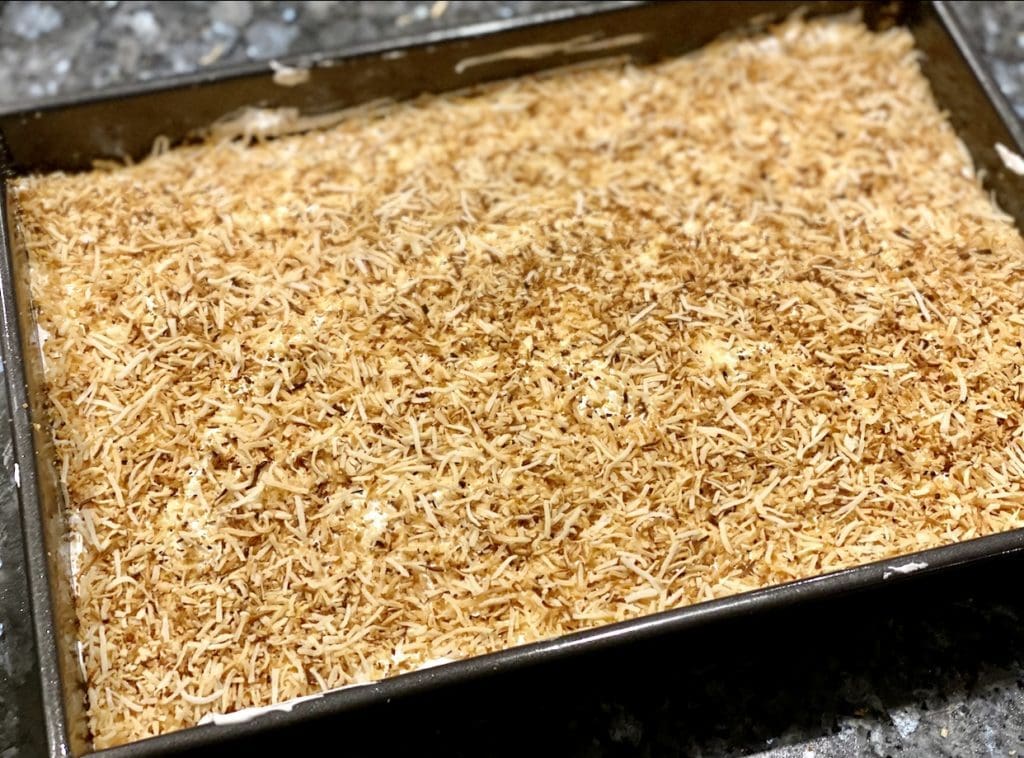
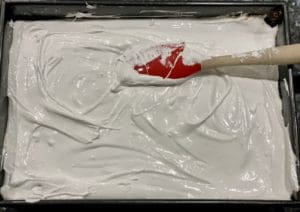
Pour the marshmallow onto the prepared tin over the toasted coconut with a spatula. Spread the mixture in the pan evenly, then sprinkle some toasted coconut on top. Leave the uncovered marshmallow to set at room temperature until firm. This can take up to 5 to 6 hours.

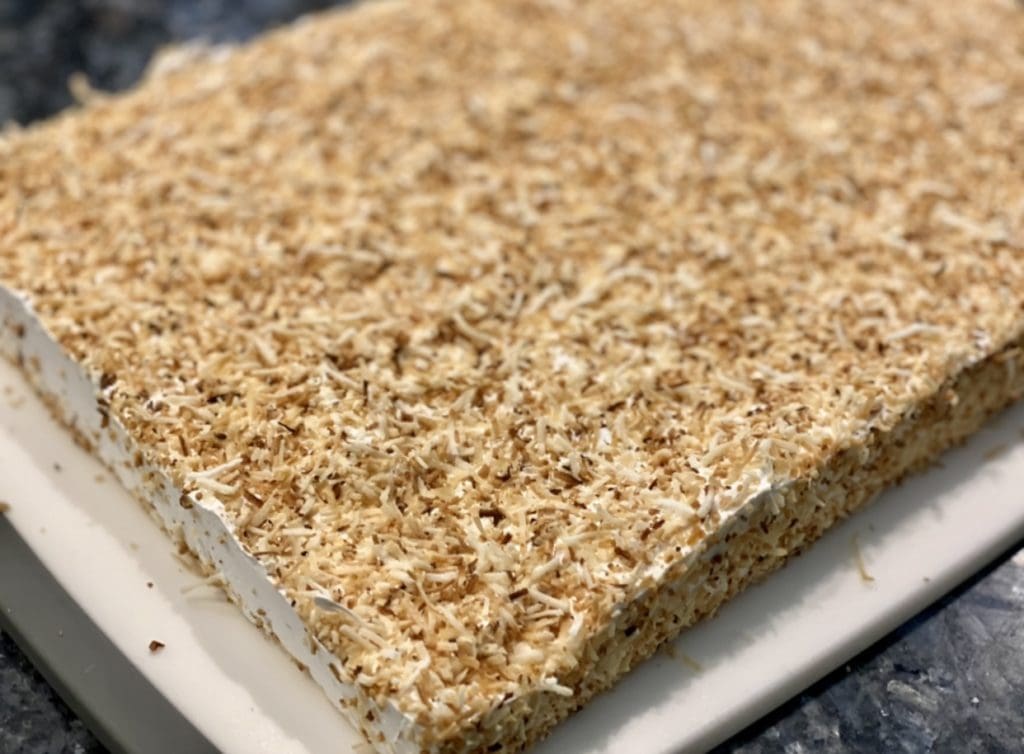
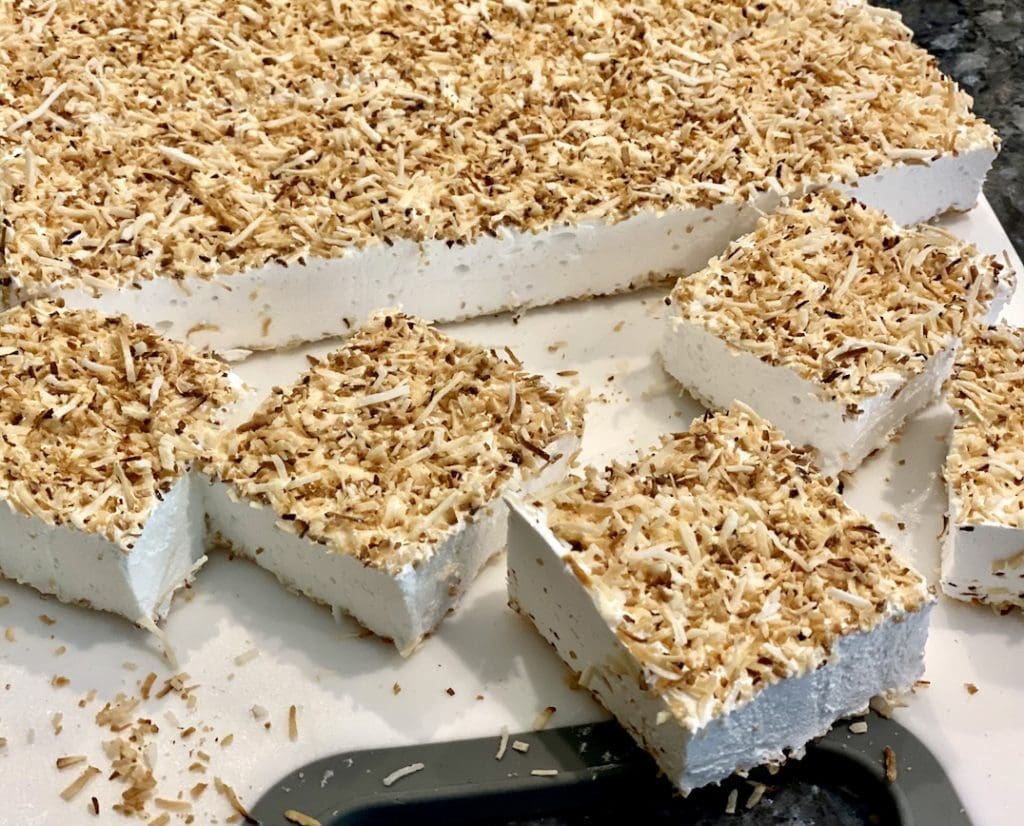
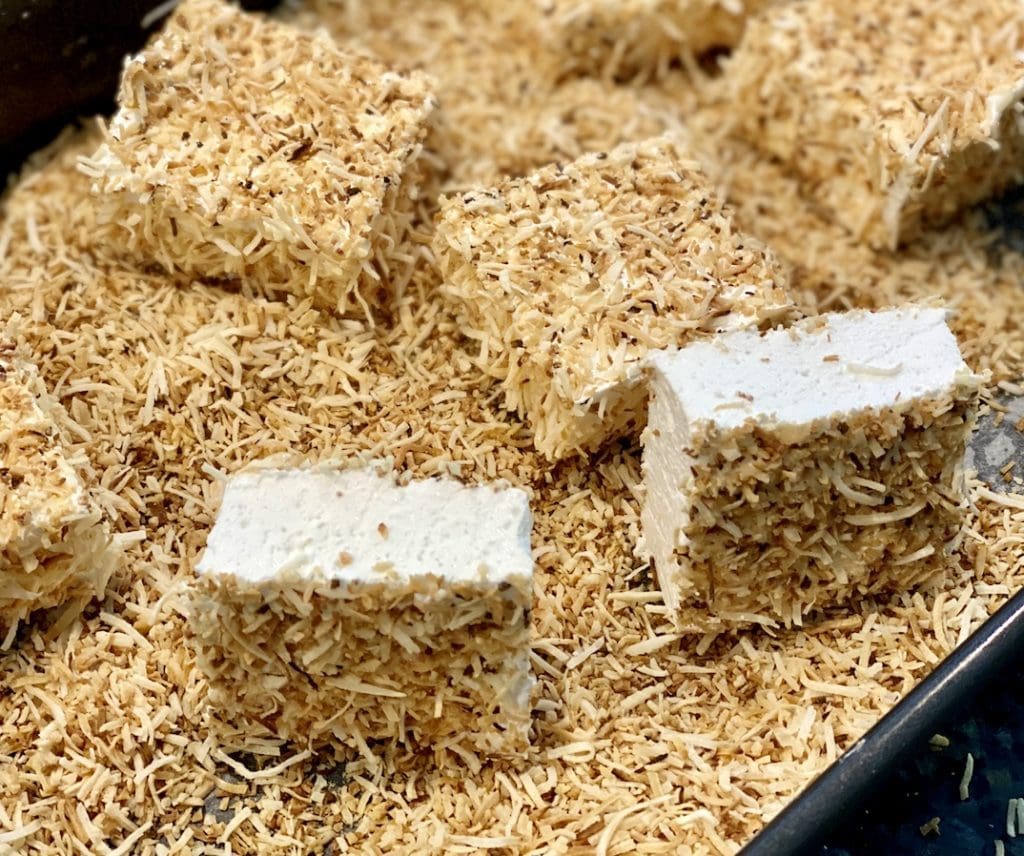
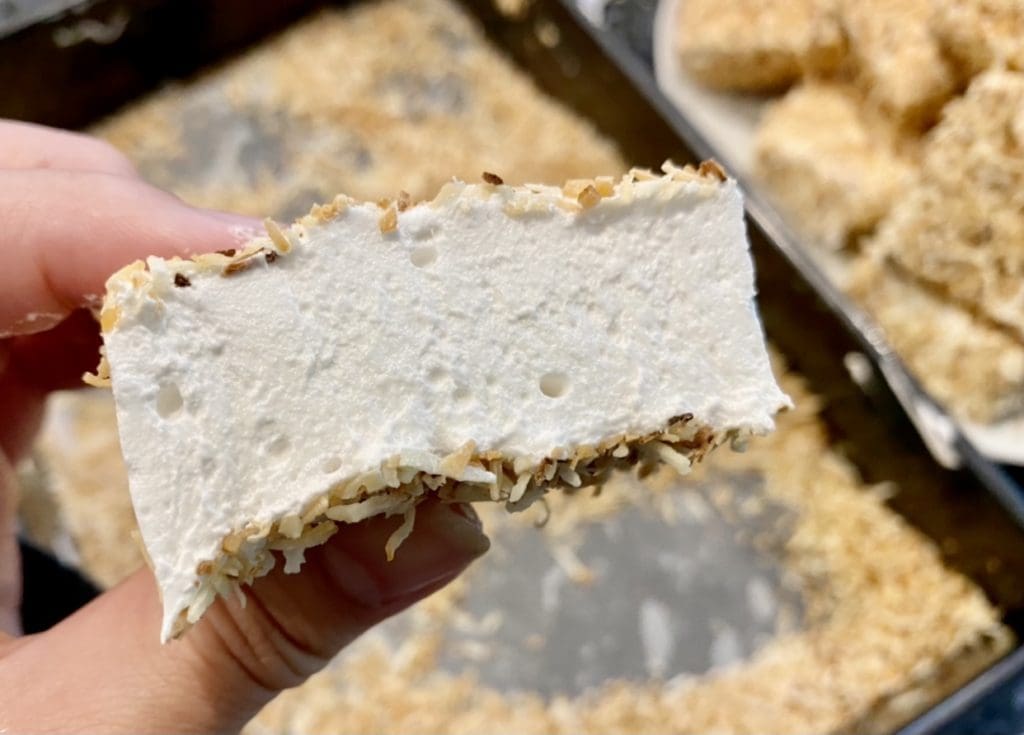
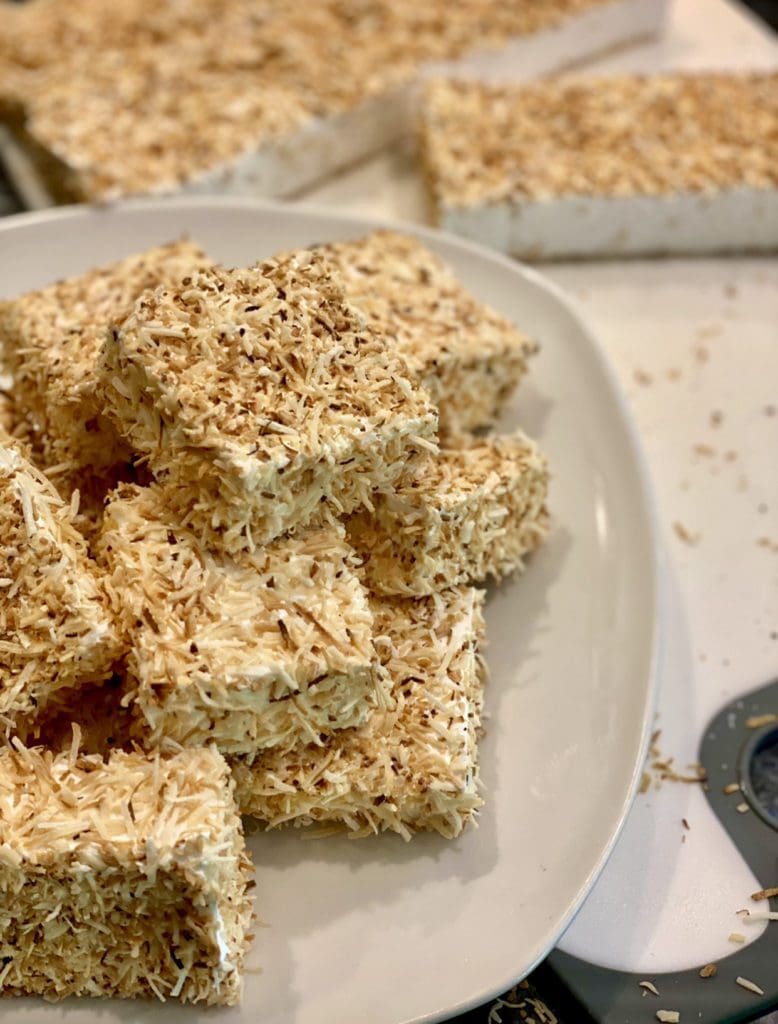
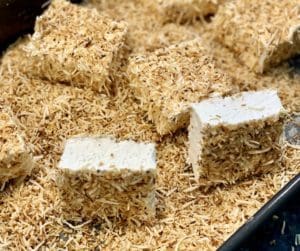
Once set, use a thin blunt knife or spatula to pry the marshmallows from the sides of the tin. Pull the marshmallow out and slice them into desired pieces. Place the remaining toasted coconut into the same baking tin and use it to coat all sides of each slice.
Do you love the idea of making homemade candies? Try out this BRITTLE recipe, it’s creamy and addictive, or perhaps this CHOCOLATE BARK is more your thing.
Storage – Transfer the marshmallows into an airtight container and store them at room temperature. It’ll be good for up to 3 weeks.
Cooking measurements are in Australian standard spoon and cup measurements.
A Third-Party Application calculated the calories and nutritional information. Please use this as an approximate guide only.
I would love to hear your thoughts or feedback on this post. If you have made this recipe, please show your support by commenting and rating this recipe. You can do this by scrolling down or by clicking the green circle on the left. To prevent spam on this site, your email address is required but it will not be published.
Cheers (I’ll drink to that) – Cat Tre
Toasted Coconut Marshmallows
Ingredients
- 2½ cup unsweetened desiccated coconut (NOTE 1)
- 1 cup glucose syrup (or corn syrup) (NOTE 2)
- 1¾ cup caster sugar (NOTE 3)
- ½ cup cold water
- ½ tsp salt
- 3 tsp vanilla extract
For blooming the gelatine
- 25 gm unflavoured gelatine powder
- ½ cup cold water
Instructions
- Lightly grease the bottom and sides of a 23x33cm (9x13in) tin and line the base with non-stick baking (parchment) paper. Heat a frying pan over high heat, then add in the coconut. Stir regularly to toast the coconut for 3 to 4 minutes or until golden. Place enough coconut to cover the base of the tin evenly. Store the remaining coconut in an air-tight container for later.
- In a medium heavy-based saucepan; place in the glucose syrup, sugar, salt and 1/2 cup of water. Place the pan over medium heat and stir slowly just until the sugar dissolves, then stop stirring. Allow the sugar mixture to come to a boil.

- Meanwhile, bloom the gelatine – Pour 1/2 cup of cold water into the bowl of a stand mixer and sprinkle the gelatine on top. Give it a quick mix and leave it to bloom whilst finishing the sugar mixture.

- Once the mixture comes to a boil, cover the saucepan for a minute. Doing this will help get rid of any sugar crystals stuck on the side of the pan. Uncover the pan and boil until it the temperature is between 115 – 118°C (239 – 244°F). Remove the pan from the heat.

- Place the stand mixer at low speed. Carefully pour in the sugar mixture slowly into the gelatine with the mixer running. Once the sugar mixture is all in, gradually increase the speed of the mixture to high. Whip the marshmallow mixture for approximately 10 to 15 minutes or until thick and glossy. Pour in vanilla extract and whip on high for another 30 seconds or until combined.
- Pour the marshmallow onto the prepared tin over the toasted coconut with a spatula. Spread the mixture in the pan evenly, then sprinkle some toasted coconut on top. Leave the uncovered marshmallow to set at room temperature until firm. This can take up to 5 to 6 hours.
- Once set, use a thin blunt knife or spatula to pry the marshmallows from the sides of the tin. Pull the marshmallow out and slice them into desired pieces. Place the remaining toasted coconut into the same baking tin and use it to coat all sides of each slice.
Notes
Cooking measurements are in Australian standard spoon and cup measurements. A Third-Party Application calculated the calories and nutritional information. Please use this as an approximate guide only.

These are the best marshmallows ever. I will never have store bought again. They are extra light and fluffy and totally addictive!!! I loved the way the recipe was detailed with explicit instructions and photos. Thank you!!
Hi Paula,
You’re welcome! So happy you found this marshmallow recipe and even happier you loved them. Thanks so much the kind feedback ?