
No Knead Focaccia with Bacon, Egg and Sausage

This No Knead Focaccia is sure to please with its lovely crust with an inside that’s soft and chewy. Simply mix, refrigerate and bake.
This No-Knead Focaccia pleases my lazy side
Scrolling through Instagram, it’s easy to spot so many talented home bakers out there. Every 10 posts I would see a perfectly baked sourdough with artsy scoring and crust that would make professional bakers jealous. Then, I’ll read their description explaining their experience with making sourdough. Woah, talk about complex, I’ve never made sourdough and I don’t think I ever will! But hold that thought, curiosity may make me do it one day.
Homemade bread gives me anxiety because I never know how it’s going to turn out until it’s out of the oven. Once it’s done, there’s no turning back. I recall trying to feed a few of my failed bread to pigeons, but even they turned their beaks away from my disaster.
I’ll be moping around the kitchen for ages, wondering where it went wrong. I mean, I spent half the day on the damn dough! why couldn’t it just work? All that energy kneading and proving the dough for nothing!

Although my relationship with bread making has improved nowadays, I still love making no-knead and no-proof bread like this simple Olive Cheese Bread. This Focaccia has a few steps but is very doable and easy to follow. There’s no hand or machine kneading required. We simply just mix the dough and refrigerate it overnight.
Impressive, right? What’s even more incredible is what you have after baking. This effortless no-knead focaccia is crispy on the outside and soft and chewy on the inside, such a delight to bite into. I made breakfast focaccia loaded with eggs, sausages, bacon and tomatoes, but you could put whatever you want on this beautiful focaccia base.

For the latest recipes, join our FREE 3CatsFoodie mailing list

Slow rising, no-knead focaccia overnight dough
Maybe I should’ve called it ‘brunch focaccia’ instead. My husband, Tomasi, takes over Kai, our toddler’s breakfast routine in the morning on the weekends, so I’m able to get to sleep in for a bit. However, that morning he was expecting me to get up with them as he knew I was planning to bake us this breakfast focaccia for breakfast. Needless to say, he was waiting anxiously for it.
By the time I rolled out of bed, it was already 8 am. The focaccia dough was waiting for me in the fridge, but it needed time to rest at room temperature for a few hours. So, to Tomasi’s annoyance, there was no focaccia for breakfast. Never mind, we ended up enjoying delicious breakfast focaccia for brunch instead.
If it wasn’t for Kai or having to wake up for work, I would wake up at 10 am every morning. I’m not a morning person at all! Tomasi is the opposite because he loves waking up at 5 am and getting things done before the day starts. Maybe I should show my husband how to prepare the dough in the tin next time because it’s very simple.

We just mix the flour and yeast and warm water into a sticky dough with a large bowl and wooden spoon. Once it comes together, we place it in the fridge. This is where we need to prepare in advance because the dough needs to be in the fridge for at least 12 hours. Then the dough needs to rest at room temperature for 2 to 4 hours before baking. I guess all this waiting time is the compromise of not having to knead and prove the dough 2 or 3 times.
The dough, however, is good to stay refrigerated for up to two days. I worked on my dough in the early afternoon and chilled it overnight for the next morning. Placing the dough in the fridge slows down the yeast and therefore slows down the rising process. It also makes the dough more flavourful because of the slow fermentation.
Ingredients for No-Knead Breakfast Focaccia
Bread flour has a higher amount of protein than plain flour (all-purpose flour). Protein produces lots of gluten and makes the dough rise when baking. Plain flour would also work, but it may end up being a slightly wetter dough and different in texture.
Yeast – I used instant yeast (rapid yeast), this variety you usually need to chill or freeze after opening. Instant yeast doesn’t need to be hydrated and rises faster than active yeast. Instant and active are interchangeable for equal amounts, but active yeast needs more time to rise. Out of habit, I always hydrate my yeast, regardless of what variety I’m using, because I like seeing it alive.
FOR THE TOPPING

This no-knead focaccia recipe makes a very impressive base. You pretty much could choose your own toppings. This bread is so tasty on its own that you could just sprinkle some sea salt flakes and some herbs and bake it.
I’m greedy so I overloaded my breakfast focaccia with everything! Use more or less topping as desired because cooking is always best when you add the ingredients you love.
Mini sausages – I used raw pork chipolatas. If you can’t find mini sausages, regular-sized ones would work too.
Bacon – My favourite bacon is streaky, as I like the ratio of fat and meat. However, all kinds of rindless bacon would work.
How to make No-Knead Breakfast Focaccia
Step-by-step guide with photos
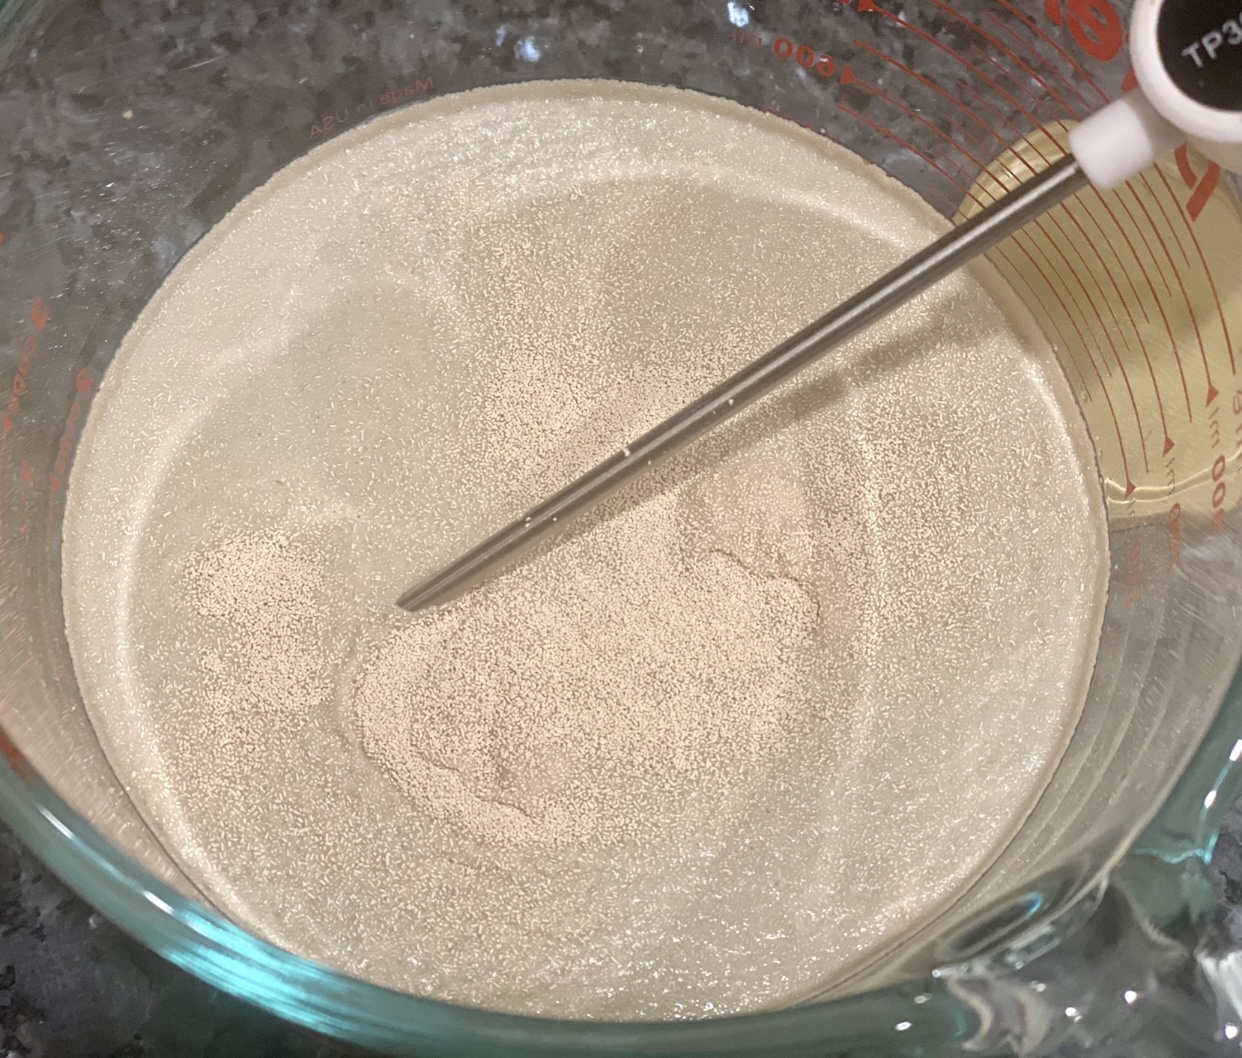

In a microwave-safe jug/bowl, pour in the water then add in the sugar and stir to mix. Place the jug into the microwave and zap it for 30 seconds. Stir the mixture and place a thermometer in. The water should be lukewarm in temperature and read between 36.5 to 40.5 C (100 to 110 F). You may need to leave the water to cool for a few minutes if it’s too hot. Once it reaches the correct temperature, stir in the yeast. Cover and leave for 7 minutes or until foamy. If it doesn’t foam, your yeast is no longer alive, so discard the mixture.
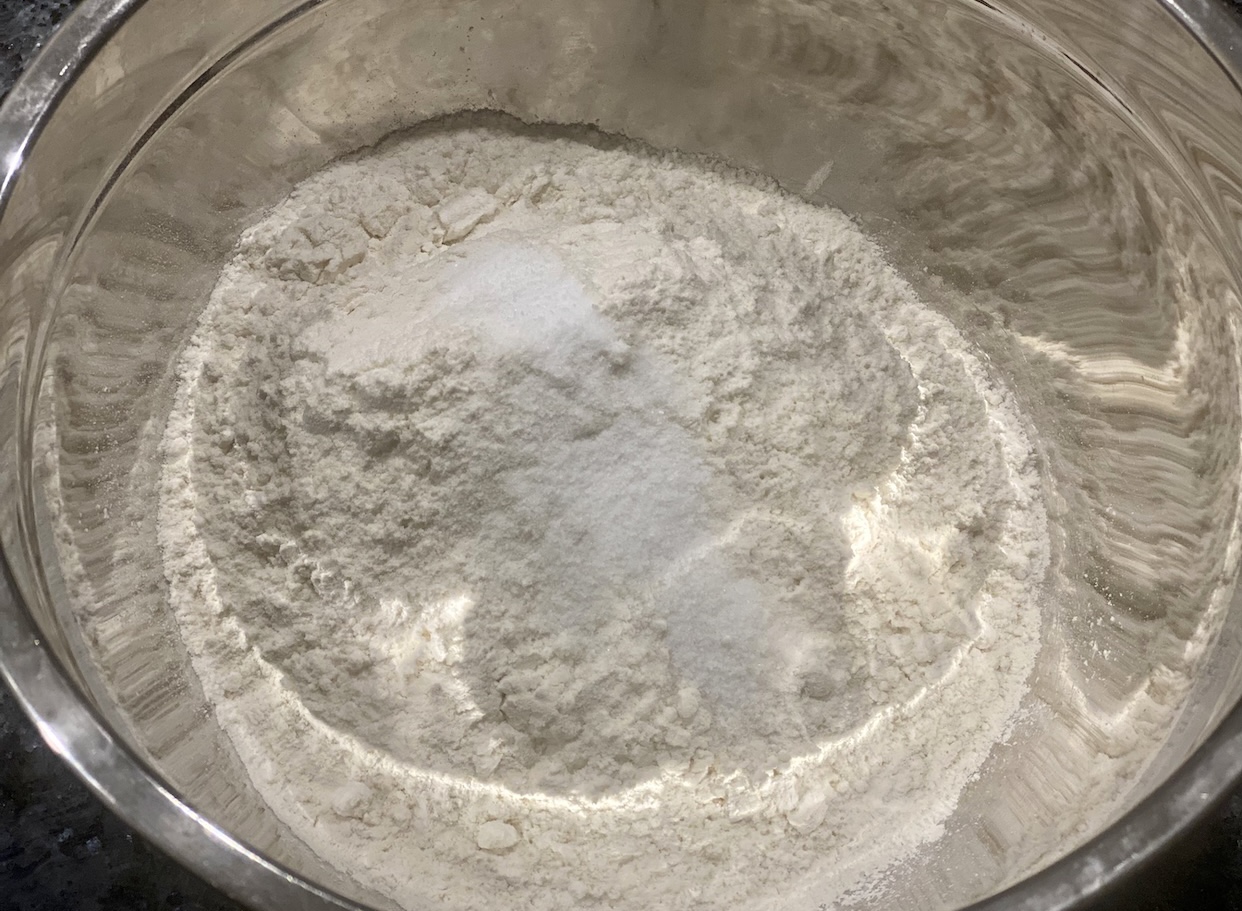


Place the flour and salt into a large mixing bowl and make a well in the centre. Give the yeast mixture a quick mix, then pour it over the flour.


Mix the flour and yeast mixture together until well combined and a very sticky dough forms. Grease a large bowl with oil and place the dough in it. Then brush or spray the surface of the dough with oil to prevent it from drying out. Cover the bowl with a cling wrap/plastic film and place it in the fridge for at least 12 hours (Dough can stay in the fridge for a maximum of 48 hours)


Place 2 tablespoons of oil in a non-stick 23x33cm (9x13in) baking tin. Cover the base and the sides of the tin with oil.
Remove the dough out of the fridge. Using your hands, lift the edges of the dough up, then drop it down into the centre (do this in 4 sections).

Place the dough into the tin on top of the oil. Press the dough down and press it gently so it spreads out evenly onto the base of the tray. If the dough springs back and is difficult to work with, cover it and let it rest at room temperature for 30 minutes. After this time, the dough should be easier to flatten. Lightly oil the surface of the dough, cover, and leave it at room temperature for 2 to 4 hours or until the dough doubles in size. The warmer your kitchen is, the faster the dough will rise. Mine took approximately 2.5 hours on a fairly warm day.


In the last 15 minutes of the dough resting time, preheat the oven to 220°C (430°F) or 200°C (390°F) for fan-forced ovens and prepare the bacon and sausages. Heat a tablespoon of oil in a frying pan over medium-high heat. Sear the bacon and sausages for a few minutes until the surface is golden. There is no need to cook them completely, as the oven will finish the cooking process. Place the meat onto a plate and set it aside.
Finally, it’s time to bake!
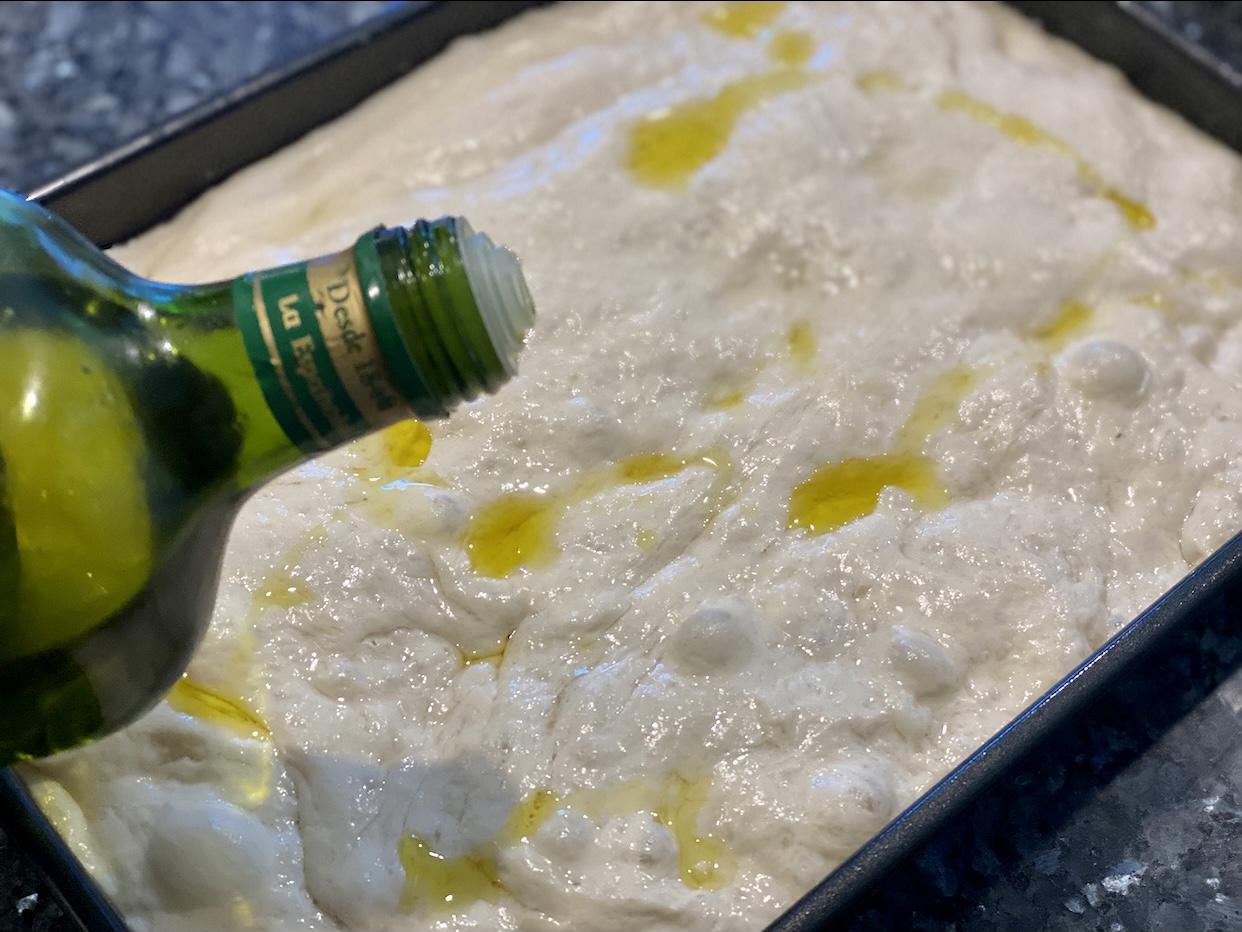

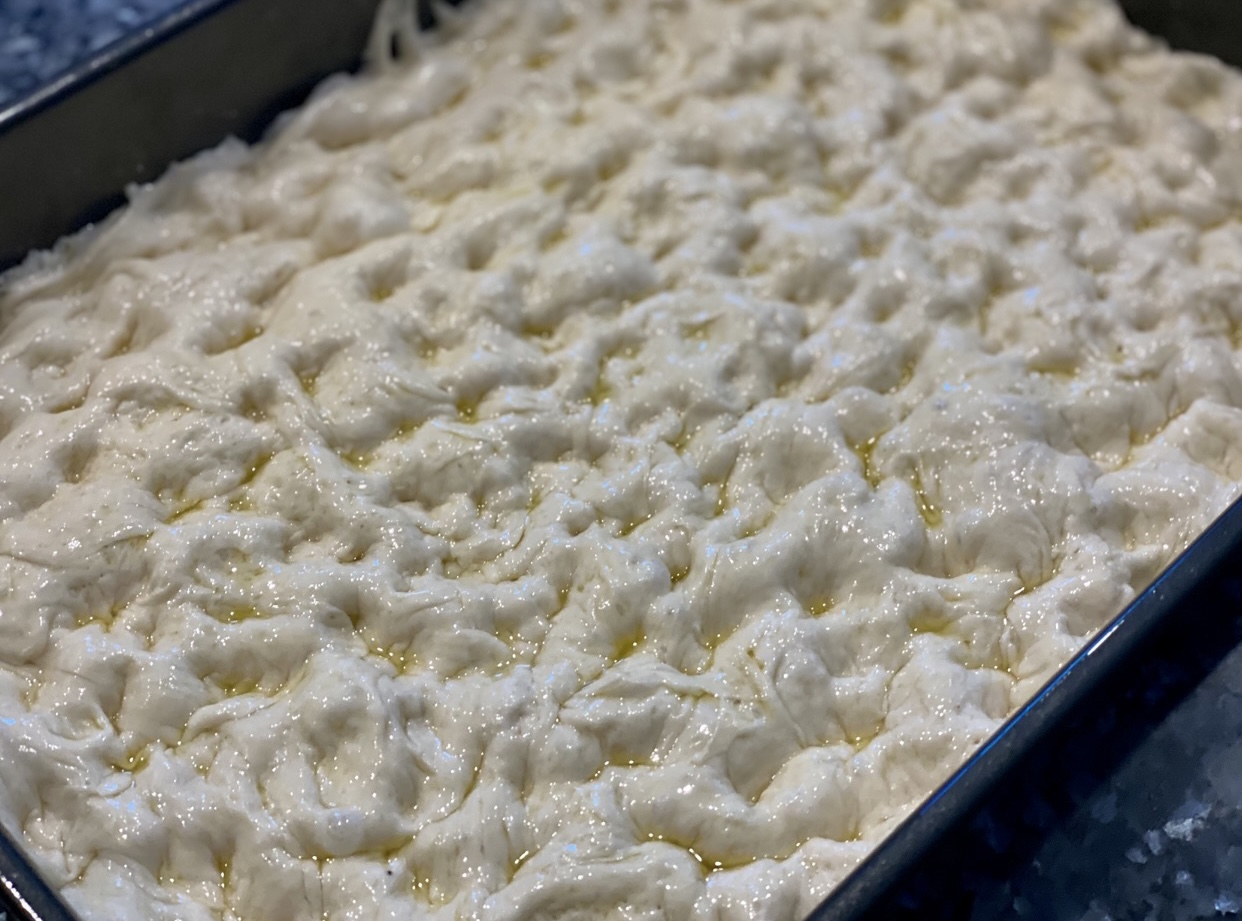
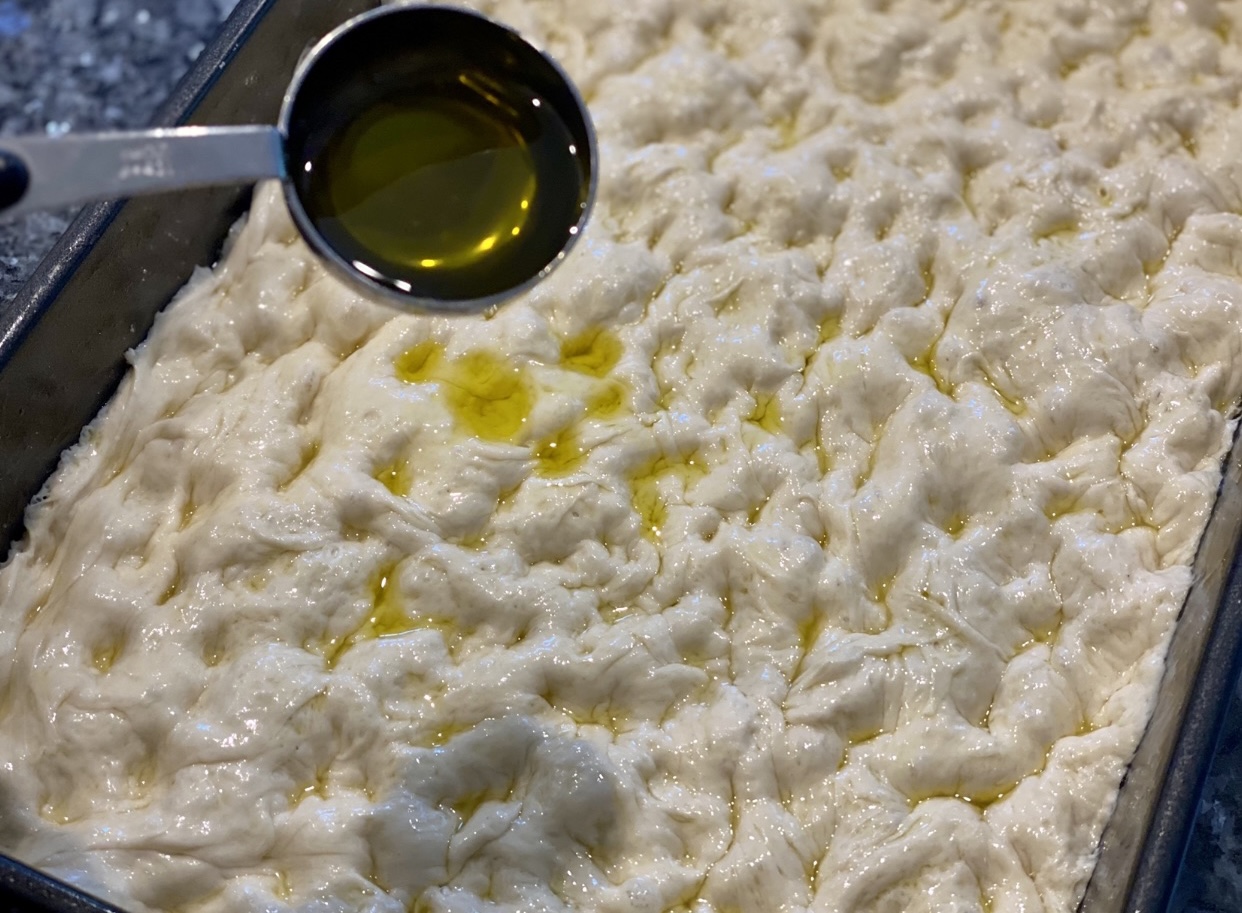
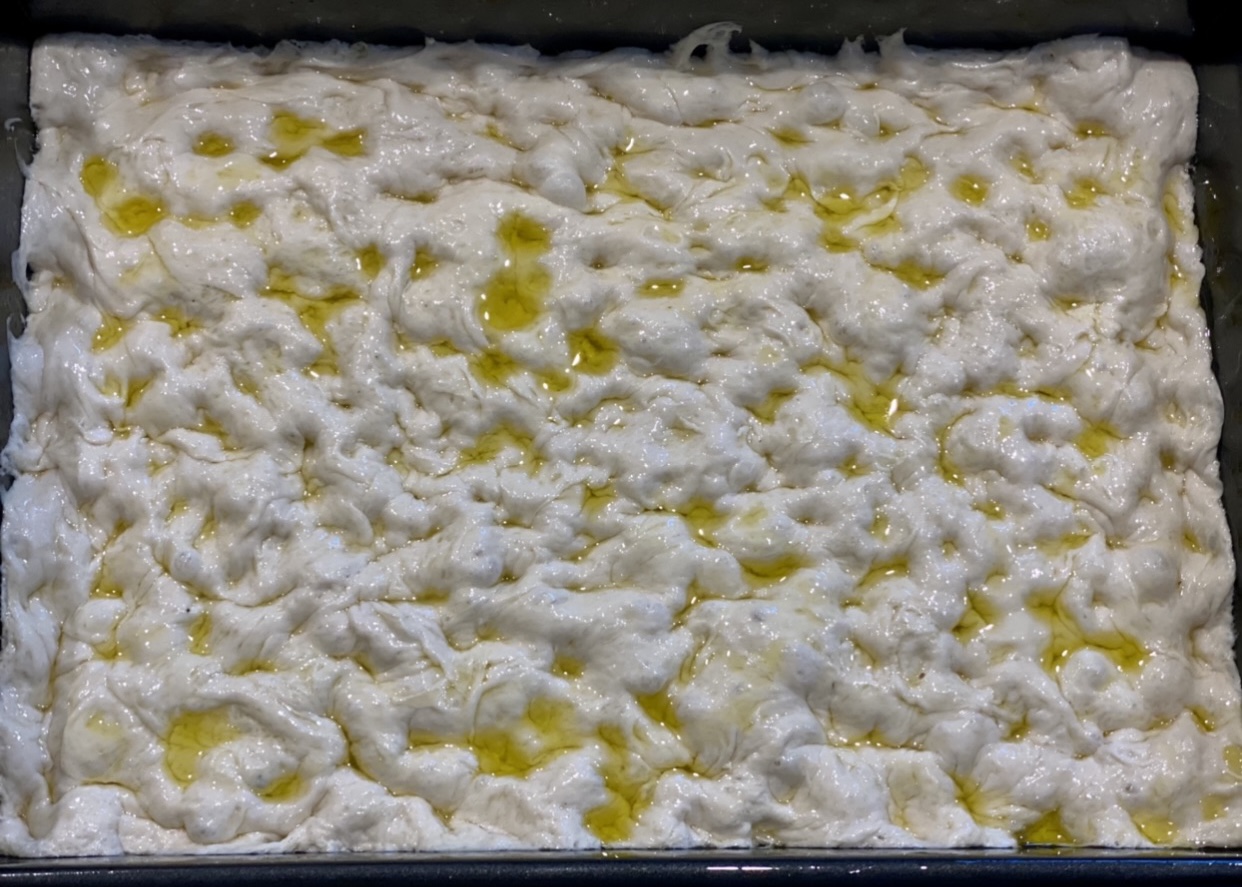
Drizzle a tablespoon of oil over the surface of the dough and use your hand or pastry brush to coat it evenly. Use your fingers to press down into the dough all the way to the bottom of the tin. Do this several times to form indents in the dough. Once done, drizzle another tablespoon of oil onto the dough.


Make larger indents in the dough for the eggs, then place the eggs in those spots. Place the sausages and bacon on top of the dough and press them down gently. Give the tomatoes a squeeze until the skin breaks (this will help them wilt during baking) then press them down into the dough. Finish by sprinkling some rosemary and sea salt flakes on top. Bake for 30 minutes or until the top of the focaccia is nice and golden.
Leftovers – Allow the focaccia to cool completely at room temperature, then wrap in cling wrap/ plastic film and place into an air-tight container. Store for 3 days at room temperature or freeze for up to a month.
A Third-Party Application calculated the calories and nutritional information. Please use this as an approximate guide only.
Cooking measurements are in Australian standard spoon and cup measurements.
I would love to hear your thoughts or feedback on this post. If you have made this recipe, please show your support by commenting and rating this recipe. You can do this by scrolling down or by clicking the green circle on the left. To prevent spam on this site, an email address is required but it won’t be published.
Cheers (I’ll drink to that) – Cat Tre

No Knead Focaccia with Bacon Egg and Sausage
Ingredients
FOR THE DOUGH
- 2 cups water
- 1 tsp sugar
- 2 tsp instant yeast (NOTE 1)
- 4 cups bread flour (NOTE 2)
- 1 tsp salt
- oil spray or oil for greasing
TOPPING AND BAKING
- 5 tbsp extra virgin olive oil
- 6-8 mini sausages (NOTE 3)
- 4-6 bacon strips (rindless) (NOTE 4)
- 5 eggs
- 8-10 grape tomatoes (or cherry tomatoes)
- 2 tsp rosemary leaves (optional)
- ½ tsp sea salt flakes
Instructions
- In a microwave-safe jug/bowl, pour in the water then add in the sugar and stir to mix. Place the jug into the microwave and zap it for 30 seconds. Stir the mixture and place a thermometer in. The water should be lukewarm in temperature and read between 36.5 to 40.5 C (100 to 110 F). You may need to leave the water to cool for a few minutes if it's too hot. Once it reaches the correct temperature, stir in the yeast. Cover and leave for 7 minutes or until foamy. If it doesn't foam, your yeast is no longer alive, so discard the mixture.

- Place the flour and salt into a large mixing bowl and make a well in the centre. Give the yeast mixture a quick mix, then pour it over the flour. Mix the flour and yeast mixture together until well combined and a very sticky dough forms. Grease a large bowl with oil and place the dough in it. Then brush or spray the surface of the dough with oil to prevent it from drying out. Cover the bowl with a cling wrap/plastic film and place it in the fridge for at least 12 hours (Dough can stay in the fridge for a maximum of 48 hours)

- Place 2 tablespoons of oil in a non-stick 23x33cm (9x13in) baking tin. Cover the base and the sides of the tin with oil. Remove the dough out of the fridge. Using your hands, lift the edges of the dough up, then drop it down in the centre (do this in 4 sections)

- Place the dough into the tin on top of the oil. Press the dough down and press it gently so it spreads out evenly onto the base of the tray. If the dough springs back and is difficult to work with, cover it and let it rest at room temperature for 30 minutes. After this time, the dough should be easier to flatten. Lightly oil the surface of the dough, cover, and leave it at room temperature for 2 to 4 hours or until the dough doubles in size. The warmer your kitchen is, the faster the dough will rise. Mine took approximately 2.5 hours on a fairly warm day.

- In the last 15 minutes of the dough resting time, preheat the oven to 220°C (430°F) or 200°C (390°F) for fan-forced ovens and prepare the bacon and sausages. Heat a tablespoon of oil in a frying pan over medium-high heat. Sear the bacon and sausages for a few minutes until the surface is golden. There is no need to cook them completely, as the oven will finish the cooking process. Place the meat onto a plate and set it aside.

- Drizzle a tablespoon of oil over the surface of the dough and use your hand or pastry brush to coat it evenly. Use your fingers to press down into the dough all the way to the bottom of the tin. Do this several times to form indents in the dough. Once done, drizzle another tablespoon of oil onto the dough.

- Make larger indents in the dough for the eggs, then place the eggs in those spots. Place the sausages and bacon on top of the dough and press them down gently. Give the tomatoes a squeeze until the skin breaks (this will help them wilt during baking) then press them down into the dough. Finish by sprinkling some rosemary and sea salt flakes on top. Bake for 30 minutes or until the top of the focaccia is nice and golden.


A brilliant brunch recipe, fuss-free and delicious! ?
Hi SueLyn,
Thanks so much! I’m thrilled this recipe worked out for you. I agree, this focaccia is fuss-free and delicious x
The perfect brunch recipe! My boys absolutely loved this (big & small). My Dad was over helping build our deck and he was asking me to send the recipe to my mom lol. Between the 6 of us enjoying brunch nothing was left because it was so delicious. I’ll definitely be making this again!
Hi Stacey,
Thanks for taking the time to leave this comment because it made my day reading this! This focaccia is perfect for 6 people and it’s quite filling too, and definitely a crowd-pleaser. Haha, I love the sound of your dad! Send your dad over here and I’ll cook for him anytime.
Good luck with your deck!